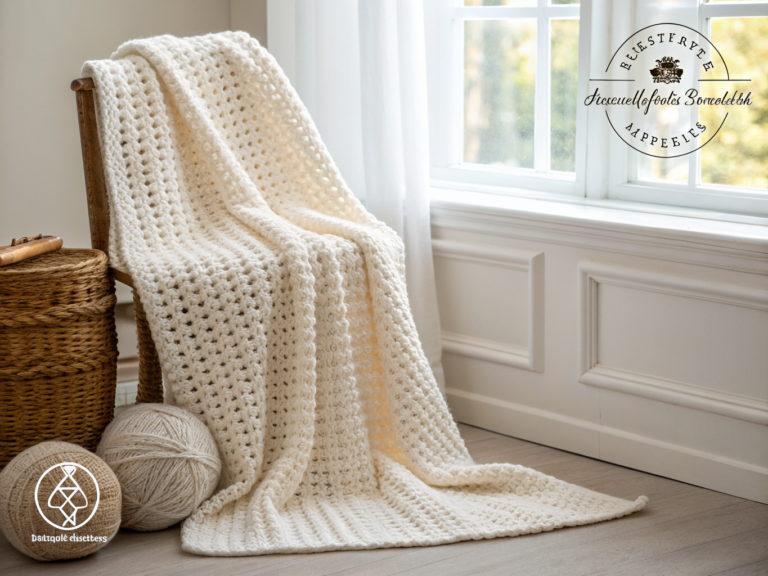
Easy Baby Blanket Crochet Pattern for Beginners to Make
Table of Contents
A new crocheter can make a thoughtful handmade gift by following a simple repeat and working at a comfortable pace. A first project can feel big, but each row gives you a clear next step. You do not need a complex design to make something useful and personal.
Gauge is the number of stitches and rows in a measured swatch, used to estimate the finished dimensions of your project. A simple repeat can help you learn how your yarn and crochet hook work together. You can also adjust the design to fit your recipient and your preferred pace.
This pattern approach leaves room for your own choices. You will decide how the blanket should look, how much time you can give it, and what size suits its use. A steady rhythm matters more than speed, and small mistakes are easier to fix when you check your work as you go.
Start with a plan that feels manageable, not a promise that one stitch count fits every project. Your swatch and chosen dimensions will guide the work. Choosing yarn and finished dimensions comes before following the pattern.
What Yarn and Tools Should You Choose?
For an everyday project, choose a soft yarn that can handle regular washing. Size 3 yarn makes a lighter, more breathable fabric, while size 4 yarn makes a thicker, warmer one. Yarn weight means strand thickness, not how much a skein weighs.
Acrylic is a common choice for a crochet baby blanket because it is warm, breathable, easy to care for, and sold in many colors. Cotton or cotton blends suit warmer weather. Soft acrylic and superwash merino are cozy choices for winter projects.
Pick a Soft, Washable Yarn
Machine-washable DK or aran yarn can work well for a blanket that gets frequent use. DK yarn is commonly paired with a 4 mm crochet hook, while aran yarn often uses a 5 mm hook. The recommended yarn and hook in a pattern are the safest starting point.
| Yarn type | Typical use or feel | Practical fit |
|---|---|---|
| Acrylic | Warm, soft, many colors | Easy-care everyday baby projects |
| Cotton or cotton blend | Breathable, less lofty feel | Blankets for warmer weather |
| Superwash merino | Soft, cozy warmth | Winter projects that need wash care |
Gather the Basic Crochet Tools
Changing hook size changes stitch size and the fabric’s drape. A smaller crochet hook can make stitches tighter; a larger one can make them looser. Hooks range from 2.25 mm to 30 mm, so use the size your pattern recommends before making adjustments.
Useful tools include scissors, a yarn needle, measuring tape, and stitch markers. A pram blanket in DK yarn typically takes 600-900 meters, and a cot blanket may need about twice as much. Check the specific pattern’s yardage, since those estimates are not guarantees.
For the size baby blanket you plan to make, use the pattern’s stated yarn amount rather than guessing from a general estimate. Once you have chosen yarn and hook, decide how large the finished fabric needs to be.
What Size Should You Make?
There is no single standard dimension for every baby blanket, so choose the size by where it will be used. Average sizes range from 18 x 30 inches for a bassinet blanket to 36 x 50 inches for a crib blanket. Patterns and makers vary, so treat these figures as guides.
A receiving blanket often measures 36 x 36 inches. A car-seat or stroller blanket averages 30 x 35 inches, while a bassinet or cradle blanket averages 18 x 30 inches.

| Blanket type | Average width x height | Typical use |
|---|---|---|
| Receiving | 36 x 36 inches | General wrapping and home use |
| Bassinet or cradle | 18 x 30 inches | Small sleep space |
| Car-seat or stroller | 30 x 35 inches | Travel and outings |
| Crib | 36 x 50 inches | Covering a crib mattress |
Match the Dimensions to How the Blanket Will Be Used
Pick dimensions based on the setting, not only the baby’s age. A smaller blanket can be easier to carry in a stroller, while a crib blanket needs more length. Always follow safe-use advice for the place where the blanket will be used.
There is no industry-wide standard for baby blanket sizes, and an individual pattern may give different measurements. If you are making one for a charity or neonatal unit, check its rules for size before starting.
Adjust the Size Without Guessing
A common handmade option is about 32 inches wide. You can make it square or choose a height 4-6 inches greater than its width for a longer rectangle.
Use a gauge swatch to estimate how many stitches create your chosen width. Then measure as you work, since yarn, hook size, and tension can change the finished size. With the intended dimensions in mind, you can use a simple repeat and adjust it to the chosen size.
How Do You Follow a Baby Blanket Crochet Pattern?
The simplest first pattern is a foundation chain followed by the same basic stitch repeated across each row. A single-crochet repeat gives you a clear rhythm and avoids shaping. It makes a simple baby blanket crochet pattern that suits a beginner’s first large project.
Use your swatch to estimate the foundation chain for the chosen width. The exact chain count depends on yarn, hook, tension, and gauge, so one count cannot promise one width for every crocheter.
Make the Foundation Chain and First Row
Keep the foundation chain relaxed so it does not pull the lower edge inward. Work into the chain with care, and count the stitches in your first row before turning.
- Make a slip knot, then chain until the foundation reaches your chosen width based on a swatch.
- Work one single crochet into each chain across the row.
- Chain one, turn the fabric, and single crochet across each row.
- Repeat until the fabric reaches your chosen length, then fasten off.
Repeat the Rows to Reach Your Target Size
After each row, count the stitches and check that the edges remain straight. A stitch marker can help you spot the first and last stitch. If the edge starts to curve, pause and check the count before adding more rows.
Measure from the foundation edge to track the blanket’s length. A small difference can grow over many rows, so check the dimensions every few inches. This basic crochet baby blanket approach is easy to adapt without changing the stitch.
For a full example with adjustable dimensions, try this beginner single-crochet newborn blanket pattern. Its foundation and row count can be changed to suit your intended size.
Once you understand the basic repeat, choose whether to keep the fabric plain or try a more decorative stitch.
Which Stitches and Blanket Styles Suit Beginners?
A row-based design is often easier to manage at first, while small motifs are convenient when you want a portable project. Rows grow steadily with little sewing, while motifs need joining unless you connect them as you go. Your choice depends on how you like to work.
A plain double-crochet row makes a flexible fabric and gives you practice with a common stitch. Granny-square motifs create a classic look and let you carry a small piece at a time. Squares or hexagons are easy to enlarge, but they leave yarn ends and a joining task.

Choose Between Rows and Motifs
Join-as-you-go methods attach motifs as you make them, which can reduce end-joining work. Row-based ripples and corner-to-corner blankets also grow in a clear direction, with little sewing at the end.
A granny-square blanket uses separate blocks, while granny stripes make a similar look in long rows. Corner-to-corner crochet builds a blanket on the diagonal. It can be easy to carry, though you need to follow its increase and decrease steps.
Add Texture or Color With a Repeat
Chevron or ripple rows make a zigzag outline through repeated shaping. Bobble stitches add raised dots, and shell stitches form curved clusters. A lacy style leaves open spaces, so consider where and how the blanket will be used.
Color changes can create stripes without changing the basic construction. You can keep the same stitch and switch yarn colors at a row edge. This can add interest without asking you to learn several new stitches.
For more examples of beginner-friendly blankets and style choices, read these easy crochet newborn blanket patterns. Once you have a style in mind, compare real beginner-friendly designs before choosing one to make.
Which Crochet Baby Blanket Patterns Can You Try?
A useful first pattern is one whose instructions match the stitches you already know and whose repeat is easy to track. Check the stitch list and row repeat before you gather yarn. Free patterns provide online instructions, though not every pattern offers a downloadable PDF.
The phrase baby blanket crochet pattern free means you can follow the online instructions without paying for them. A print-ready version may still have a cost, and some designers offer both options.
Modern Crochet Baby Blanket Patterns
Modern crochet baby blanket patterns free often use clean lines, simple repeats, and calm color choices. A minimalist design can still feel soft and inviting when the stitch gives the fabric good drape.
Easy Crochet Baby Blanket Patterns
Easy crochet baby blanket patterns free can help you practice one stitch or a short sequence. Look for clear row counts and a repeat you can recognize. A one-skein design may suit a smaller project, but check its stated yarn amount and finished size.
Chevron Baby Blanket Crochet Pattern Ideas
A chevron baby blanket crochet pattern creates a ripple or zigzag look with peaks and valleys. Follow that pattern’s own repeat instructions, since chevron designs do not all use the same stitch count.
- Modern Baby Blanket: An easy, minimalist design with drape.
- This Charming (No Holes) Baby Blanket: A textured, one-stitch repeat worked in one color.
- Easy Shell Blanket: Uses chain, single crochet, and double crochet.
- One Skein Baby Blanket: Uses filet crochet, which forms a patterned openwork fabric.
- V with a Twist Baby Blanket: Combines V-stitch with colorful stripes.
Compare the required yarn weight, hook, and skill label before choosing among these crochet patterns. A free online pattern can be read on its webpage, so a download is not always part of the offer.
After selecting a design, learn how to follow its notation and keep your rows consistent.
How Can You Read the Pattern and Keep Rows Even?
Before starting a pattern, check its stitch abbreviations and whether it uses US or UK terminology. US single crochet is not the same stitch name as UK single crochet. A quick terminology check can prevent a whole blanket from coming out differently than expected.
Patterns often shorten chain to ch, single crochet to sc, and double crochet to dc. Look for the pattern’s key, since designers may use extra abbreviations or special terms.
Decode Abbreviations and Stitch Counts
The Craft Yarn Council’s project levels start with basic, which may use basic stitches and basic increases or decreases. Easy and intermediate follow as higher levels. Yet designers do not use beginner, basic, and easy in the same way.
Check a pattern’s stitch list and shaping notes instead of relying only on its skill label. A pattern that says easy may still include a stitch you have not tried. Try a small sample first if the instructions feel unfamiliar.
Catch Tension and Edge Problems Early
Make a swatch to check gauge, then mark the first and last stitch of each row. Count stitches often, especially during the first few rows. A skipped edge stitch can narrow the blanket, while extra stitches can make its edges widen.
You can hold a crochet hook with either a knife grip or a pencil grip. Use the hold that feels steady and comfortable, and avoid gripping so tightly that your hand aches.
An average baby blanket may take about 12 hours, but the time can be much shorter or longer. Pattern detail, yarn weight, size, and skill all affect the pace.
Free patterns can give you the full online instructions. Print-ready, ad-free versions commonly cost about $4-$5 USD, and are useful if you prefer paper instructions over reading online.
Once the rows are steady, focus on a neat, secure finish and sensible everyday use.
How Do You Finish and Care for the Blanket?
A careful border can make uneven edges look more finished without requiring an elaborate stitch. One even round of single crochet can square the edges and cover differences between row ends and stitch tops. Check your stitch spacing as you work around the blanket.
Put three stitches in each corner so the border can lie flat. If the edge ruffles, you may have added too many border stitches; if it pulls, you may have added too few.
Add a Border and Secure the Loose Ends
A simple crab-stitch or shell edging can add a finished look. Secure every yarn end, including ends from color changes. A loose end can work free with washing and regular use.
Use this checklist before you call the project done:
- Weave every yarn end securely in two directions.
- Block the damp blanket to its measurements if the yarn allows it.
- Avoid loose lace for everyday use because small fingers or toes can catch.
- Avoid sewn-on embellishments, buttons, and long tassels on blankets used in a cot.
- Keep yarn labels for care instructions and replacement information.
Keep the Finished Blanket Practical for Baby Use
Follow the yarn label’s washing directions, and inspect the blanket for loose stitches before use. A colorwork heart worked into the fabric is different from a sewn-on heart, which can detach.
Acrylic yarn may have care directions that differ from cotton or wool, so use the label kept with your project. If you are unsure whether blocking suits the yarn, check its care notes first.
With the project finished and its care understood, decide whether it is for home use, a gift, or a specific recipient.
How Can You Personalize a Blanket for a Gift or Special Need?
A small choice of color or texture can make the same basic pattern feel personal to its recipient. Choose details to suit the family’s taste and the blanket’s planned use. A handmade gift can feel thoughtful and useful, though every family may use it differently.
Ask about favorite colors if you can, or choose shades that fit the season or room. A stitch pattern can also change the feel without changing the blanket’s purpose. Keep any detail worked into the fabric, rather than adding a loose piece.
Choose Colors and a Personal Design Detail
Leftover yarn can make a coordinated small item, such as a matching basket liner or a simple home accessory. Use it only if its fiber, care needs, and intended use suit that item. A shared color can tie a small collection together.
For a gift, a simple label with washing details can help the recipient care for the blanket. You might include the yarn label or write down the fiber and care directions. That small note is practical after the project leaves your hands.
Check Requirements for Preemie or Charity Projects
There is no single preemie size to assume. If you are making one for a neonatal unit or charity, first confirm its required dimensions and washable-yarn rules.
Follow the receiving organization’s size and washable-yarn requirements instead of guessing from a standard baby size. Its needs may differ from those of a family gift, and the receiving group can tell you what it accepts.
For visual ideas, you can browse the Hooksylane crochet collection on Pinterest as a separate source of blanket inspiration.
Use the recipient’s needs as your final guide, then begin with a swatch and the chosen pattern’s instructions.
Conclusion
A first handmade blanket does not need complicated stitches to be meaningful or useful. A repeated basic stitch can make your first project approachable, even when the blanket takes many rows.
Matching the yarn, crochet hook, and size to the pattern helps the finished fabric meet your expectations. Small differences in gauge can change both the feel and dimensions.
Choose a pattern, gather its recommended yarn and hook, then make a swatch before chaining for the full width. That is a clear first step, and you can build the blanket one steady row at a time.