Valentine Bunny Crochet Pattern: Easy Ideas for a Handmade Gift
Table of Contents
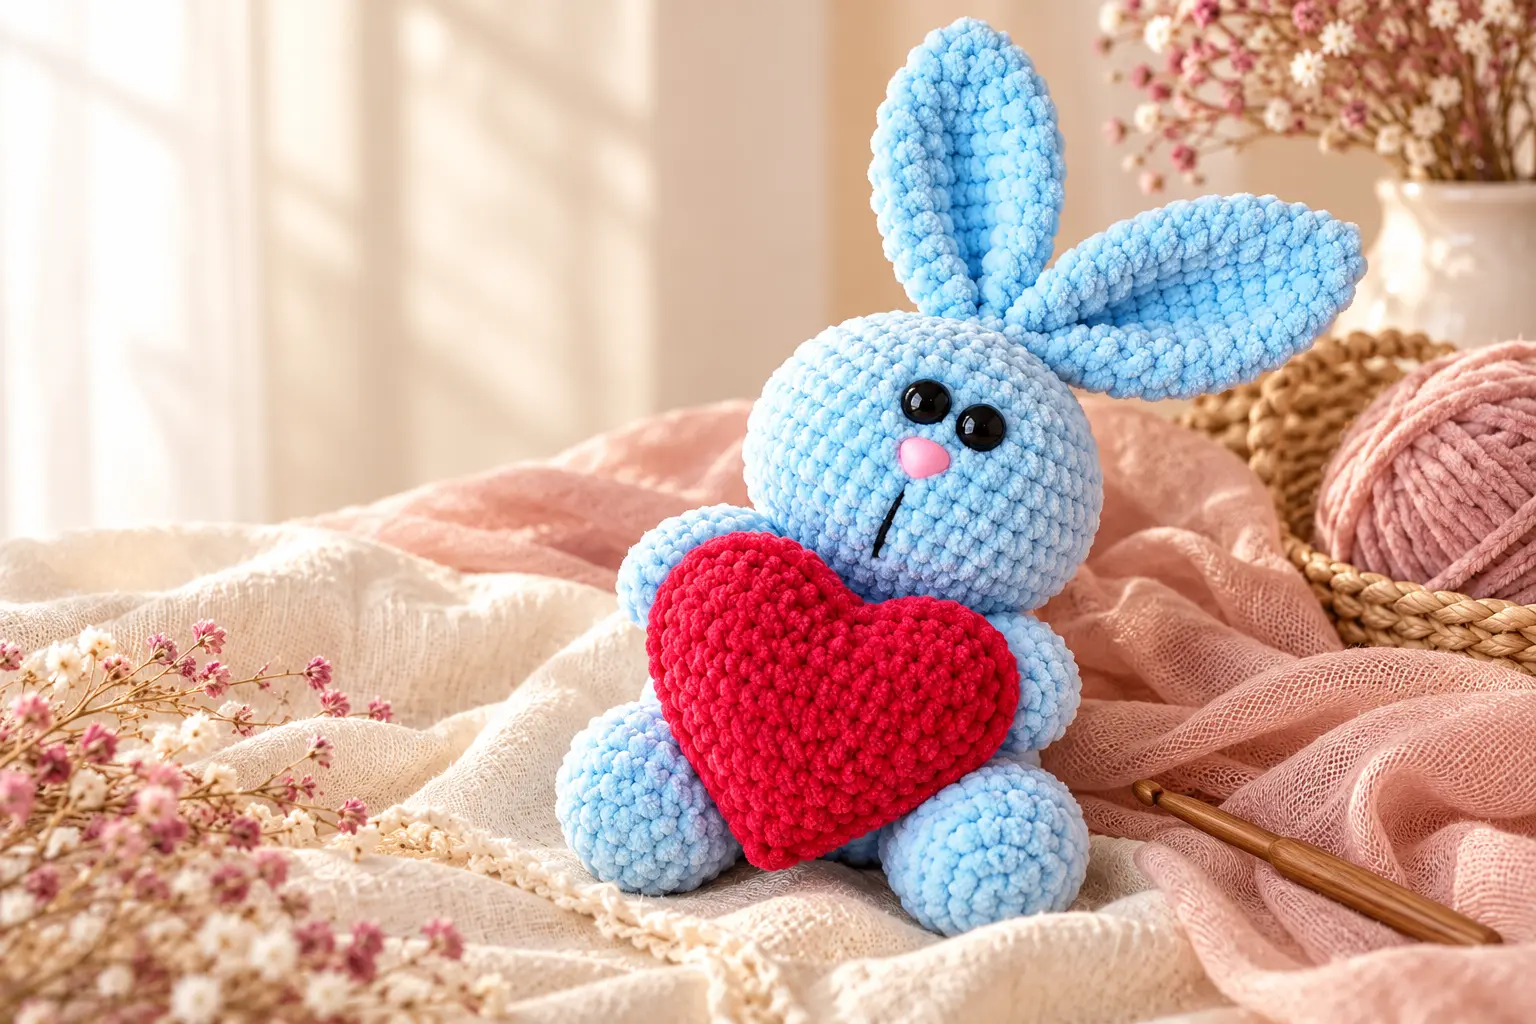
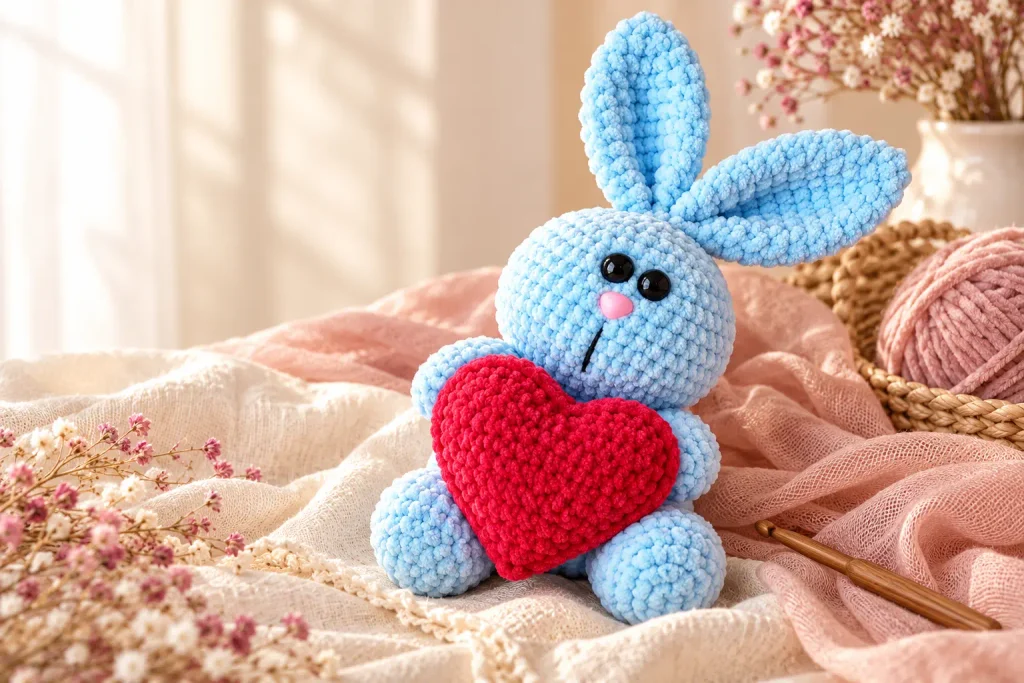
This Valentine bunny crochet pattern creates a soft chenille rabbit that holds a stuffed heart between its paws. The legs, body and head are worked as one continuous piece, so the finished toy has fewer bulky seams and a stable shape. Along with the complete pattern, this tutorial explains plush-yarn tension, stuffing, arm placement, face shaping, heart assembly and child-safe finishing.
| Skill level | Confident beginner to intermediate |
|---|---|
| Terminology | US crochet terms |
| Yarn | Super-bulky plush chenille |
| Hook | 5 mm or the size that creates dense stitches |
| Construction | Legs, body and head worked continuously |
| Gauge | Not critical; fabric must hide the stuffing |
Why This Bunny Is a Useful Plush-Yarn Project
The pattern is more than a seasonal decoration. It teaches several techniques that transfer to other amigurumi projects: joining two legs without twisting them, crocheting flattened arms directly into the body, shaping a large head with controlled decreases, and joining two flat panels to make a softly stuffed accessory. If you are still building these skills, visit HooksyLane’s beginner crochet tutorials before starting.
The heart can be removed from the design or recolored for birthdays, anniversaries, nursery gifts and craft-fair collections. Once you understand the construction, the same bunny works in neutral cream, warm beige, dusty rose, pale sage or any washable plush yarn.In this tutorial

Materials for the Valentine Bunny Crochet Pattern
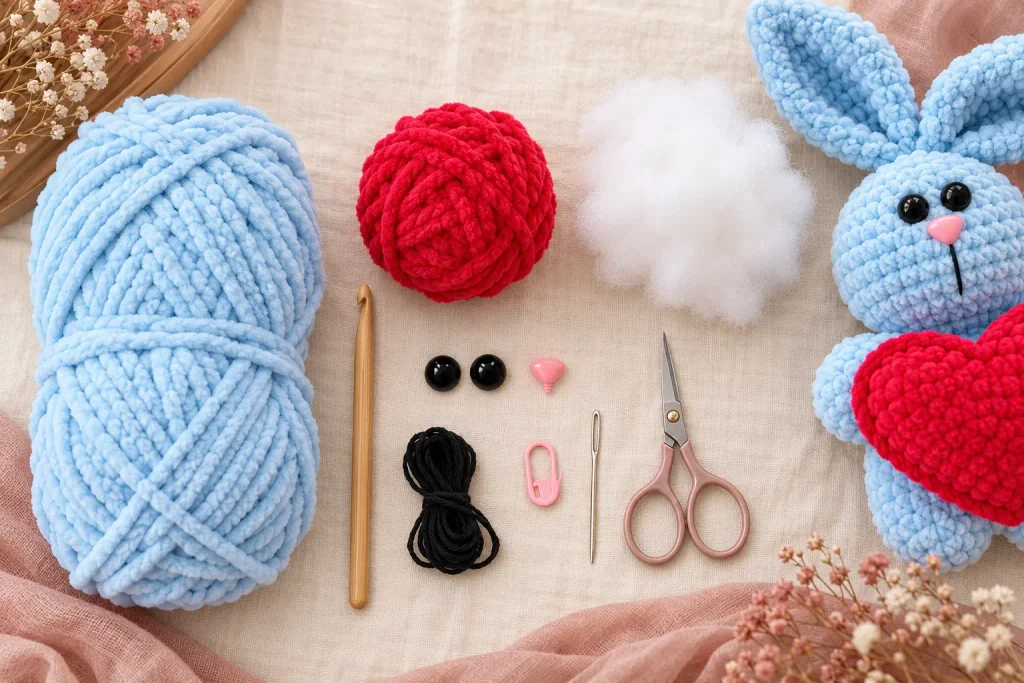
- 1 skein super-bulky plush chenille yarn in powder blue, cream or your chosen bunny color
- About 1/4 skein red, pink or plum plush chenille yarn for the heart
- A small amount of black cotton or cotton-blend yarn for the mouth and optional facial sculpting
- Two matching safety eyes and one safety nose, sized to suit your yarn
- Approximately 50 g polyester fiberfill
- 5 mm crochet hook, or a smaller/larger hook that produces a dense fabric
- Stitch marker, scissors, tapestry needle and pins
Toy safety: Plastic safety eyes and noses are not suitable for children under three. For a baby or toddler gift, embroider the eyes and nose, secure every yarn tail and pull-test all seams before use.
Choosing Yarn, Hook Size and Tension
Plush chenille hides stitch definition, so a stitch marker is essential. Choose a hook that lets you insert the tip without forcing it but still creates a fabric with no visible holes. If the stuffing shows, move down one hook size. If your hands tire quickly or the yarn sheds from friction, loosen your grip or move up by 0.5 mm.
Gauge does not determine a fixed garment size here, but it does affect proportions. Use the same yarn and hook for the bunny and heart if you want the heart to fill the space between the paws. Always make both legs and both ears with identical tension.
Before You Begin
Abbreviations: ch = chain; dec = invisible decrease; inc = 2 sc in one stitch; MR = magic ring; rnd = round; sc = single crochet; st(s) = stitch(es).
- Work in continuous spiral rounds unless the instructions say to turn.
- Move the marker after every round and count before beginning the next one.
- Stuff in small pieces to avoid hard lumps.
- Leave the ears and top halves of the arms unstuffed so they fold neatly.
- Read the joining rounds before crocheting them; pausing halfway can make it easier to accidentally twist a leg or arm.
Crochet the Ears
Rnd 1With blue plush yarn, 4 sc in a magic ring. [4]
Rnd 2Inc in each stitch around. [8]
Rnd 3(1 sc, inc) x 4. [12]
Rnd 4(2 sc, inc) x 4. [16]
Rnd 5(3 sc, inc) x 4. [20]
Rnds 6-1120 sc around for 6 rounds. [20]
Rnd 12(3 sc, dec) x 4. [16]
Rnd 13(2 sc, dec) x 4. [12]
Rnd 14Fold flat and work 6 sc through both layers. [6]
Do not stuff the ears. Leave a long sewing tail on each one. The folded edge becomes the base that sits against the crown. Wait until the facial features are positioned before sewing the ears, because their angle changes the bunny’s expression.
Crochet the Arms
Rnd 1With blue plush yarn, 6 sc in a magic ring. [6]
Rnd 2(1 sc, inc) x 3. [9]
Rnd 3(2 sc, inc) x 3. [12]
Rnds 4-912 sc around for 6 rounds. [12]
Rnd 10Fold flat and work 6 sc through both layers. [6]
Stuff only the rounded lower half. The flat upper section will be crocheted into the body on Round 21. Keep both arms the same length and place their round markers in the same position before flattening.
Legs, Body and Head
First Leg
Rnd 1With blue plush yarn, 6 sc in a magic ring. [6]
Rnd 2Inc in each stitch around. [12]
Rnd 3(1 sc, inc) x 6. [18]
Rnds 4-818 sc around for 5 rounds. [18]
Fasten off the first leg. Make the second leg through Round 8 but do not cut the yarn.
Join the Legs and Continue the Body
JoinMake the second leg through Round 8. Ch 1 and join to the first leg.
Rnd 9(18 sc around one leg, 1 sc in the joining chain) x 2. [38]
Rnd 1016 sc, inc, 1 sc, inc, 1 sc, inc, 16 sc, inc. [42]
Rnds 11-1542 sc around for 5 rounds. [42]
Rnd 16(5 sc, dec) x 6. [36]
Rnds 17-1836 sc around for 2 rounds. [36]
Rnd 19(4 sc, dec) x 6. [30]
Rnd 2030 sc around. [30]
Rnd 216 sc, 6 sc through the first arm and body, 8 sc, 6 sc through the second arm and body, 4 sc. [30]
Rnd 22(3 sc, dec) x 6. [24]
Rnd 23(3 sc, inc) x 6. [30]
Rnd 24(4 sc, inc) x 6. [36]
Rnd 25(5 sc, inc) x 6. [42]
Rnd 26(6 sc, inc) x 6. [48]
Rnds 27-3248 sc around for 6 rounds. [48]
Rnd 33(6 sc, dec) x 6. [42]
Rnd 34(5 sc, dec) x 6. [36]
Rnd 35(4 sc, dec) x 6. [30]
Rnd 36(3 sc, dec) x 6. [24]
Rnd 37(2 sc, dec) x 6. [18]
Rnd 38(1 sc, dec) x 6. [12]
Rnd 39Dec x 6. [6]. Fasten off and close the opening.
Arm attachment on Round 21: Hold each flattened arm against the outside of the body. Insert the hook through both the arm stitch and the corresponding body stitch, then complete one single crochet. Repeat for all six stitches of the arm. The rounded ends should point forward so they can hug the heart.
Stuffing and Face Placement
Start filling the body before the neck narrows. Use small pieces and press them into the outer edges rather than packing one large ball in the center. Add firmer support at the neck so the oversized head does not lean.
Before locking the eye washers, pin the eyes and nose temporarily and inspect the face from the front, side and top. Plush yarn makes holes difficult to reuse. Install the features while the head opening is still wide enough for your fingers, then continue stuffing around—not directly behind—the washers.
Crochet the Heart Panels
Make two identical panels. Each begins with two small lobes that join before the sides decrease toward the point.
Lobe 1 – Row 1With red plush yarn, 4 sc in a magic ring. [4]
Row 2Turn. Inc in each stitch. [8]
Row 3Turn. (1 sc, inc) x 4. [12]. Fasten off.
Lobe 2Repeat Rows 1-3, but do not fasten off.
Row 4Work 7 sc along the lower edge of Lobe 2, then 7 sc along the lower edge of Lobe 1. [14]
Row 5Turn. 14 sc. [14]
Row 6Turn. Dec, 10 sc, dec. [12]
Row 7Turn. Dec, 8 sc, dec. [10]
Row 8Turn. Dec, 6 sc, dec. [8]
Row 9Turn. Dec, 4 sc, dec. [6]
Row 10Turn. Dec, 2 sc, dec. [4]
Row 11Turn. Dec x 2. [2]
Row 12Turn. Dec. [1]. Fasten off.
After Row 12, work single crochet evenly around the entire outside edge. Keep the spacing consistent around the two top curves so both lobes remain symmetrical. Make the second panel the same way.
Join and Stuff the Heart
- Place both panels together with the right sides facing outward.
- Match the top lobes, side edges and bottom point; pin the layers if the plush yarn shifts.
- Work single crochet through both layers around the edge. Reverse single crochet can be used for a more decorative ridge.
- Pause before closing the final section and add small pieces of filling.
- Finish the edge, fasten off and hide the tail inside the heart.
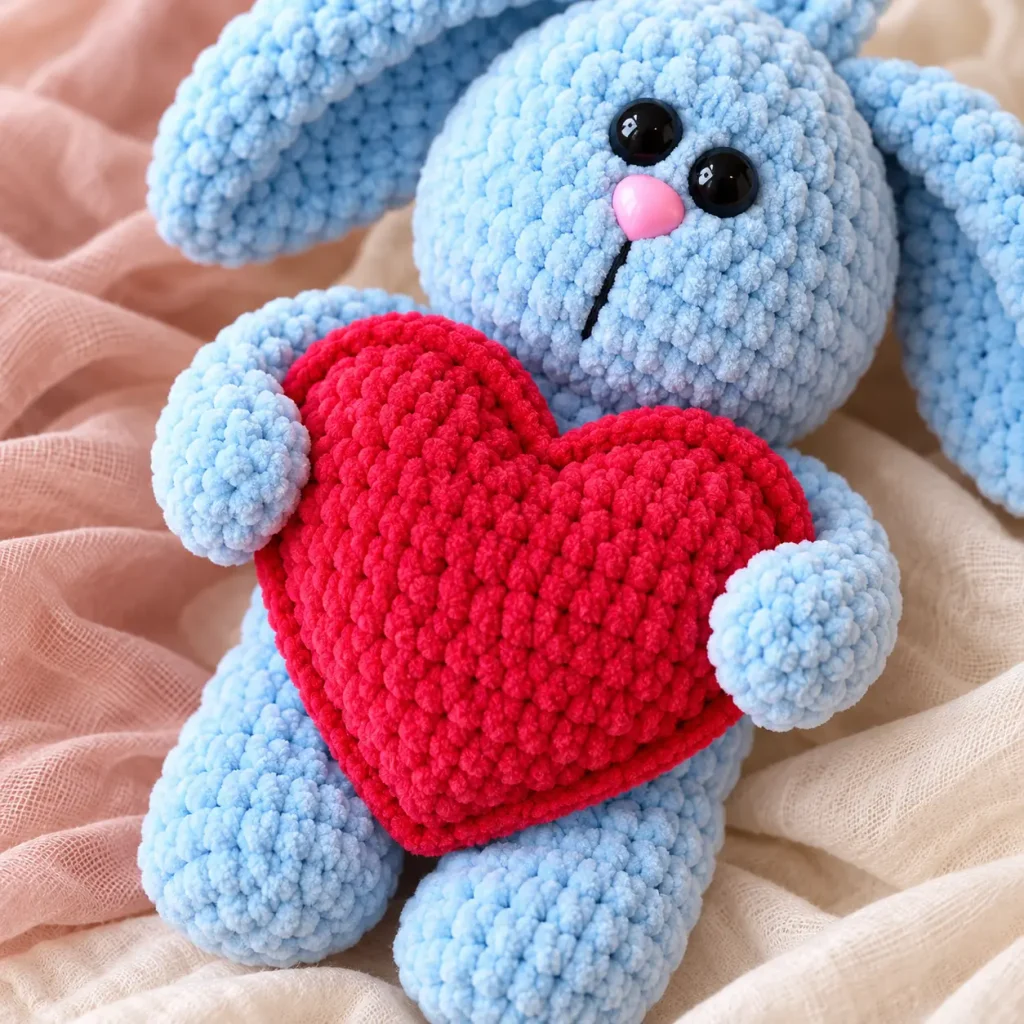
A lightly stuffed heart sits more naturally against the body than a very firm one. If one lobe looks smaller, massage the filling across the center before closing the final stitches.
Assembly: Face, Ears and Heart
- Embroider the short mouth line with black cotton yarn.
- For optional eye sculpting, bring strong matching thread beside each eye and tighten gently from the back of the head.
- Pin the ears to the crown, checking symmetry from every angle. Sew through each folded base several times.
- Center the heart over the body. Sew it to both paws using matching red yarn.
- Add one hidden tack through the heart and body so the heart stays upright without pulling the arms out of shape.
- Hide every yarn tail inside the toy and pull-test all joins.
How to Customize the Bunny
- HooksyLane palette: powder-blue bunny with a dusty-rose or deep-plum heart.
- Classic Valentine: cream bunny with a rich red heart.
- Nursery style: warm beige bunny with a blush-pink heart and embroidered features.
- Spring version: pale sage bunny with a cream heart and a tiny crochet flower near one ear.
- Anniversary gift: embroider initials and a date on a small felt tag sewn to the back of the heart.
For more soft-toy inspiration, browse the HooksyLane amigurumi patterns. You may also like the free crochet cat pattern or the soft baby seal crochet pattern.
Troubleshooting Plush-Yarn Amigurumi
| Problem | What causes it | Practical fix |
|---|---|---|
| Stuffing shows | Hook is too large or filling is packed too tightly | Move down one hook size and redistribute the filling. |
| Hole between the legs | Joining chain loosened | Close the gap with two or three mattress stitches using the original yarn tail. |
| Head leans | Neck lacks support | Add small, firm pieces of filling around the neck before closing. |
| Ears collapse | Base is too narrow or loosely sewn | Keep the ear unstuffed but stitch the folded base to a wider area of the crown. |
| Heart is uneven | Panels have different counts or tension | Recount both panels and lightly shape them before joining. |
| Paws do not reach the heart | Heart is placed too low or arms twisted during attachment | Pin the heart first and tack each paw at its natural contact point. |
Toy Safety, Washing and Long-Term Care
Follow the yarn label. Spot-cleaning is usually safest for chenille toys with plastic facial features. Blot moisture with a clean towel and air-dry flat away from direct heat. Reshape the ears, feet and heart while the toy is damp.
If the bunny is handled by a child, inspect the eyes, nose, heart seam, ear bases and arm attachments regularly. Retire the toy from play if any hardware loosens or a seam opens. For more projects and practical crochet guidance, explore HooksyLane’s free crochet patterns.
Save the Pattern and Keep Creating
Find printable HooksyLane crochet patterns in the store, then follow the Pinterest account for new amigurumi ideas, seasonal projects and visual inspiration.Visit the HooksyLane Store Follow HooksyLane on Pinterest
Finish Your Valentine Bunny
Take time with the final shaping: level the feet, soften the heart, angle the ears and check the face in natural light. A carefully stuffed neck and securely attached heart make the biggest difference to the finished silhouette. Once every seam passes a gentle pull test, your bunny is ready for gifting, seasonal decor or a handmade amigurumi collection.
More Amigurumi Patterns
Explore handmade crochet animals and plush toys.
Crochet for Beginners
Build essential skills with clear tutorials.