Free Crochet Sheep Pattern: Cute Bobble-Stitch Amigurumi Tutorial
Table of Contents
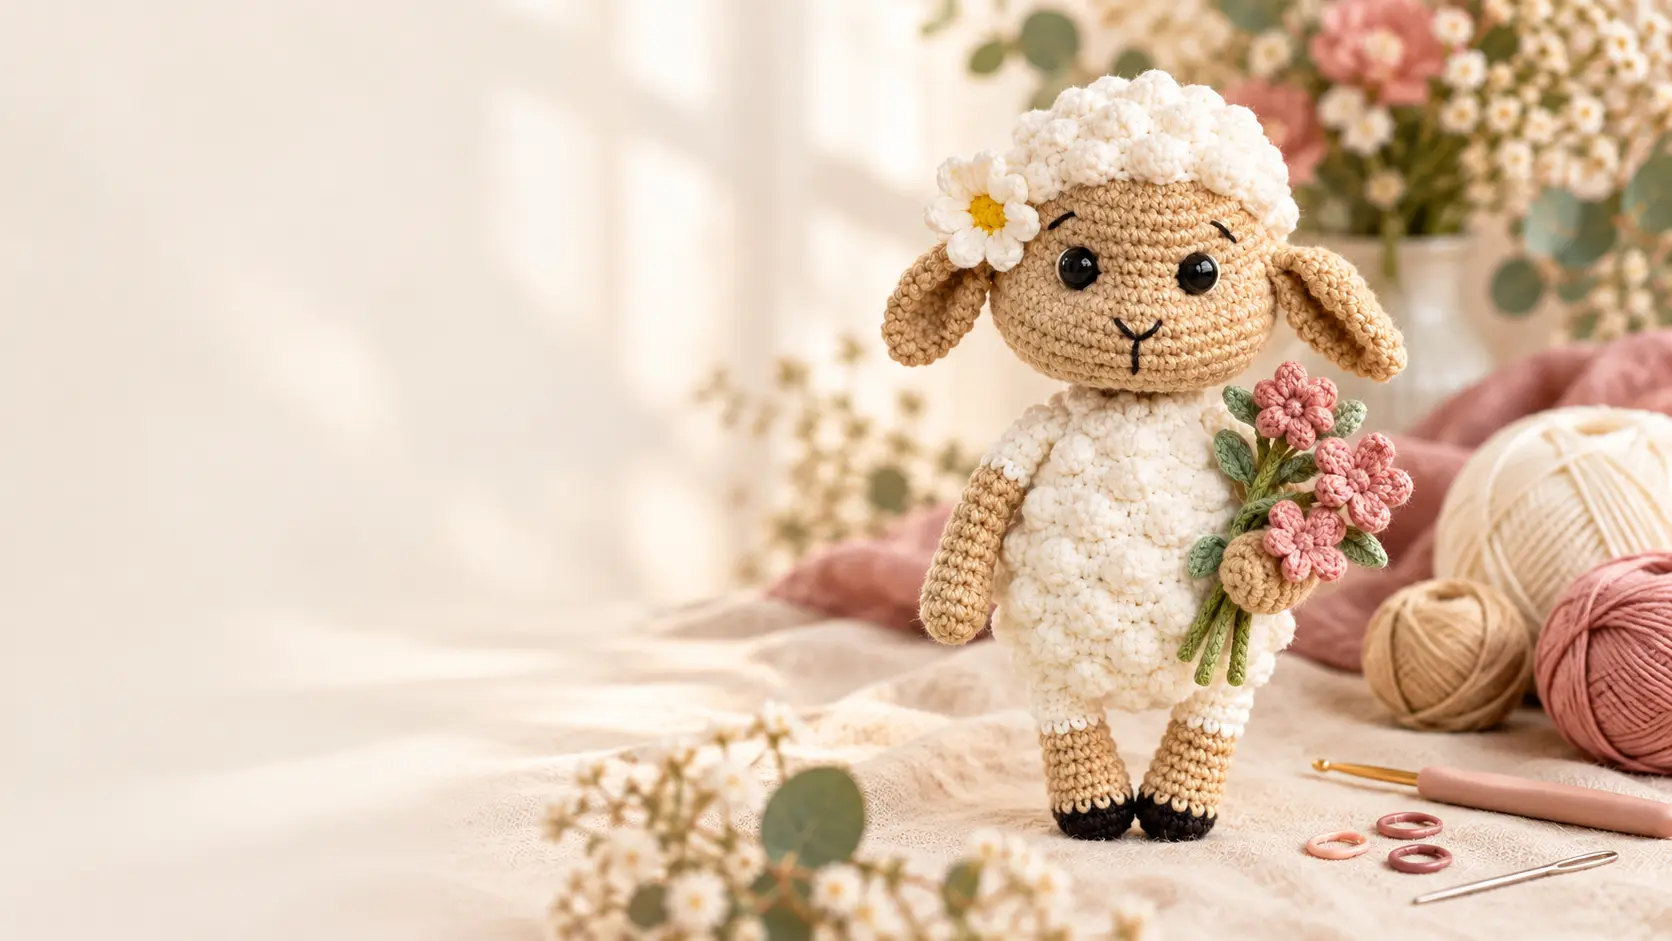
This detailed crochet sheep pattern combines a smoothly sculpted beige face with a white bobble-stitch fleece, floppy ears, tiny black hooves and a handmade flower bouquet. The head and body are crocheted continuously as one piece, helping the finished 17 cm sheep sit securely without a bulky neck seam.

Source errata: The supplied pattern closes the body at Round 48, then accidentally repeats an impossible block labeled Rounds 49-60 beginning at 48 stitches. This edition removes that duplicate and ends the main piece at Round 48.
| Skill level | Intermediate |
|---|---|
| Terminology | US crochet terms |
| Finished height | Approximately 6.7 in / 17 cm |
| Yarn | Sport/DK cotton blend |
| Hook | 1.5 mm |
| Construction | Head and body worked continuously |
Materials
- One skein beige and one skein white YarnArt Jeans, or similar sport/DK cotton blend
- Small amounts of black, green, dusty-rose and yellow yarn
- 1.5 mm crochet hook, stitch marker, scissors and yarn needle
- Long needle and strong beige yarn for optional eye sculpting
- Two 10 mm safety eyes or black embroidery thread
- Polyester fiberfill and pins

Toy safety: Plastic eyes and small decorations are choking hazards. For a child under three, embroider the eyes, omit loose parts and inspect every seam before use.
Abbreviations and the 4-dc Bobble
US terms: bobble = 4-dc cluster in one stitch; ch = chain; dc = double crochet; dec = invisible decrease; inc = 2 sc in one stitch; MR = magic ring; sc = single crochet; sl st = slip stitch.
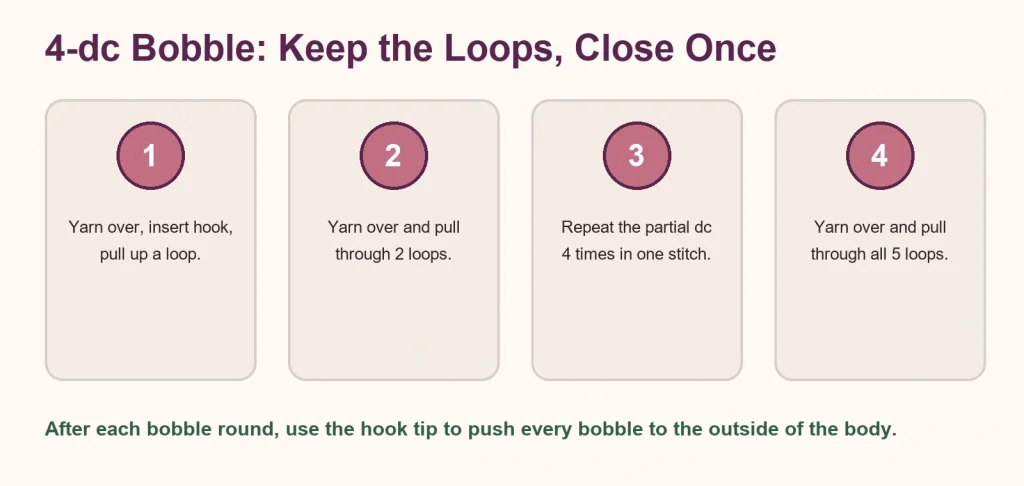
The bobbles will naturally form toward the inside. At the end of every textured round, use the hook tip to push each bobble to the outside before continuing.
Head: Rounds 1-27
Rnd 1With beige, 6 sc in a magic ring. [6]
Rnd 2Inc x 6. [12]
Rnd 3(1 sc, inc) x 6. [18]
Rnd 41 sc, inc, (2 sc, inc) x 5, 1 sc. [24]
Rnd 5(3 sc, inc) x 6. [30]
Rnd 62 sc, inc, (4 sc, inc) x 5, 2 sc. [36]
Rnd 7(5 sc, inc) x 6. [42]
Rnds 8-1242 sc. [42]
Rnd 13(1 sc, inc) x 12, 18 sc. [54]
Rnds 14-1854 sc. [54]
Rnd 19(7 sc, dec) x 6. [48]
Rnd 2048 sc. [48]
Rnd 213 sc, dec, (6 sc, dec) x 5, 3 sc. [42]
Rnd 22(5 sc, dec) x 6. [36]
Rnd 232 sc, dec, (4 sc, dec) x 5, 2 sc. [30]
Rnd 24(3 sc, dec) x 6. [24]
Rnd 251 sc, dec, (2 sc, dec) x 5, 1 sc. [18]
Rnds 26-2718 sc. [18]
Eye placement: Insert 10 mm eyes between Rounds 11 and 12 with 5 single-crochet stitches between them. Stuff the head firmly and distribute extra filling into the cheeks.
Bobble-Stitch Body: Rounds 28-48
Rnd 28Change to white: (1 sc, bobble, inc) x 6. [24]
Rnd 2924 sc. [24]
Rnd 30(Bobble, 2 sc, inc) x 6. [30]
Rnd 31(4 sc, inc) x 6. [36]
Rnd 32(Inc, 1 sc, bobble, 2 sc, bobble) x 6. [42]
Rnd 3342 sc. [42]
Rnd 342 sc, bobble, inc, (2 sc, bobble, 2 sc, bobble, inc) x 5, 2 sc, bobble. [48]
Rnd 3548 sc. [48]
Rnd 361 sc, bobble, (3 sc, bobble) x 11, 2 sc. [48]
Rnd 3748 sc. [48]
Rnd 38(Bobble, 3 sc) x 12. [48]
Rnd 3948 sc. [48]
Rnd 402 sc, bobble, (3 sc, bobble) x 11, 1 sc. [48]
Rnd 41(6 sc, dec) x 6. [42]
Rnd 42(Bobble, 2 sc) x 14. [42]
Rnd 43(5 sc, dec) x 6. [36]
Rnd 44(2 sc, bobble, 1 sc, dec) x 6. [30]
Rnd 45(3 sc, dec) x 6. [24]
Rnd 46(2 sc, dec) x 6. [18]
Rnd 47(1 sc, dec) x 6. [12]
Rnd 48Dec x 6. [6]. Close the opening and hide the tail.
Close the final 6 stitches, secure the yarn and hide the tail inside the body. The duplicated Rounds 49-60 from the supplied source are not used.
Optional Eye Sculpting and Face
- Enter from the underside of the head with a long needle and strong beige yarn.
- Exit beside the first eye, re-enter on its opposite side and return to the underside.
- Repeat around the second eye. Pull both threads gently and evenly.
- Tie securely and hide the ends inside the head.
- Embroider a small Y-shaped muzzle and eyebrows with black thread. Add short white eye highlights if desired.
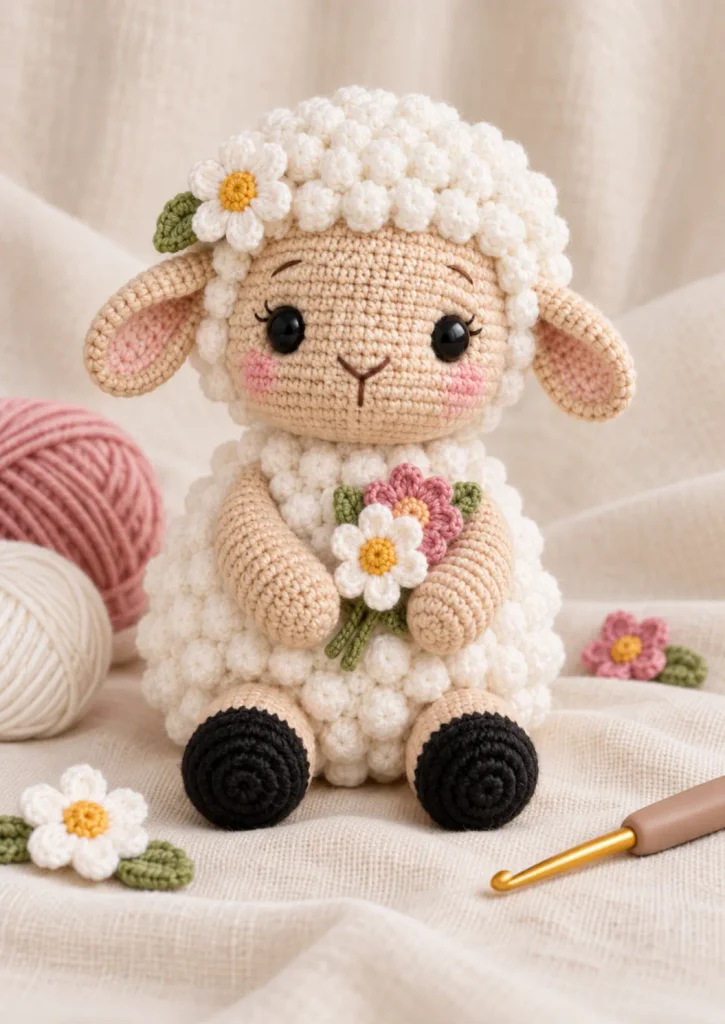
Fluffy Cap
Rnd 1With white, 6 sc in MR. [6]
Rnd 2Inc x 6. [12]
Rnd 3(Bobble, inc) x 6. [18]
Rnd 4(2 sc, inc) x 6. [24]
Rnd 51 sc, inc, bobble, (2 sc, inc, bobble) x 5, 1 sc. [30]
Rnd 6(4 sc, inc) x 6. [36]
Rnd 7(Bobble, 2 sc, bobble, 1 sc, inc) x 6. [42]
Rnd 842 sc. [42]
Rnd 9(2 sc, bobble) x 14. [42]
Rnd 1042 sc. [42]
Rnd 11(Bobble, 2 sc) x 14. [42]
Fasten off with a long sewing tail. Fit the cap evenly over the head, pin it in place and sew around the lower edge with small invisible stitches.
Ears – Make Two
Rnd 1With beige, 6 sc in MR. [6]
Rnd 2(1 sc, inc) x 3. [9]
Rnd 39 sc. [9]
Rnd 4(2 sc, inc) x 3. [12]
Rnd 512 sc. [12]
Rnd 6(1 sc, inc) x 6. [18]
Rnds 7-818 sc. [18]
Rnd 9(1 sc, dec) x 6. [12]
Fold each ear and work 6 sc through both layers. Fold the base once more, stitch it together, then sew one ear securely to each side below the cap.
Arms – Make Two
Rnd 1With beige, 6 sc in MR. [6]
Rnd 2(1 sc, inc) x 3. [9]
Rnd 39 sc. [9]
Rnd 41 bobble, 8 sc. [9]
Rnds 5-119 sc. [9]
Rnds 12-15Change to white: 9 sc. [9]
Stuff the beige section but leave the white upper part unstuffed. Flatten the top and work 4 sc through both layers before sewing each arm to the body.
Legs and Tail
Legs – Make Two
Rnd 1With black, 6 sc in MR. [6]
Rnd 2(1 sc, inc) x 3. [9]
Rnd 3(2 sc, inc) x 3. [12]
Rnds 4-9Change to beige: 12 sc. [12]
Rnds 10-13Change to white: 12 sc. [12]
Leave the upper white section unstuffed. Flatten each top and work 6 sc through both layers. Pin the legs below the body with the black hooves facing forward.
Tail
Rnd 1With beige, 6 sc in MR. [6]
Rnds 2-36 sc. [6]
Flatten and work 2 sc through both layers. Fasten off with a long tail and sew to the center back.
Daisy and Flower Bouquet
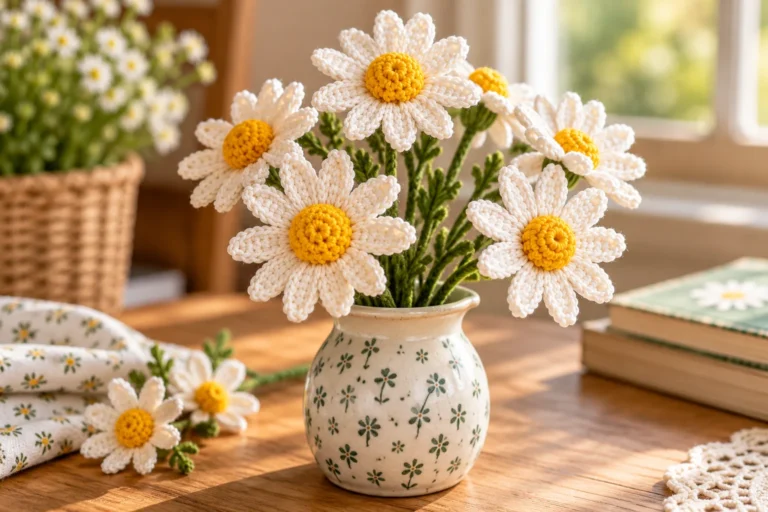
Daisy
- With yellow, work 6 sc in a magic ring.
- Change to white. In each stitch work: ch 6, sl st in the same stitch, ch 6, sl st in the same stitch.
- Fasten off and sew the daisy between one ear and the cap.
Three Green Stems
With green, ch 25 and work 24 sc from the second chain. Without fastening off, repeat the 25-chain stem twice more. Fold the three stem bases together and sew securely.
Pink Flowers
At one stem tip, work 3 sc along one side of the top loop and 3 sc along the opposite side; join for 6 stitches. In every stitch work: ch 6, sl st in the same stitch, ch 6, sl st in the same stitch. Repeat at the other two stem tips.
Assembly Order
- Complete face sculpting and embroidery.
- Sew the cap evenly around the head, then attach the folded ears.
- Pin and sew the arms and legs symmetrically.
- Attach the tail to the center back.
- Sew the daisy near one ear.
- Position the bouquet in one paw and add a hidden tack through the stems, paw and body.
- Weave in every end, shape the bobbles and pull-test all attachments.
Troubleshooting
| Problem | Solution |
|---|---|
| Bobbles stay inside | Push each bobble outward with the hook tip after its round. |
| Head tilts | Add neck stuffing evenly and keep the cap and ears balanced. |
| Body feels lumpy | Add small pieces of filling gradually instead of one large bundle. |
| Cap edge waves | Reduce sewing tension and distribute its 42 stitches evenly. |
| Legs point sideways | Re-pin them with the hooves facing forward before sewing the second side. |
Prefer the Printable PDF?
Get the organized HooksyLane edition with US terms, complete round tables, bobble guide, assembly checklist and troubleshooting.Get the Printable Pattern
Frequently Asked Questions
Is this crochet sheep pattern beginner friendly?
It suits an intermediate or confident beginner comfortable with continuous rounds, decreases, bobble stitches, stuffing and sewn assembly.
Can I embroider the eyes?
Yes. Embroidered eyes remove two plastic small parts and are the safer choice for a toy intended for a young child.
Can I use thicker yarn?
Yes, but the sheep will be larger. Choose a hook that makes a dense fabric and adjust the safety-eye size proportionally.
Finish Your Crochet Sheep
After every seam passes a gentle pull test, arrange the flower stems, shape the ears and smooth the fleece bobbles. The same pattern can become a classic farm sheep in cream and brown or a soft HooksyLane version in warm beige, dusty rose and ivory.