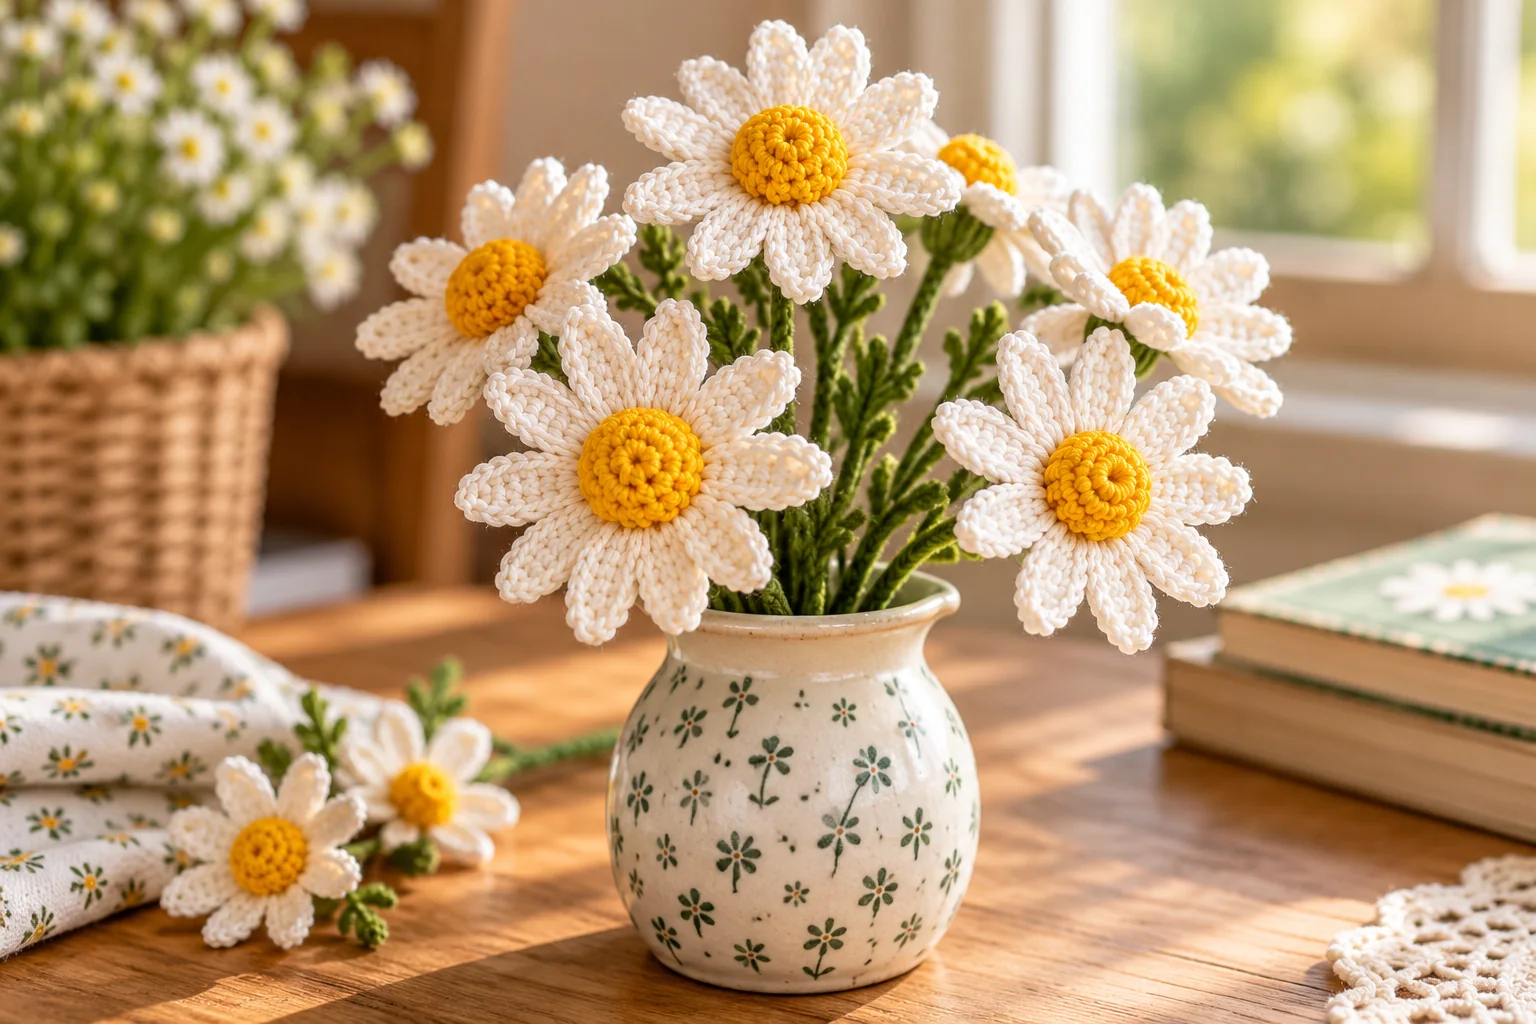
How to Crochet a Daisy Flower: Beautiful 3D Crochet Daisy Pattern
Table of Contents
There’s something special about a handmade crochet flower. It never wilts, looks lovely in a little vase, and adds a personal touch to almost any space.
If you’ve been searching for a crochet daisy pattern that looks like a real flower, this three-dimensional daisy is a beautiful project to try.
With delicate white petals, a textured yellow center, and a slender green stem, this crochet daisy is perfect for creating handmade flower bouquets, spring decorations, and thoughtful gifts.
What makes this pattern particularly lovely is its realistic construction. Instead of crocheting a simple flat flower, you’ll create the flower base, work individual petals, make a raised yellow center, and assemble everything into a finished daisy.
Ready to make your own little flower garden? Gather your yarn and crochet hook, and let’s get started!

Crochet Daisy Pattern at a Glance
| Pattern detail | Information |
|---|---|
| Project | 3D crochet daisy flower |
| Skill level | Confident beginner/intermediate |
| Crochet terms | US terminology |
| Yarn | Lace-weight cotton |
| Crochet hook | 1.75 mm |
| Flower diameter | Approximately 4 cm |
| Petals | 10 |
| Construction | Separate flower base, petals, center, and stem |
| Gauge | Not critical |
Pattern note: The approximate size is based on the original sample made with lace cotton and a 1.75 mm hook. Your finished size may vary depending on yarn and tension.
Materials You’ll Need
Before beginning, gather the following supplies:
- 25 meters of white lace cotton yarn
- 15 meters of yellow lace cotton yarn
- 10 meters of green lace cotton yarn
- 1.75 mm crochet hook
- Yarn needle
- Scissors
- 20 cm florist wire
- Cutting pliers

Choosing the Best Yarn for Your Crochet Daisy
Cotton yarn is an excellent choice for delicate crochet flowers because it provides good stitch definition and helps the petals maintain their shape.
Lace-weight cotton creates a smaller, more realistic-looking daisy. If you’re new to working with fine yarn, you can practice the stitches using thicker cotton yarn and a suitable hook before making the final flower.
For this particular design, tight stitches are helpful because they give the flower base and petals more structure.
Crochet Abbreviations
This pattern uses US crochet terminology.
| Abbreviation | Meaning |
|---|---|
| ch | Chain |
| sc | Single crochet |
| dc | Double crochet |
| sl st | Slip stitch |
| st | Stitch |
| sts | Stitches |
| BLO | Back loop only |
| FLO | Front loop only |
| picot | Small decorative loop made with chains |
Beginner tip: If you’re not familiar with working into the front or back loop of a stitch, look at the top of a crochet stitch. You’ll see two loops forming a small V. The front loop is the one closest to you, while the back loop is the one farther away.
How to Crochet a Daisy Flower Step by Step
This crochet daisy is made in four main stages:
- Crochet the green receptacle, or flower base.
- Make ten white daisy petals.
- Create the raised yellow flower center.
- Add the wire stem and assemble the flower.
Take your time with each stage. The individual components are small, but the finished result is worth the extra attention.
Step 1: Crochet the Green Flower Base
The green receptacle supports the petals and creates the structure underneath the daisy.
Start with your green cotton yarn.
Round 1: Create the Foundation Circle
Chain 4 and join with a slip stitch into the first chain to form a small ring.
Chain 1, then work 5 single crochet stitches into the center of the ring.
Join with a slip stitch into the first single crochet.
Stitch count: 5 sc.
You should now have a small green circle.
Round 2: Increase the Circle
Chain 1.
Work 2 single crochet stitches into the same stitch, then work 4 single crochet stitches into the next stitch.
Join with a slip stitch into the first single crochet.
Stitch count: 10 sc.
The extra stitches create a wider base for the daisy.
Round 3: Prepare the Front Loops
Chain 1.
Work 10 single crochet stitches, using the front loops of the stitches from the previous round.
Join with a slip stitch into the front loop of the first single crochet.
Stitch count: 10 sc.
Working in the front loops creates a useful separation between the different parts of the flower.
Round 4: Create the Decorative Green Points
Chain 3.
Make a slip stitch into the third chain from the hook to form a picot.
Slip stitch into the front loop of the next single crochet stitch.
Repeat this process eight more times.
Join with a slip stitch into the first stitch.
Fasten off and weave in the yarn ends.
Final count: 10 picots.
These little green points help create the natural appearance of the underside of a daisy.
Create the Inner Green Base
Chain 4, counting the chains as a double crochet.
Work 7 double crochet stitches into the fourth chain from the hook.
Turn your work.
Stitch count: 8 dc.
This small section forms part of the flower’s inner structure.
Step 2: Crochet the White Daisy Petals
Now it’s time for the prettiest part of the project: making the white petals!
The daisy has ten individual petals worked around the green flower base.
Attach your white yarn to a back loop of a stitch from Round 2 of the green receptacle.
First Petal
Work the following sequence:
- Chain 8.
- Single crochet into the second chain from the hook.
- Double crochet into the next chain.
- Work 3 treble crochet stitches into the next 3 chains.
- Double crochet into the next chain.
- Single crochet into the next chain.
- Slip stitch into the next available back loop of the receptacle.
Your first petal is complete!
Repeat the Petal Pattern
Repeat the same petal sequence around the green base until you have ten petals.
Fasten off the white yarn and weave in the loose ends.
Final count: 10 white petals.
The longer stitches in the middle help give each petal an elongated shape, while the shorter stitches create a tapered end.
How to Keep Your Daisy Petals Even
If your petals look uneven, don’t worry. Small crochet flowers often need a little shaping.
Try these simple tips:
- Maintain consistent tension throughout each petal.
- Count the chains carefully before working back along them.
- Make sure every petal uses the same stitch sequence.
- Avoid pulling the joining slip stitches too tightly.
- Gently arrange the petals after completing the round.
You can also use your fingers to spread the petals evenly around the green base.
Step 3: Make the Raised Yellow Flower Center
The bright yellow center is what gives this crochet daisy its cheerful appearance.
Instead of making a flat circle, this pattern uses a textured, puff-like construction to create a rounded floral disk.
Start the Yellow Center
Using your yellow cotton yarn, chain 4.
Join with a slip stitch into the first chain to form a small foundation ring.
Work as many single crochet stitches as you can comfortably fit into the center of the ring.
The stitches should sit closely together to create a dense circular center.
Build the Raised Texture
Continue working single crochet stitches over the first row, pushing the stitches backward to form a rounded, doughnut-like shape.
Keep working around the circle until the central opening is no longer visible.
The original pattern uses approximately 50 single crochet stitches in total, although the exact number depends on your yarn and tension.
Fasten off, leaving a long yarn tail for attaching the center to the flower.
Helpful tip: The goal is a firm, rounded yellow center rather than a perfectly flat circle. Keep the stitches close together, but avoid pulling so tightly that you cannot insert your hook.
Step 4: Prepare the Crochet Daisy Stem
A realistic crochet flower needs a stem to support its petals and center.
For this project, you’ll use florist wire to create a slender, flexible stem.
Attach the Wire
Fold the florist wire in half.
Insert the folded ends through the central foundation opening of the green receptacle.
Fold and position the wire so it is secured at the base of the flower.
Twist the wire below the petals to help hold the stem in place.
Safety note: Florist wire can have sharp ends. Use cutting pliers carefully, cover exposed ends securely, and keep wired flowers away from babies and young children.
Shape the Stem
Gently straighten or bend the wire into the desired position.
If you want a more finished appearance, you can wrap the stem with green yarn or suitable floral tape.
This optional finishing touch creates a cleaner look, especially when making a bouquet.
Step 5: Assemble Your Crochet Daisy Flower
You’re almost finished!
Now it’s time to bring all the individual pieces together.
Place the raised yellow floral disk over the center of the white petals.
Using the long yellow yarn tail and a yarn needle, sew the floral disk securely into place.
Make sure the yellow center covers the middle of the flower without pulling the petals out of shape.
Fasten off and weave in the remaining yarn ends.
Finally, arrange the white petals evenly around the center.
If needed, gently block the petals to help them maintain their shape.
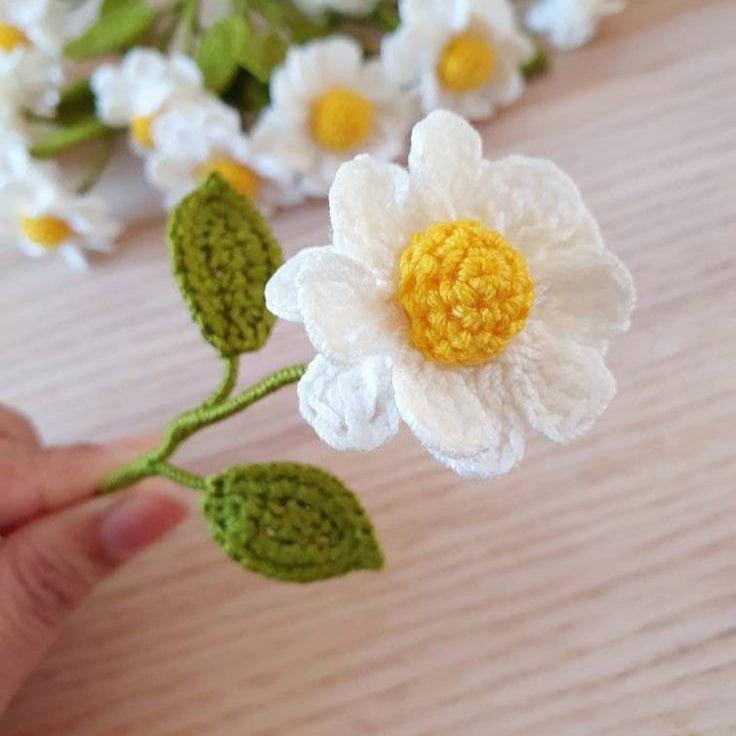
Your handmade crochet daisy is complete!
How to Make Your Crochet Daisy Look More Realistic
A few small details can make your finished flower look more natural.
Use a Slightly Off-White Yarn
Bright white yarn creates a fresh, classic daisy.
However, cream or ivory yarn can produce a softer, more natural appearance.
Keep the Yellow Center Rounded
The raised center is one of the most important details in this pattern.
A slightly textured, rounded disk gives the flower depth and helps distinguish it from a flat crochet appliqué.
Shape Each Petal Individually
Real daisy petals aren’t always perfectly symmetrical.
Gently arranging the petals at slightly different angles can create a more organic appearance.
Experiment With Stem Lengths
If you’re making several flowers, try varying the stem lengths.
This can help a handmade bouquet look more natural when arranged in a vase.
Creative Ways to Use Crochet Daisy Flowers
Once you’ve finished your first daisy, you’ll probably want to make a few more!
Here are some lovely ways to use them.
Make a Crochet Daisy Bouquet
Crochet five to seven daisies and arrange them in a small vase.
You can combine white daisies with pastel-colored flowers for a soft spring-inspired arrangement.
Create Handmade Spring Decorations
Place your crochet daisies in a decorative jar or use them as part of a seasonal centerpiece.
Unlike fresh flowers, your handmade daisies can be enjoyed throughout the year.
Give a Handmade Flower Gift
A single crochet daisy makes a thoughtful little gift.
Wrap the stem with ribbon or combine several flowers into a small handmade bouquet.
Decorate Your Craft Room
Crochet flowers look lovely on shelves, desks, and craft tables.
They’re also a fun way to display your growing crochet skills.
Common Crochet Daisy Problems and How to Fix Them
Why Are My Crochet Daisy Petals Curling?
Petals may curl if your tension is too tight or your hook is too small.
Try relaxing your tension slightly and gently shaping the petals after finishing.
Why Is My Yellow Center Too Flat?
The yellow center needs enough closely packed stitches to create a raised shape.
If it looks flat, check whether you’ve worked enough stitches to build the rounded texture.
Why Are My Petals Different Lengths?
This usually happens when you accidentally skip a chain or use the wrong stitch height.
Count the stitches in every petal carefully.
Why Is My Flower Not Holding Its Shape?
Fine cotton yarn and a suitably small hook can help the petals maintain their structure.
You can also gently block the finished flower, following the yarn manufacturer’s care instructions.

Frequently Asked Questions
Is This Crochet Daisy Pattern Good for Beginners?
This pattern is best suited to confident beginners who already know basic crochet stitches.
The flower uses chains, single crochet, double crochet, treble crochet, slip stitches, and loop-specific techniques.
If you’re completely new to crochet, practice these stitches before beginning.
What Size Is the Finished Crochet Daisy?
The reference flower measures approximately 4 cm in diameter when made with lace cotton yarn and a 1.75 mm crochet hook.
Your finished flower may be larger or smaller depending on your materials and tension.
Can I Use Thicker Yarn?
Yes. You can experiment with thicker cotton yarn and a compatible hook.
However, this will change the finished flower’s size and appearance.
Can I Make Crochet Daisies Without Wire?
Yes, if you only want the flower head.
You can omit the wire stem and use the daisy as a decorative element, although you may need to adapt the finishing method to attach it securely.
How Many Petals Does This Crochet Daisy Have?
This design has ten individual white petals arranged around a raised yellow center.
Can I Make a Whole Crochet Daisy Bouquet?
Absolutely!
Once you’ve made one daisy, you can repeat the pattern to create a bouquet.
Try mixing different stem lengths or adding other crochet flowers for variety.
Final Thoughts
Making a crochet daisy flower is a lovely way to turn a little yarn into something beautiful and lasting.
From the delicate white petals to the raised yellow center and realistic green stem, each detail gives this handmade flower its own charm.
Whether you’re making a single daisy for your desk or creating an entire crochet flower bouquet, this pattern is a rewarding project for anyone who enjoys floral crochet.
Save this crochet daisy pattern for later, experiment with your favorite yarn colors, and explore more handmade flower ideas on HooksyLane.
Happy crocheting!