Crochet Penguin Pattern With Sweater and Ice Cream Applique
Table of Contents
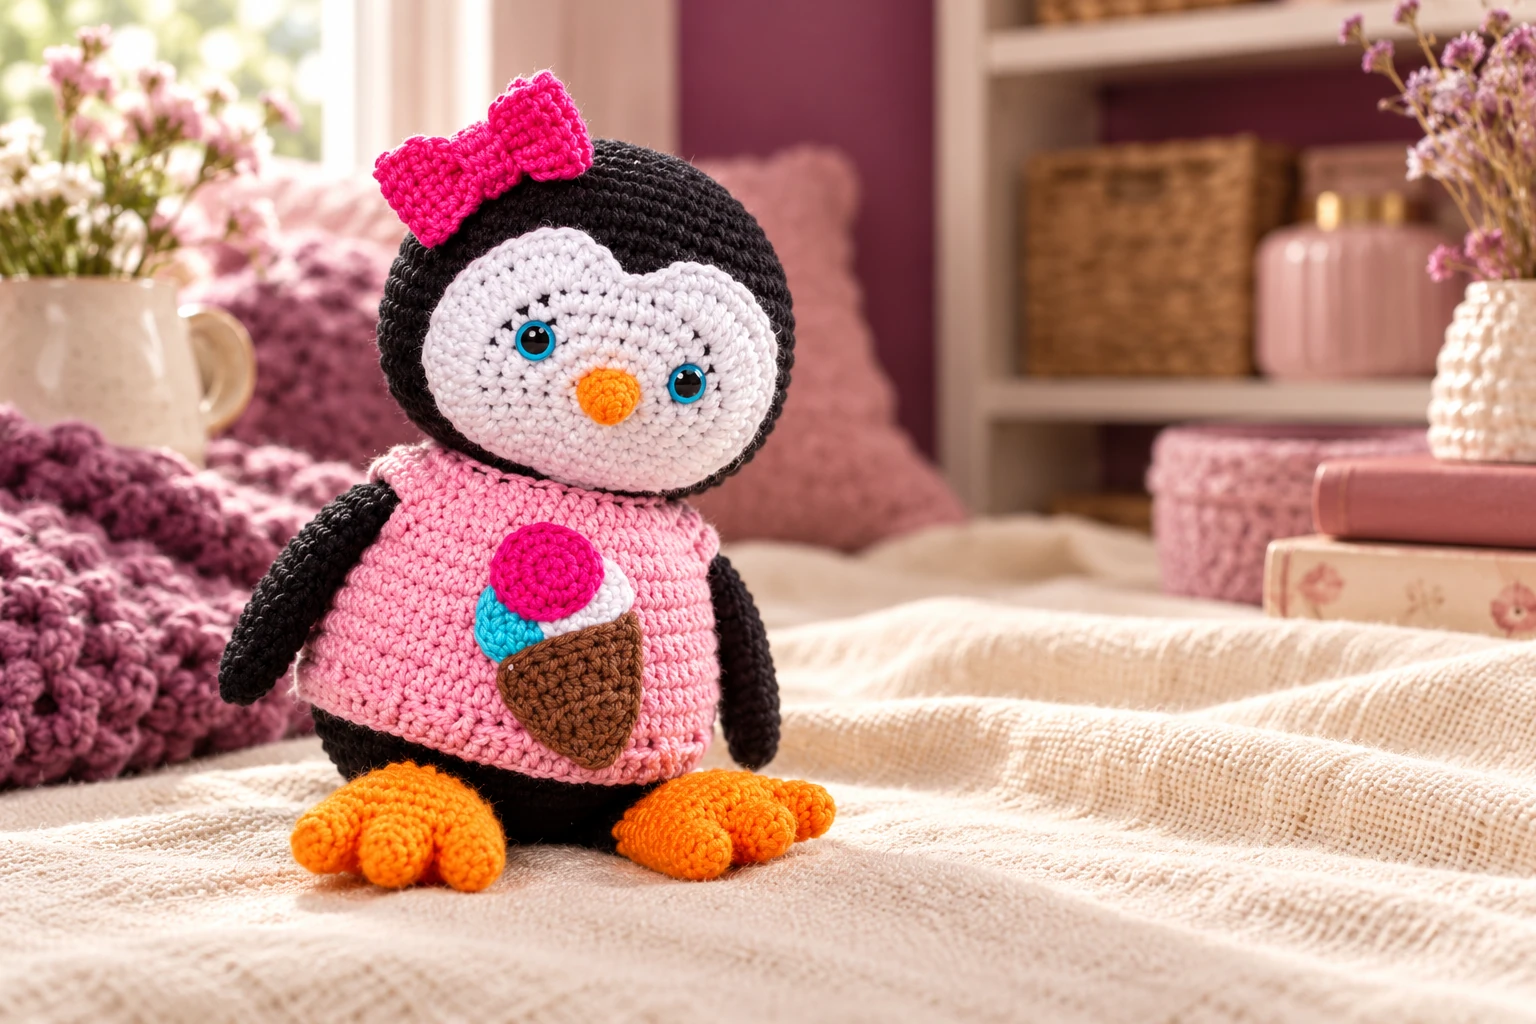
Crochet a characterful black-and-white penguin with bright three-toed feet, a heart-shaped face, a cozy pink sweater, a bold bow, and a colorful ice-cream applique. This complete US-terms tutorial combines the full pattern with the shaping, stuffing, garment-fit, assembly, and safety details that help the finished toy look polished.
What You Will Make
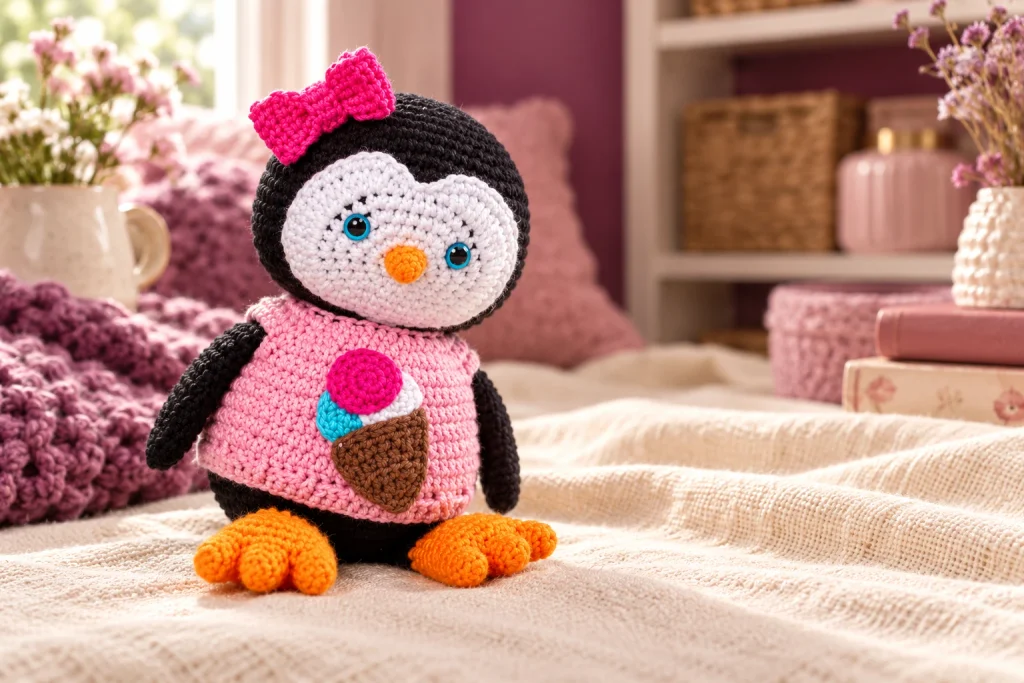
This crochet penguin pattern creates a medium-sized amigurumi character with a separate rounded head and body, a shaped white face panel, a small orange beak, black wings, three-dimensional orange feet, and a short tail. The removable-looking sweater is actually fitted around the completed body before the head is sewn on, giving the neckline a clean finish.
Skill level Intermediate
Yarn Smooth DK cotton blend
Hook 2.25 mm
Terms US crochet terms
The original source does not state an exact finished height, so your measurement will depend on yarn, hook, tension, and stuffing. If you are learning toy construction, review the HooksyLane crochet beginner guides and browse more amigurumi patterns and ideas.
Materials for the Amigurumi Penguin
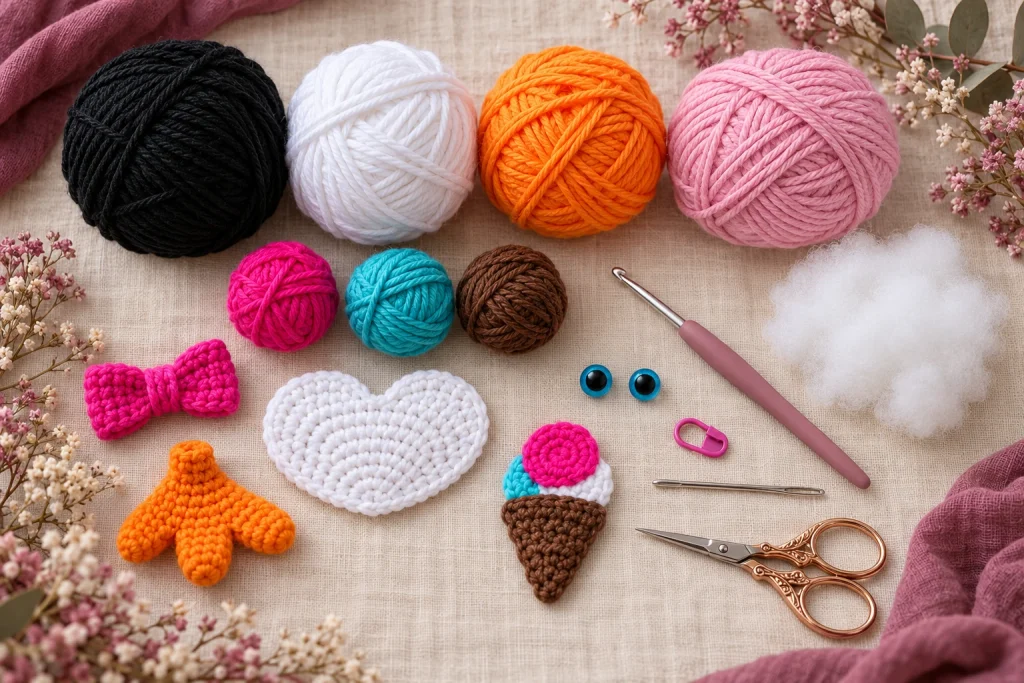
- DK cotton-blend yarn in black, white, orange, blush pink, hot pink, turquoise, and brown.
- 2.25 mm crochet hook, or a hook that produces dense, gap-free stitches.
- Two 8 mm safety eyes, or black embroidery thread for embroidered eyes.
- Polyester fiberfill, stitch marker, tapestry needle, pins, and scissors.
- Optional black thread for lashes and textile-safe pink pigment for subtle cheeks.
Safety note: Safety eyes, lashes, and small appliques can become choking hazards. For a child under three, embroider the eyes and lashes, sew every decoration securely, and avoid glued pieces.
Yarn, Tension, and Construction Skills
A smooth DK cotton-blend yarn keeps the face shaping crisp and gives the sweater enough structure to hold the applique. The stitches should be tight enough to hide the filling but flexible enough to accept the hook comfortably. Use an invisible decrease wherever possible and keep the first stitch marked throughout every spiral.
You will use single crochet, half double crochet, double crochet, increases, decreases, slip stitches, front-post and back-post stitches, joined toes, chain-space armholes, turning rows, sewing, and light face embroidery.
How to prevent dark fibers showing
Use a clean needle for the white panel, keep black yarn tails inside the head, and avoid pulling a black sewing strand through the white fabric. Pin the panel first and sew only with white yarn around its edge.
Stuffing plan
- Fill the head evenly while its opening is still wide.
- Shape the lower belly firmly, but leave the upper body slightly flexible for the head seam.
- Stuff the orange feet before beginning the black ankle sections.
- Keep the wings, tail, face panel, sweater, bow, and applique unstuffed.
Complete Crochet Penguin Pattern
Abbreviations: MR = magic ring; ch = chain; sl st = slip stitch; sc = single crochet; hdc = half double crochet; dc = double crochet; inc = increase; dec = invisible decrease; hdc2tog = half double crochet decrease; FPdc/BPdc = front/back post double crochet.
Work amigurumi parts in continuous rounds unless the instruction says to join or turn. Numbers in brackets are stitch counts.
Head – black
- R1: 6 sc in MR [6]
- R2: inc x6 [12]
- R3: (1 sc, inc) x6 [18]
- R4: (2 sc, inc) x6 [24]
- R5: (3 sc, inc) x6 [30]
- R6: (4 sc, inc) x6 [36]
- R7: (5 sc, inc) x6 [42]
- R8: (6 sc, inc) x6 [48]
- R9: (7 sc, inc) x6 [54]
- R10: (8 sc, inc) x6 [60]
- R11-20: 60 sc [60]
- R21: (8 sc, dec) x6 [54]
- R22: (7 sc, dec) x6 [48]
- R23: (6 sc, dec) x6 [42]
- R24: (5 sc, dec) x6 [36]
- R25: (4 sc, dec) x6 [30]
- R26: (3 sc, dec) x6 [24]. Sl st and leave a long tail.
White heart-shaped face panel
- R1: 6 sc in MR [6]
- R2: inc x6 [12]
- R3: (1 sc, inc) x6 [18]
- R4: (2 sc, inc) x6 [24]
- R5: (3 sc, inc) x6 [30]
- R6: (4 sc, inc) x6 [36]
- Shaping: 6 sc; hdc inc x5; dc inc x3; hdc inc x3; 1 sc; 3 sl st; 1 sc; hdc inc x3; dc inc x3; hdc inc x5. Sc in any remaining base stitches to return to the marker.
- Outline: sc around the shaped edge, but work sl st over the three slip stitches. Finish with a sl st and leave a sewing tail.
Lightly damp-block the face panel before sewing so both upper lobes lie flat and match.
Orange beak
- R1: 6 sc in MR [6]
- R2: (1 sc, inc) x3 [9]
- R3: 9 sc [9]. Leave a long tail and stuff very lightly.
Body – black
- R1: 6 sc in MR [6]
- R2: inc x6 [12]
- R3: (1 sc, inc) x6 [18]
- R4: (2 sc, inc) x6 [24]
- R5: (3 sc, inc) x6 [30]
- R6: (4 sc, inc) x6 [36]
- R7: (5 sc, inc) x6 [42]
- R8: (6 sc, inc) x6 [48]
- R9: (7 sc, inc) x6 [54]
- R10: 20 sc, (1 sc, inc) x6, 22 sc [60]. Center the increase section at the front.
- R11-15: 60 sc [60]
- R16: 20 sc, (1 sc, dec) x7, 18 sc, inc [54]
- R17-21: 54 sc [54]
- R22: (7 sc, dec) x6 [48]
- R23: (6 sc, dec) x6 [42]
- R24: (5 sc, dec) x6 [36]
- R25: (4 sc, dec) x6 [30]
- R26-27: 30 sc [30]. Fasten off.
Three-toed feet – make 2
Make three orange toes per foot. Do not cut the yarn after the third toe.
- Toe R1: 6 sc in MR [6]
- R2: (1 sc, inc) x3 [9]
- R3-4: 9 sc [9]
- Join R1: 5 sc on Toe 2, 9 sc around Toe 3, 4 sc on the remaining side of Toe 2, 9 sc around Toe 1 [27]
- R2-3: 27 sc [27]
- R4: (7 sc, dec) x3 [24]
- R5: (2 sc, dec) x6 [18]
- R6-7: 18 sc [18]
- R8: 1 sc, ch 4, skip 4, 13 sc [18 including chains]
- R9: (1 sc, dec) x6 [12]. Stuff.
- R10: dec x6 [6]. Close.
- Join black around the R8 opening and distribute 12 sc evenly [12]
- Black R2: 12 sc [12]
- R3: (3 sc, inc) x3 [15]
- R4-5: 15 sc [15]. Stuff and leave a sewing tail.
Wings – make 2
- R1: 6 sc in MR [6]
- R2: inc x6 [12]
- R3: 12 sc [12]
- R4: 5 sc, inc x5, 2 sc [17]
- R5: 17 sc [17]
- R6: 6 sc, inc x2, 9 sc [19]
- R7-11: 19 sc [19]
- R12: 6 sc, dec x3, 7 sc [16]
- R13: 16 sc [16]
- R14: 5 sc, dec x2, 7 sc [14]
- R15-19: 14 sc [14]
- R20: fold and work 7 sc through both layers [7]. Leave a tail.
Tail
- R1: 6 sc in MR [6]
- R2: (1 sc, inc) x3 [9]
- R3-4: 9 sc [9]
- R5: fold and work 4 sc through both layers. Leave a tail.
Pink Crochet Sweater
- Foundation: ch 65 and join without twisting.
- R1: ch 2, 65 dc, join [65]
- R2: work a 2-FPdc / 2-BPdc rib around, adjusting the final stitch neatly [65]
- R3-5: ch 2, 65 hdc, join [65]
- R6: ch 2, (15 hdc, hdc2tog) x3, 14 hdc, join [62]
- R7: 62 hdc, join [62]
- R8: ch 2, 15 hdc, ch 7 and skip 7, 24 hdc, ch 7 and skip 7, 9 hdc, join [62]
- R9: 1 hdc in every stitch and chain around [62]
- R10: ch 2, (9 hdc, hdc2tog) x5, 7 hdc, join [57]
- R11: (2 hdc, hdc2tog) x14, 1 hdc [43]
After assembly, pass a matching yarn tail through the final sweater round and cinch it lightly beneath the head. Do not tighten until the wings and head placement have been checked.
Hot-pink bow
Ch 9, work 8 sc turning rows for 14-16 rows, then join the first and last rows with slip stitches. Make a center band by chaining 4 and working 3-sc rows until it wraps around the middle. Sew the bow securely to the head.
Ice-cream cone applique
- Brown cone R1: ch 3, turn, 2 hdc in the second chain [2]
- R2: turn, 3 hdc [3]
- R3: hdc inc, 1 hdc, hdc inc [5]
- R4: 5 hdc [5]
- R5: hdc inc, 3 hdc, hdc inc [7]
- Edge with sc and leave a sewing tail.
Make three flat scoops: with turquoise, white, and hot pink, work 6 sc in MR; inc x6 [12]; (1 sc, inc) x6 [18]; finish with a neat slip stitch. Overlap the circles above the cone and sew the applique to the center front of the sweater.
Assembly and Face Finishing
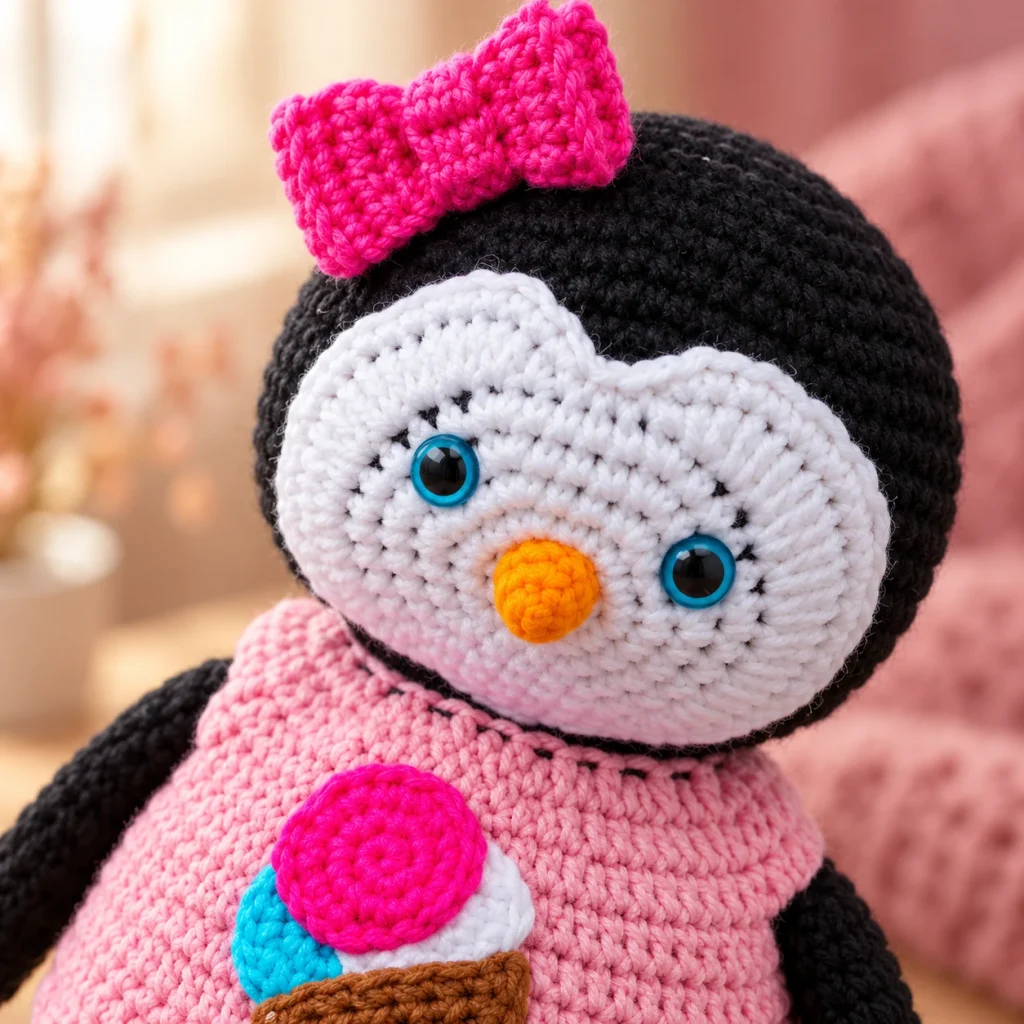
- Pin the blocked white face panel to the head and sew it with small white stitches.
- Insert the eyes only after the panel is centered. For a young child’s toy, embroider them instead.
- Sew the lightly stuffed beak between and slightly below the eyes.
- Pin the feet beneath the body and check that the penguin can sit or stand evenly before sewing.
- Pin and sew the wings to the sides and the tail to the lower back.
- Put the sweater on the body and sew the ice-cream applique to the center front.
- Sew the head to the body using two neat passes, then cinch the sweater neckline gently.
- Sew the bow through its center band and into the black head several times.
Optional lashes should be embroidered for a durable finish. If you add cheek color, use a tiny amount of textile-safe pigment and build it gradually.
Troubleshooting for a Polished Penguin
Face panel ripples
Loosen the mixed-height shaping stitches, lightly damp-block the panel, and pin it flat before sewing.
Feet twist
Rotate the black ankles so the toe fans point forward. Pin both feet before attaching either one permanently.
Head leans
Add support to the upper body and sew the neck in two passes with small, even stitches.
Sweater armhole pulls
Open the chain space gently or remake only the seven-chain section with a slightly larger hook.
Applique is bulky
Keep the scoops flat, overlap them slightly, and sew only around the visible outer edges.
Black fibers show
Keep dark tails inside the head and use a separate clean needle and white sewing yarn for the face panel.
Customization, Care, and Related Projects
Try a plum sweater for a winter look, charcoal yarn for a softer nursery palette, or embroidered sleepy eyes for a child-safe expression. The applique can become a heart, snowflake, or initial without changing the sweater pattern. To resize the penguin, change yarn and hook together while keeping the stitch counts unchanged.
Spot clean when possible. If all materials are washable, use a laundry bag, cool water, and a gentle cycle; reshape the face and feet and air dry completely. Avoid machine washing glued lashes or loose decorations.
Continue with the free crochet cat pattern, the crochet cat amigurumi tutorial, or the baby seal crochet pattern. Browse the full HooksyLane crochet pattern library for more projects.
Save the Printable Pattern
Find printable patterns in the HooksyLane Gumroad store, and follow HooksyLane on Pinterest for crochet tutorials, seasonal ideas, and new amigurumi projects.