Crochet Princess Doll Pattern: Beautiful Alexia Amigurumi Doll
Table of Contents
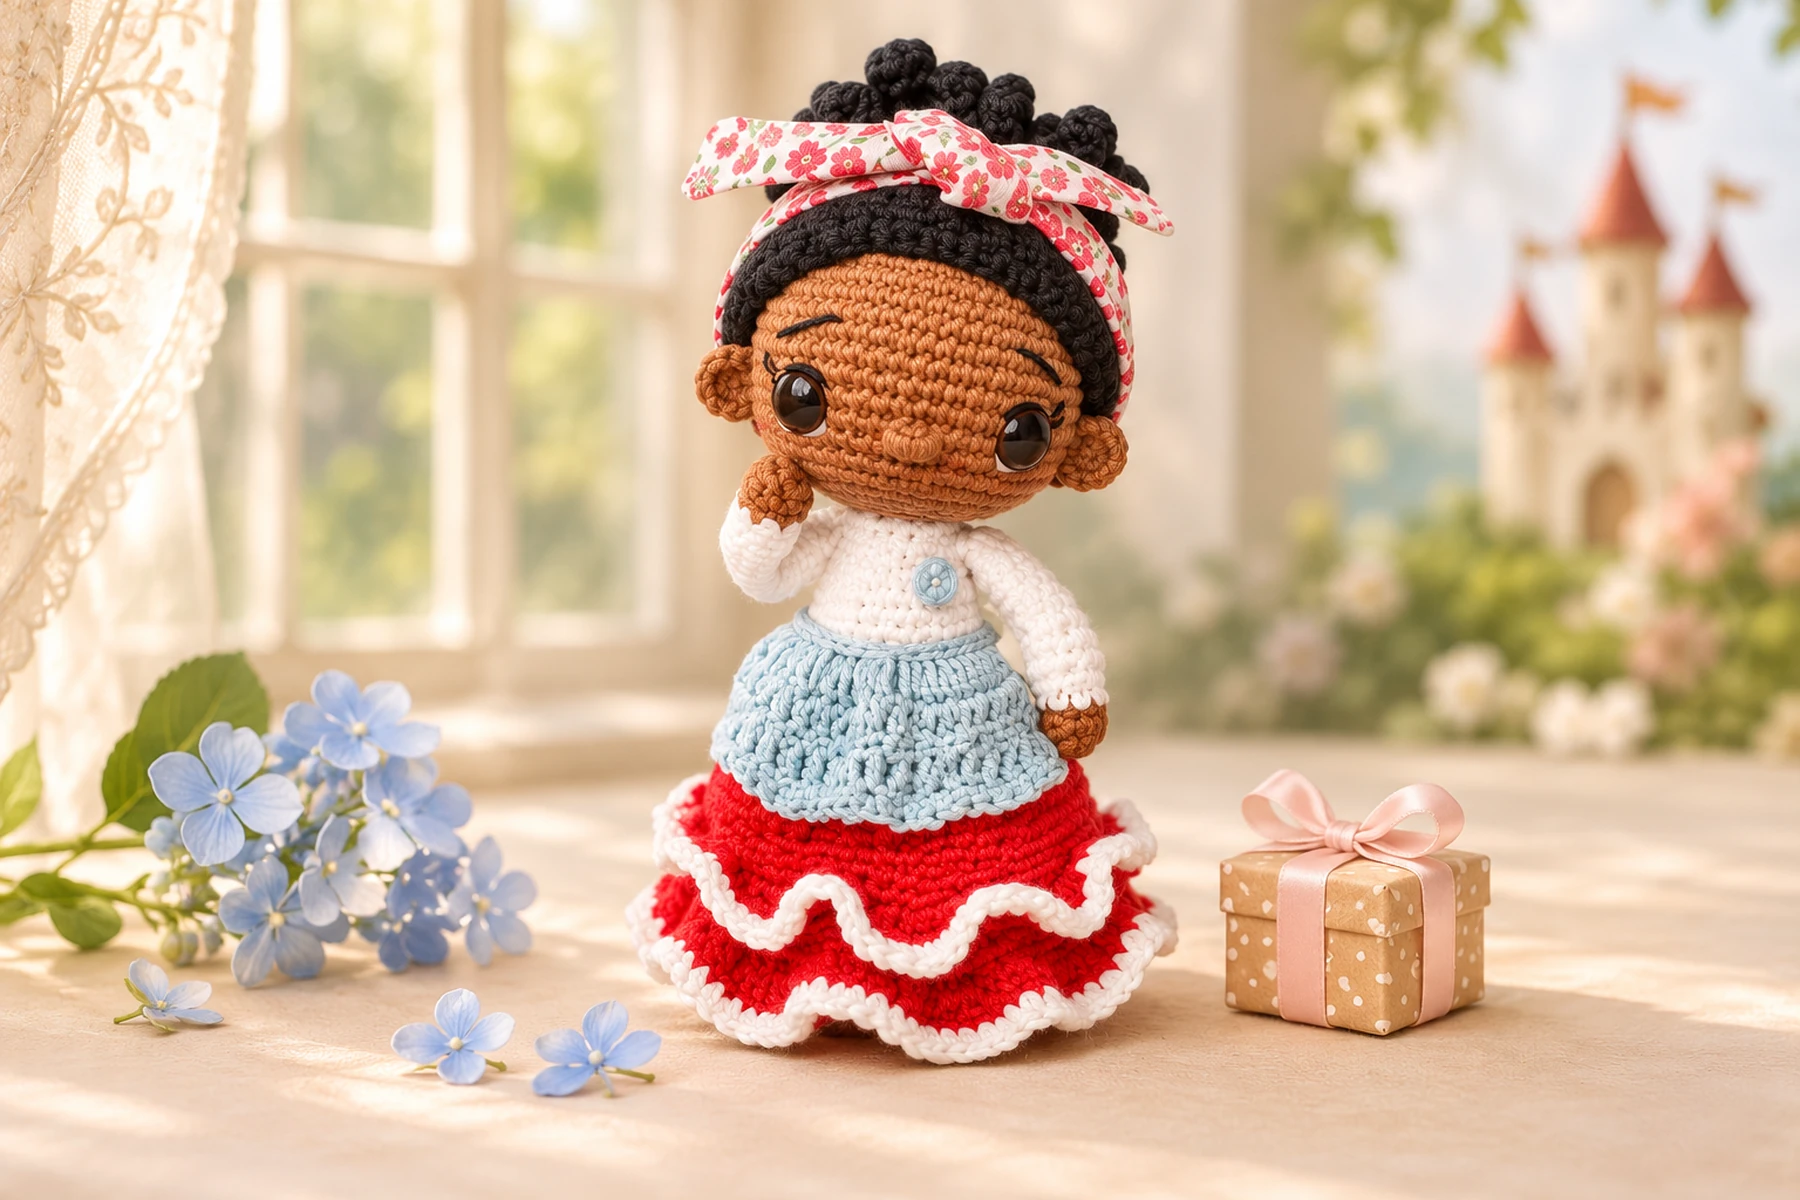
This crochet princess doll pattern creates Alexia, a customizable amigurumi character with rich brown yarn skin, a high curly bun, floral headband, white blouse, pale blue apron and a two-layer red skirt finished with white ruffles. The doll is a thoughtful handmade birthday gift, nursery decoration or story-time companion. This complete US-terms tutorial adds a corrected head decrease, precise assembly order, child-safe face options, hairstyle guidance, color planning, troubleshooting and care instructions.
Crochet Princess Doll Pattern at a Glance
- Skill level: Intermediate or confident adventurous beginner.
- Finished size: Approximately 10-12 in / 25-30 cm with medium cotton and a 3 mm hook; size varies with yarn and tension.
- Construction: Separate head, joined-leg body, skirt, arms, hair cap, spiral strands, ears, headband and apron.
- Main skills: Magic ring, spiral rounds, shifted increases, invisible decreases, BLO/FLO, joining legs, ruffles and sewing.
- Suggested hook: 3 mm or size needed for dense fabric.
- Estimated time: About 10-15 hours.
- Gift uses: Birthday doll, nursery decor, personalized keepsake or imaginative-play character.
Why This Princess Doll Works as an Evergreen Gift
The princess theme is recognizable without copying a licensed character. That makes the design easy to personalize and useful throughout the year. Change the skin tone, hair texture, skirt colors and headband print to represent the recipient. The wide ruffled skirt gives the doll a display-ready silhouette, while the apron and hair bow create strong visual details for Pinterest thumbnails.
Current keyword research supports a clear product-first phrase rather than a vague title. One third-party dataset estimates 5,400 average monthly searches for “doll crochet pattern,” and Pinterest’s 2026 hobby report highlights personal, giftable crafts plus growing interest in unique amigurumi. The focused phrase here combines that broad doll demand with an exact princess project, while related terms cover amigurumi, birthday gifts and customizable dolls.
Materials
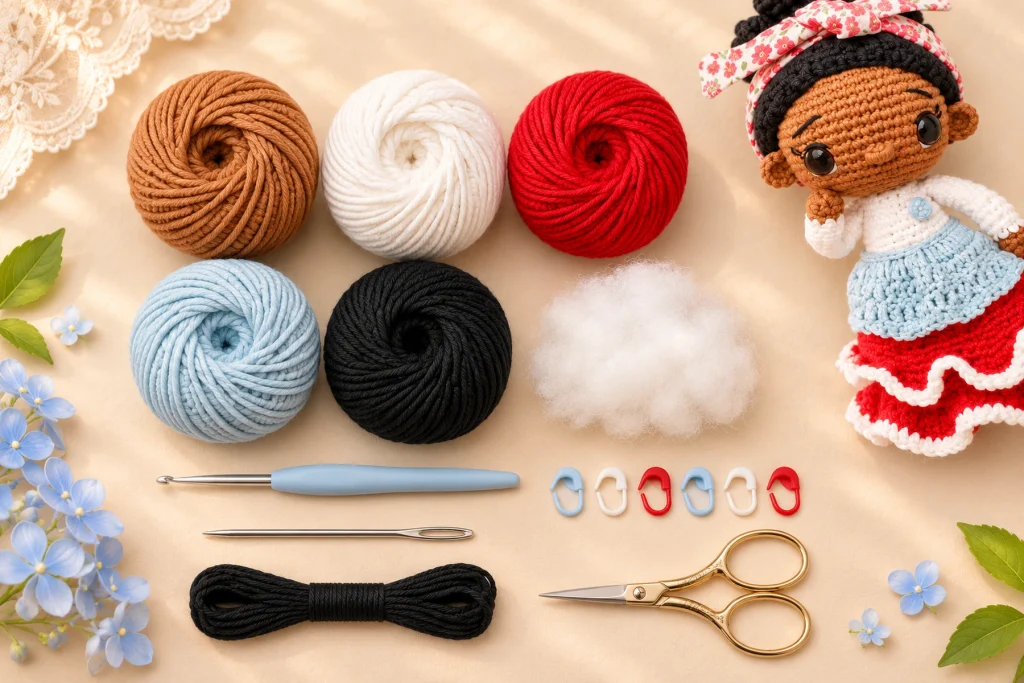
- Medium or light-worsted cotton yarn in brown, white, red, pale blue and black.
- 3 mm crochet hook or size that creates firm amigurumi fabric.
- 14 mm safety eyes for an adult-display doll, or black embroidery thread for a child-safe face.
- Polyester toy stuffing.
- Tapestry needle, embroidery needle, stitch markers, pins, scissors and stuffing tool.
- Optional floral fabric strip for the headband, or matching yarn for the crocheted version.
- Optional small button-like rosette worked in yarn and sewn securely to the blouse.
Gauge, Yarn Choice and Size
Exact gauge is not essential, but the fabric must be dense. Make a small six-round circle and stretch it over your finger. If stuffing would show between stitches, use a smaller hook. Cotton gives clean facial shaping and strong ruffles; acrylic makes a softer, lighter doll. Use one yarn weight throughout so the 18-stitch head and body openings align.
The source materials do not state a finished measurement. With medium cotton and a 3 mm hook, expect roughly 10-12 in / 25-30 cm, but measure your own sample before writing a product listing. Heavier yarn increases the head weight and may require firmer neck stuffing.

🧶 Crochet Essentials You’ll Love
Explore useful supplies for your next project
As an Amazon Associate, I earn from qualifying purchases.
US Crochet Abbreviations
| Abbreviation | US meaning |
|---|---|
| MR | magic ring |
| ch | chain |
| sl st | slip stitch |
| sc | single crochet |
| hdc | half double crochet |
| dc | double crochet |
| inc | 2 sc in the same stitch |
| dec | single crochet 2 stitches together; invisible decrease recommended |
| BLO | back loop only |
| FLO | front loop only |
| st(s) | stitch(es) |
| R | round |
| FO | fasten off |
Important Pattern Correction
The source lists Head R21 as “(2 sc, dec) six times” with a total of 36. That repeat would produce only 18 stitches and cannot follow a 48-stitch round. The mathematically consistent instruction is (2 sc, dec) twelve times for 36 stitches. Head R22 then consumes those 36 stitches and decreases correctly to 30. The corrected version below preserves the following stitch counts and the intended rounded head.
Complete Crochet Princess Doll Pattern
Head
R1: With brown skin-tone yarn, 6 sc in a MR. [6]
R2: Inc around. [12]
R3: (Sc, inc) 6 times. [18]
R4: Sc, inc, (sc 2, inc) 5 times, sc. [24]
R5: (Sc 3, inc) 6 times. [30]
R6: Sc 2, inc, (sc 4, inc) 5 times, sc 2. [36]
R7: (Sc 5, inc) 6 times. [42]
R8: Sc 3, inc, (sc 6, inc) 5 times, sc 3. [48]
R9: (Sc 7, inc) 6 times. [54]
R10-19: Sc around. [54]
R20: (Sc 7, dec) 6 times. [48]
R21: CORRECTED – (Sc 2, dec) 12 times. [36]
R22: Sc 2, dec, (sc 4, dec) 5 times, sc 2. [30]
R23: (Sc 3, dec) 6 times. [24]
R24: Sc, dec, (sc 2, dec) 5 times, sc. [18]
Place 14 mm eyes between R15-R16 with eleven stitch positions from one insertion point to the other, leaving nine visible stitches between the eyes. For children under three, embroider closed or open eyes instead. Begin stuffing after R20, spreading small tufts around the outer walls. FO after R24 with a long sewing tail and leave the 18-stitch opening unclosed.
Face Embroidery and Sculpting
Mark the center line before adding the nose. Embroider a small horizontal nose one to two rounds below the eyes, then add a short vertical stitch and a gentle smile. Add eyebrows two rounds above the eyes. Optional needle sculpting can pull the inner eye corners slightly inward, but use light tension so the crochet fabric does not pucker. A tiny amount of washable blush can warm the cheeks; embroidery is more permanent and easier to care for.
Legs and Body
Leg R1: With brown, 6 sc in a MR. [6]
Leg R2: Inc around. [12]
Leg R3-4: Sc around. [12]
Leg R5: (Sc 3, inc) 3 times. [15]
Leg R6-13: Sc around. [15]
Body R14: Finish the first leg and make the second without fastening off. Change to red or chosen under-skirt color. Ch 2, sc 15 around first leg, sc 2 across chain, sc 15 around second leg, sc 2 along opposite side of chain. [34]
Body R15: (Sc 16, inc) 2 times. [36]
Body R16-18: Sc around. [36]
Body R19: (Sc 4, dec) 6 times. [30]
Body R20: Change to white; sc around. [30]
Body R21: BLO sc around. [30]
Body R22-23: Sc around. [30]
Body R24: (Sc 3, dec) 6 times. [24]
Body R25-27: Sc around. [24]
Body R28: (Sc 2, dec) 6 times. [18]
Body R29: Sc around. [18]
Make two identical legs. Stuff each foot and leg to the same firmness and compare the round count before joining. At Body R14, place both legs facing forward; the chain-2 bridge becomes the crotch. Use the starting tails to close any gap around the bridge. Continue stuffing every three rounds, keeping the lower body firm enough to support the wide skirt.
Red Skirt Base
R1: With red, join in the exposed FLO from body R21. (Sc, inc) 15 times. [45]
R2-4: Sc around. [45]
R5: (Sc 8, inc) 5 times. [50]
R6-12: Sc around. [50]
R13: BLO sc around. [50]
R14: (Sc 9, inc) 5 times. [55]
R15: Sc around. [55]
Keep the doll upright as you work so the skirt falls toward the feet. R13 is worked BLO to leave a visible front-loop ridge for the upper ruffle. The lower ruffle is attached around the finished R15 edge. If you prefer a removable skirt, crochet the same stitch counts separately and add a waist tie, but a permanently attached skirt is safer for young children.
Two White-Edged Ruffles
Upper ruffle: Join red in the exposed FLO from Skirt R13. Ch 2. Work (3 hdc, hdc inc) repeatedly around, adjusting the final repeat only if needed to meet the join. Join with a slip stitch. Change to white and work one sc in every stitch around.
Lower ruffle: Join red to the edge of Skirt R15. Ch 2 and repeat (3 hdc, hdc inc) around. Change to white and sc evenly around the edge. Keep both white rounds relaxed so they wave rather than pull the red fabric inward.
Arms – Make Two
R1: With brown skin-tone yarn, 8 sc in a MR. [8]
R2: Inc, sc 7. [9]
R3: Sc around. [9]
R4-13: Change to white; sc around. [9]
R14: Dec, sc 7. [8]
Stuff only the brown hand and the first one or two white sleeve rounds. Leave the upper arm flexible. Flatten the opening and FO with a long tail. Pin the arms between body R25-R28, check the hand height from the front, and sew through both flattened layers with several passes.
Hair Cap
R1: With black, 6 sc in a MR. [6]
R2: Inc around. [12]
R3: (Sc, inc) 6 times. [18]
R4: (Sc 2, inc) 6 times. [24]
R5: (Sc 3, inc) 6 times. [30]
R6: (Sc 4, inc) 6 times. [36]
R7: (Sc 5, inc) 6 times. [42]
R8: (Sc 6, inc) 6 times. [48]
R9: (Sc 7, inc) 6 times. [54]
R10: (Sc 8, inc) 6 times. [60]
R11-15: Sc around. [60]
Do not fasten off after R15. Test the cap over the head: its lower edge should sit above the eyebrows and curve behind the ears. If your tension makes it too deep, omit R15; if it is too shallow, add one plain 60-stitch round. Pin at the center front, back and both sides before sewing.
Thirty Spiral Hair Strands
Continue from the cap. For each strand, ch 30. Turn and sc in 29 chains from the second chain. Slip stitch into the cap, skip one base stitch, and slip stitch into the next base stitch. Repeat around to make 30 strands across the 60-stitch edge. Consistent chain tension is essential: tight chains make short curls, while loose chains create longer spirals.
After sewing the cap to the head, lift all strands toward the crown to form a high ponytail or bun. Secure the bundle with black yarn and several hidden stitches. Arrange a few curls around the back and sides for volume. Do not rely on a removable elastic for a child’s toy.
Ears – Make Two
With brown yarn, work 7 hdc in a MR. Pull the ring closed, FO with a long tail and leave the half-circle unstuffed. Sew one ear to each side of the head between approximately R15-R18, tucking the upper edge partly beneath the hair cap. Compare placement from the front before securing the second ear.
Floral Headband: Fabric Option
Cut a fabric rectangle approximately 2 in / 5 cm wide and long enough to wrap around the hairstyle plus 4 in / 10 cm for a knot. Fold long edges toward the center, fold again, and sew into a narrow band. Tie around the bun and tack the knot to the hair with several strong stitches. A loose fabric tie is decorative, not suitable for an unsupervised young child.
Crocheted Headband Option
With red or coordinating yarn, ch 91. Row 1: from second chain, sc 90, ch 1 and turn. Rows 2-3: BLO sc 90, ch 1 and turn. FO with long tails. Wrap around the hairstyle, tie a bow and sew the bow to the hair cap so it cannot be removed.
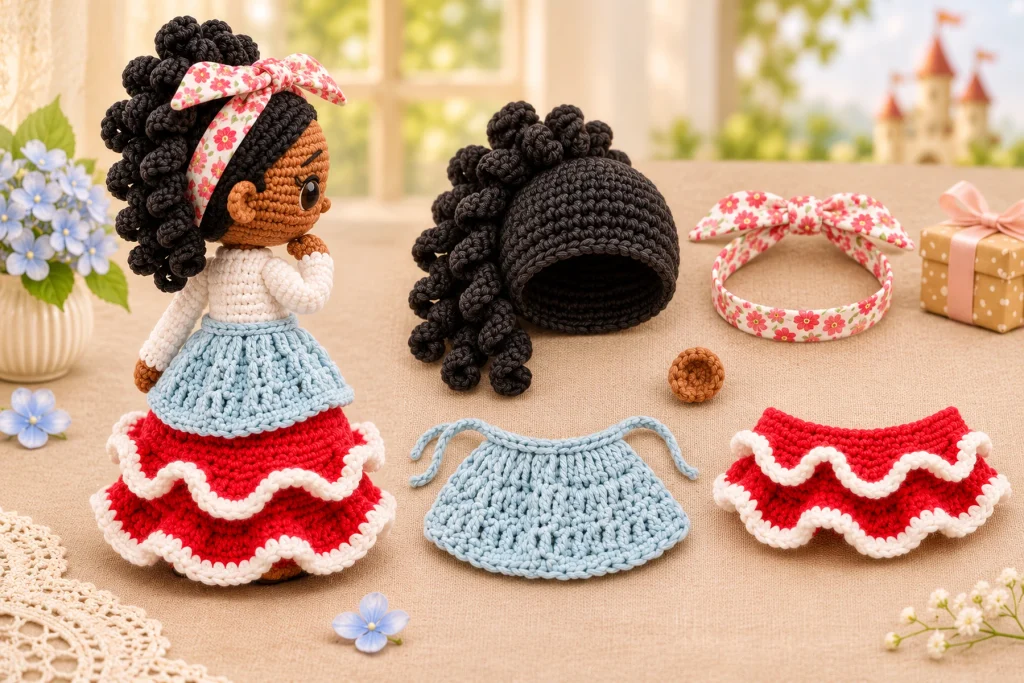
Pale Blue Apron
Foundation: Ch 10, then ch 3 more to count as the first dc. Turn.
Row 1: Work 2 dc in each of the 10 foundation chains. [20 dc plus turning chain if counted]
Rows 2-3: Ch 3, turn, dc in each stitch across. Keep 20 working stitches.
Row 4: Ch 1, turn, sc across. FO.
Waist tie: Ch 20. Slip stitch evenly across the 10-stitch foundation edge of the apron, then ch 20. FO. Position the apron over the front of the red skirt, tie at the back and tack both ties to the doll for a child-safe finish.
Small Blue Rosette
With pale blue, make 6 sc in a MR. Pull closed and FO with a long tail. Flatten the circle and sew it to the center of the white blouse. Pass the yarn through every outer stitch rather than using glue. For a more decorative adult-display version, embroider a tiny white star in the center.
Assembly Order
- Complete the head, add the face and stuff firmly while leaving 18 stitches open.
- Make both legs, join them and complete the 18-stitch body opening.
- Match head and body openings one-to-one. Mark front, back and both sides, then mattress stitch all 18 pairs.
- Add firm neck stuffing before closing the final 2 in / 5 cm and reinforce the seam once more.
- Crochet the skirt and both ruffles; finish with relaxed white edging.
- Sew the arms at equal height and attach both ears.
- Sew the hair cap, create 30 curls, lift them into a high bun and secure thoroughly.
- Add the headband, apron and blue rosette.
- Hide every tail, remove every pin and perform a gentle pull test.
How to Create a Strong 18-to-18 Neck Seam
The head and body both finish with 18 stitches, which makes alignment straightforward. Thread the head tail and place the openings together. Use four temporary markers to divide each opening into quarters. Mattress stitch one head stitch to one body stitch around the seam. Stop before the final section, add dense small tufts around the neck center, then close and repeat the seam once with a fresh strand. The finished head should stay upright without wire.
Troubleshooting
- Head count collapses at R21: use the corrected repeat twelve times to reach 36.
- Face looks tilted: mark the vertical center and count eye spaces before locking the backs.
- Body leans: confirm both legs have thirteen rounds before joining and distribute hip stuffing evenly.
- Crotch has a hole: weave the starting tails across both sides of the chain-2 bridge.
- Skirt will not flare: verify R1 has 45 stitches, R5 has 50 and R14 has 55.
- Ruffles pull inward: loosen the white edging or use a hook 0.5 mm larger.
- Hair cap covers the eyes: omit one plain cap round or sew the edge slightly higher.
- Curls are different lengths: keep all chains relaxed and count 29 return stitches.
- Bun falls backward: sew the cap first, then anchor the lifted curl bundle to several crown rounds.
- Neck is floppy: add stuffing around the inner walls and reinforce the 18-to-18 seam.
Customization Ideas
Representation is one of this design’s strengths. Choose any skin shade and coordinate the face embroidery accordingly. Black, brown, auburn, blonde or fantasy-colored hair all work with the same cap. For textured hair, keep the full 30 spiral strands; for loose waves, make fewer longer strands and sew them individually. Change red to plum, pink, green or gold, and match the apron to the recipient’s favorite color.
Add an embroidered initial to the apron or a small stitched flower to the blouse. A birthday version can carry a tiny sewn envelope or soft star. Avoid crowns, symbols or color combinations that intentionally copy a protected character. Original color stories make the doll more personal and easier to brand as a HooksyLane creation.
Gift Presentation and Pinterest Photography
Photograph the doll against a light neutral background so the black curls and red skirt remain distinct. Include one full-body image, one close face detail and one side or back view showing the bun. For Pinterest, use a vertical crop with the doll centered and the ruffled skirt fully visible. Package the doll in a box that does not flatten the hair, with acid-free tissue and a care card listing fiber content and decorative-versus-toy use.
For a product listing, state that the purchase is a digital pattern rather than a finished doll. Show the final size, skill level, language, US terms and required hook. Do not promise that safety eyes are suitable for babies. If selling finished dolls, confirm local toy regulations and complete appropriate testing.
Safety and Care
For children under three, embroider the eyes and facial details, sew the rosette instead of gluing it, permanently attach the apron and headband, and secure the hair bundle with multiple yarn passes. Loose ribbons, long ties and removable accessories can become entanglement or choking hazards. Pull-test the ears, arms, head, hair and clothing before gifting.
Spot clean with cool water and mild soap. Press moisture out in a towel without twisting. Reshape the ruffles, apron and curls, then air-dry completely. Avoid machine washing if the doll contains fabric trim, safety eyes or delicate hair styling. This pattern does not replace formal commercial toy-safety testing.
More HooksyLane Crochet Resources
Explore more amigurumi crochet patterns, browse free crochet patterns, and develop core skills with crochet for beginners tutorials. Follow HooksyLane on Pinterest for crochet gift ideas and visit the HooksyLane Gumroad store for printable patterns.

Final Quality Checklist
- Head R21 uses the corrected twelve repeats and finishes with 36 stitches.
- Eyes are centered and appropriate for the recipient’s age.
- Both legs have matching length and firmness.
- The chain-2 join is closed with no visible gap.
- Head and body are joined one-to-one across 18 stitches.
- Upper and lower ruffles curve freely without pulling.
- Arms and ears are symmetrical and secure.
- The hair cap is firmly sewn and all 30 strands are anchored.
- Apron, rosette and headband are sewn rather than glued.
- All tails are hidden and all pins are removed.
This crochet princess doll pattern combines a recognizable fairytale silhouette with meaningful customization. Follow the corrected head decrease, reinforce the 18-stitch neck seam, secure the high bun and adapt every removable detail to the recipient’s age. The finished Alexia doll becomes a polished handmade birthday gift, inclusive keepsake or nursery character with strong year-round Pinterest appeal.