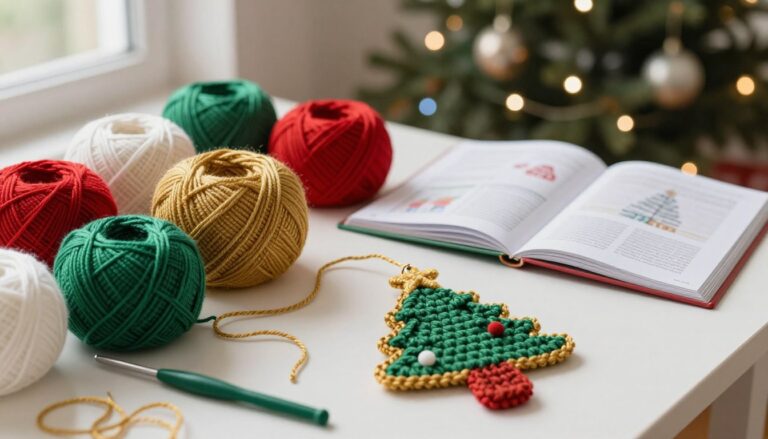

Crochet Snowman Pattern: Easy and Festive Holiday Project
Table of Contents
This crochet snowman pattern makes a classic winter amigurumi with a round white head, generous snowball body, orange carrot nose, forked brown arms, black buttons, pale blue scarf and pointed Santa hat. The complete tutorial uses US crochet terms and adds the practical details that help the finished snowman look polished: fabric-density advice, eye and nose placement, balanced assembly, pom-pom finishing, troubleshooting, care and toy-safety guidance.
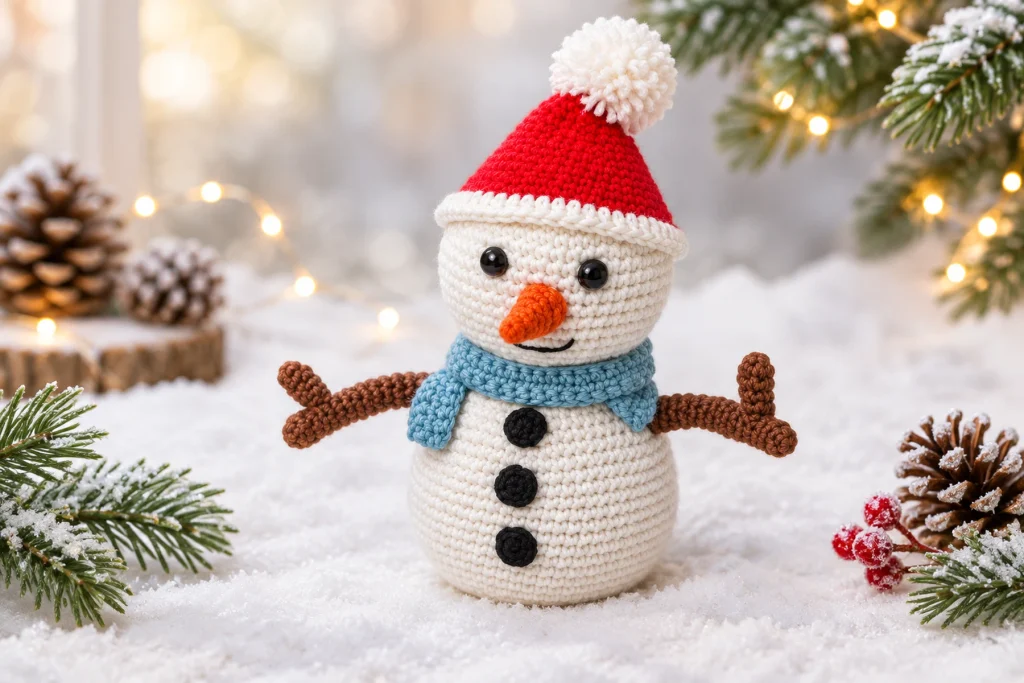
Crochet Snowman Pattern at a Glance
- Skill level: Confident beginner.
- Construction: Separate head and body, two forked arms, carrot nose, three flat buttons, scarf, hat and yarn pom-pom.
- Main techniques: Magic ring, spiral rounds, increases, invisible decreases, chains, rows, double crochet, seaming and simple embroidery.
- Suggested hook: US C/2 / 2.5 mm, or the hook that produces a firm fabric.
- Estimated time: About 5-8 hours including assembly.
- Season: Christmas, winter decor and New Year gifting.
Why a Snowman Is a Strong Seasonal Project
A snowman reaches beyond Christmas because it still feels appropriate throughout winter. That makes this design useful for holiday decorating, January displays, handmade markets and winter gifts. The simple white shapes are approachable for newer amigurumi makers, while the carrot nose, forked arms, scarf and hat provide enough finishing detail to create a distinctive product.
The pattern is also easy to customize. You can change the scarf and hat without altering the main body, embroider the eyes for a child-safe version, or use a smaller yarn weight to create an ornament-sized snowman. For consistent proportions, keep every yarn color in the same weight.
Materials for the Snowman Amigurumi

- Sport or 4-ply cotton yarn in white for the head and body.
- Small amounts of red, brown, black, orange and pale blue yarn.
- US C/2 / 2.5 mm crochet hook.
- Two 6-8 mm safety eyes, or black embroidery thread.
- Polyester toy stuffing.
- Stitch marker, yarn needle, pins, scissors and stuffing tool.
- A small piece of black embroidery thread for the smile.
Yarn and Gauge Advice
White yarn makes stitch gaps especially visible. Crochet firmly enough that the stuffing does not show when the fabric is stretched lightly. If gaps appear, move down one hook size. If the fabric becomes rigid or your hands strain, move up by 0.25-0.5 mm. Cotton gives crisp definition and a stable base; a cotton-acrylic blend creates a softer snowman.
US Crochet Abbreviations
| Abbreviation | US meaning |
|---|---|
| MR | magic ring |
| ch | chain |
| sl st | slip stitch |
| sc | single crochet |
| dc | double crochet |
| inc | 2 sc in the same stitch |
| dec | single crochet 2 stitches together; invisible decrease recommended |
| st(s) | stitch(es) |
| R | round or row |
| FO | fasten off |
Before You Crochet
- Work all round pieces in a continuous spiral unless the instructions say to join.
- Move the stitch marker at the beginning of every round.
- Count carefully after increase and decrease rounds.
- Use an invisible decrease to keep the white surface smooth.
- Stuff with many small tufts rather than a few large clumps.
- Leave long sewing tails on every separate part.
Complete Crochet Snowman Pattern
Head
R1: With white, work 6 sc in a MR. [6]
R2: Inc in each st around. [12]
R3: (Sc in next st, inc in next st) 6 times. [18]
R4: (Sc in next 2 sts, inc in next st) 6 times. [24]
R5: (Sc in next 3 sts, inc in next st) 6 times. [30]
R6: (Sc in next 4 sts, inc in next st) 6 times. [36]
R7: (Sc in next 5 sts, inc in next st) 6 times. [42]
R8: (Sc in next 6 sts, inc in next st) 6 times. [48]
R9-17: Sc in each st around. [48]
Eye placement: Insert 6-8 mm safety eyes between R11 and R12 with approximately 8 stitches between them. Pin the carrot nose before locking the backs to confirm that the expression is centered. For a child under three, use securely embroidered eyes instead.
R18: (Sc in next 6 sts, dec) 6 times. [42]
R19: (Sc in next 5 sts, dec) 6 times. [36]
R20: (Sc in next 4 sts, dec) 6 times. [30]
R21: (Sc in next 3 sts, dec) 6 times. [24]
R22: (Sc in next 2 sts, dec) 6 times. [18]
Stuff the head firmly and evenly, shaping the cheeks with small tufts. FO with a long tail and leave the final 18 stitches open for joining to the body.
Body
R1: With white, work 6 sc in a MR. [6]
R2: Inc in each st around. [12]
R3: (Sc in next st, inc in next st) 6 times. [18]
R4: (Sc in next 2 sts, inc in next st) 6 times. [24]
R5: (Sc in next 3 sts, inc in next st) 6 times. [30]
R6: (Sc in next 4 sts, inc in next st) 6 times. [36]
R7: (Sc in next 5 sts, inc in next st) 6 times. [42]
R8: (Sc in next 6 sts, inc in next st) 6 times. [48]
R9: (Sc in next 7 sts, inc in next st) 6 times. [54]
R10: (Sc in next 8 sts, inc in next st) 6 times. [60]
R11-23: Sc in each st around. [60]
R24: (Sc in next 8 sts, dec) 6 times. [54]
R25: (Sc in next 7 sts, dec) 6 times. [48]
R26: (Sc in next 6 sts, dec) 6 times. [42]
R27: (Sc in next 5 sts, dec) 6 times. [36]
R28: (Sc in next 4 sts, dec) 6 times. [30]
R29: (Sc in next 3 sts, dec) 6 times. [24]
R30: (Sc in next 2 sts, dec) 6 times. [18]
Fill the lower body firmly so the snowman stands without leaning. Add stuffing gradually as the opening narrows. FO with a long tail and leave the final 18 stitches open.
Brown Twig Arms – Make Two
R1: With brown, work 6 sc in a MR. [6]
R2-15: Sc in each st around. [6]
Do not stuff. FO with a long tail. Flatten the base lightly for sewing.
Small Twig Fingers – Make Two
R1: With brown, work 6 sc in a MR. [6]
R2-5: Sc in each st around. [6]
Do not stuff. Sew one finger diagonally to each arm between arm rounds 4 and 6. The main arm tip and attached finger create the forked branch shape.
Black Buttons – Make Three
R1: With black, work 6 sc in a MR, sl st to first sc. [6]
FO with a long tail. The source instructions state two buttons, while the finished snowman shows three. This corrected edition uses three buttons so the written pattern matches the finished design.
Orange Carrot Nose
R1: With orange, work 4 sc in a MR. [4]
R2: Sc in each st around. [4]
R3: (Sc in next st, inc in next st) twice. [6]
R4: Sc in each st around. [6]
R5: (Sc in next st, inc in next st) 3 times. [9]
R6: Sc in each st around. [9]
FO with a long tail. Add only a tiny amount of stuffing if needed. Sew the nose horizontally between head rounds 12 and 15. Keep the narrow starting tip pointing forward and the wider final edge against the face.
Pale Blue Scarf
Row 1: With pale blue or your chosen color, ch 71. Beginning in second ch from hook, sc in each ch across. [70]
Rows 2-3: Ch 1, turn, sc in each st across. [70]
FO and weave in the ends. If you want a longer scarf, add 10-20 foundation chains and work the same three rows. Test it around the joined neck before adding optional tassels.
Red Santa Hat
R1: With red, work 6 sc in a MR. [6]
R2-3: Sc in each st around. [6]
R4: Inc in each st around. [12]
R5: (Sc in next st, inc in next st) 6 times. [18]
R6: Sc in each st around. [18]
R7: (Sc in next 2 sts, inc in next st) 6 times. [24]
R8: Sc in each st around. [24]
R9: (Sc in next 3 sts, inc in next st) 6 times. [30]
R10: Sc in each st around. [30]
R11: (Sc in next 4 sts, inc in next st) 6 times. [36]
R12: Sc in each st around. [36]
R13: (Sc in next 5 sts, inc in next st) 6 times. [42]
R14: Sc in each st around. [42]
R15: (Sc in next 6 sts, inc in next st) 6 times. [48]
R16: Change to white. Ch 2, dc in each st around, sl st to first dc. [48]
FO and weave in the white brim tail. Test the 48-stitch opening around the head before attaching the pom-pom. The hat may be left removable for display, but a toy intended for a child should have it sewn securely.
White Yarn Pom-Pom
- Cut a 8 in / 20 cm length of strong white yarn and set it aside.
- Wrap white yarn around your index and middle fingers 20-30 times.
- Slide the bundle off carefully and tie the reserved strand tightly around its center.
- Cut the loops on both sides and trim the yarn evenly into a round pom-pom.
- Use the long tying ends to sew the pom-pom firmly to the hat point.
Safety note: Cut-yarn pom-poms can shed. For a baby or toddler toy, omit the pom-pom or replace it with a securely crocheted ball.
Assembly Order
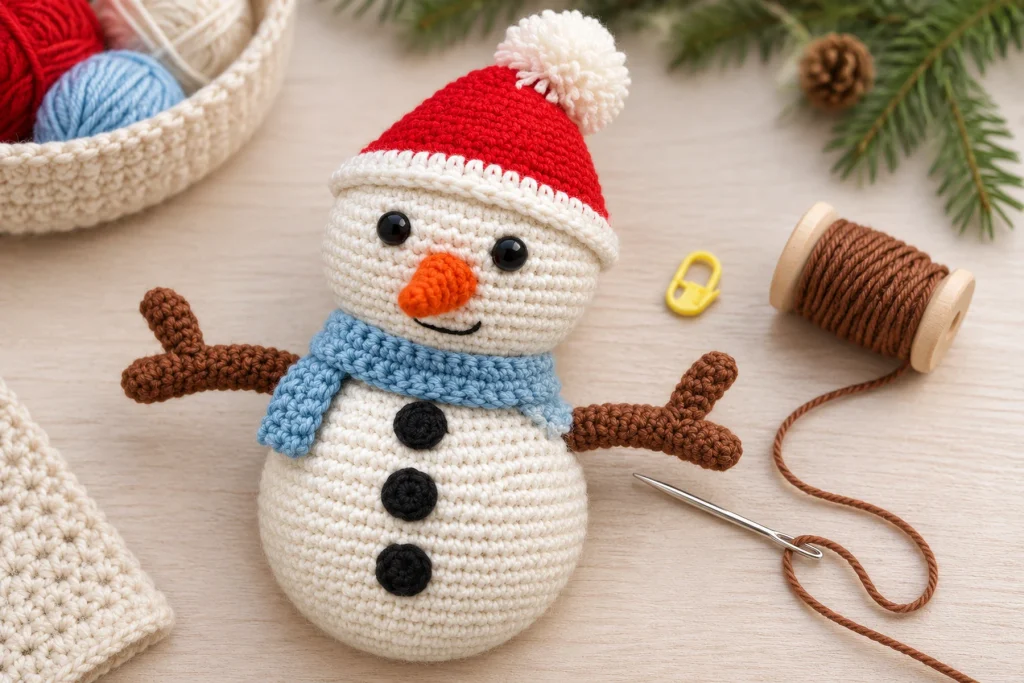
- Match the 18-stitch opening of the head to the 18-stitch body opening.
- Sew one stitch to one stitch around the neck, adding stuffing through the final gap if needed.
- Pin the carrot nose between head rounds 12 and 15 and sew around the wider base.
- Embroider a curved black smile beneath the nose.
- Attach each forked arm to the body at the same height.
- Arrange three black buttons vertically down the center front and sew them securely.
- Wrap the scarf around the neck and secure it with two hidden stitches.
- Place the hat on the head and sew the white brim in several hidden points if the snowman is intended for play.
- Sew the pom-pom firmly to the hat tip.
How to Keep the Snowman Standing Straight
Before closing the body, place it on a flat surface and press the base gently into shape. Keep the stuffing firm at the bottom and even around the sides. When attaching the head, use four temporary pins at the front, back and both sides. Sew a few stitches at each anchor point before filling the gaps. This prevents the head from drifting to one side.
Troubleshooting
The White Stuffing Shows Through
Move down a hook size and use smaller tufts. Avoid stretching the fabric by forcing in one large piece of stuffing. White or cream stuffing is less visible than gray recycled fill.
The Body Has a Flat or Lumpy Side
Massage the body while adding stuffing. Fill the edges first and the center second. If one side remains flat, insert a small tuft behind that area with a stuffing tool before closing.
The Carrot Nose Points Down
Pin the wider base to the face at four points. Make the upper stitches slightly tighter than the lower stitches so the nose lifts forward. Do not overstuff the nose.
The Arms Rotate After Sewing
Flatten the final arm round and sew through both layers as well as the body. Add a second hidden stitch slightly below the first seam to control the angle.
The Hat Is Too Loose
Use a smaller hook for the hat, or pass a strand of red yarn through the inside of R15 and tighten it slightly before securing. For a display snowman, a few hidden stitches around the white brim are enough.
Safety and Care
Plastic safety eyes are not recommended for children under three. Use embroidered eyes for a young child’s toy. Secure the scarf, hat, buttons and pom-pom permanently; loose accessories and cut yarn can become hazards. Inspect all seams and remove every pin before gifting. Spot clean with cool water and mild soap, then air-dry completely. Follow the yarn label if machine washing is appropriate.
Customization Ideas
- Use forest green, burgundy or gold for the scarf.
- Embroider tiny snowflakes on the hat brim.
- Replace black buttons with colorful crochet circles.
- Use sport yarn and a smaller hook for an ornament-sized snowman.
- Add a small fabric year tag for a Christmas keepsake.
- Make a coordinated family by changing yarn weight and hook size.
More HooksyLane Crochet Inspiration
Browse more amigurumi crochet patterns, discover seasonal ideas in free crochet patterns, and improve your technique with the HooksyLane crochet guides. Follow HooksyLane on Pinterest and visit the HooksyLane Gumroad store for printable resources.
Final Quality Checklist
- The eyes are level and approximately eight stitches apart.
- The carrot nose is centered and points forward.
- The head is straight over the body.
- Both arms sit at the same height.
- Three buttons form a straight vertical line.
- The scarf and hat are secure.
- The pom-pom is tightly attached or omitted for safety.
- All yarn tails are hidden and every pin is removed.

This crochet snowman pattern is beginner-friendly, but careful stuffing and patient assembly make the biggest difference. Check the eye spacing, shape the body base on a flat surface, pin all three buttons before sewing and secure every removable-looking detail. Those steps create a clean snowman that photographs beautifully and remains useful from Christmas through the entire winter season.