
Easy Christmas Crochet Cat Pattern: Cozy Amigurumi Gift
Table of Contents
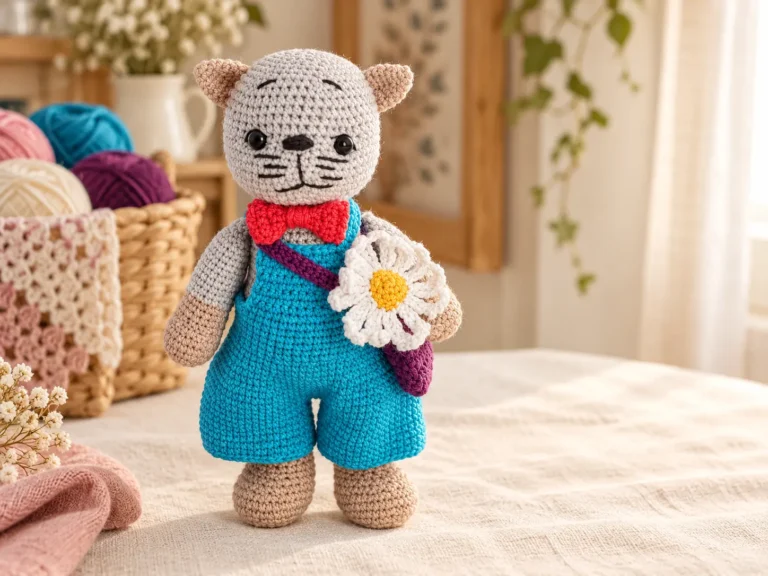
This Christmas crochet cat pattern creates a cozy smiling kitty with a large rounded head, embroidered face, triangular ears, red holiday sweater, integrated front paws, gray hind paws, long curved tail and simple scarf. The finished amigurumi makes a thoughtful cat-lover gift, Christmas shelf decoration or personalized family keepsake. This complete tutorial uses US crochet terms and adds corrected stitch counts, wire-free tail shaping, detailed assembly, embroidery, troubleshooting, gift ideas and safety guidance.
Christmas Crochet Cat Pattern at a Glance
- Skill level: Intermediate or confident adventurous beginner.
- Finished size: Approximately 8-10 in / 20-25 cm tall with fine cotton, depending on yarn and tension.
- Construction: Separate head, ears, body, paws and tail; front paws are joined during body rounds.
- Main techniques: Magic ring, spiral rounds, shaped increases, invisible decreases, FLO, joining parts into a round, embroidery and mattress stitch.
- Suggested hook: 2 mm for fine cotton or the size that creates a firm fabric.
- Estimated time: About 8-12 hours depending on experience and embroidery.
- Gift uses: Cat-lover gift, mantel decor, memorial keepsake, family character or Christmas market plush.
Why a Christmas Cat Is a Strong Seasonal Project
Cats have year-round search appeal, while the red sweater, scarf and white embroidery give the project a clear holiday purpose. Current third-party keyword data estimates about 1,000 monthly searches for “cat amigurumi,” with interest reaching its annual high in December. A specific long-tail phrase is more useful for this project than competing only for broad words such as “crochet” or “amigurumi.”
The design also works beyond one season. Change the sweater color, omit the white motifs and the same construction becomes a birthday gift, pet memorial or decor piece. For Pinterest, the large embroidered face remains readable at thumbnail size, while red, white and gray create immediate Christmas contrast.
Materials

- Fine sport or 4-ply cotton yarn in gray for the cat.
- Red cotton yarn for the sweater sleeves and scarf.
- Small amount of white yarn or embroidery floss for sweater motifs.
- Black embroidery floss for eyes, mouth and whiskers.
- Pink embroidery floss for the nose and cheeks.
- 2 mm crochet hook, or the size that produces firm fabric.
- Polyester toy stuffing.
- Stitch markers, yarn needle, embroidery needle, pins, scissors and stuffing tool.
- Optional blush powder applied permanently and sparingly; embroidery is more washable.
Yarn, Gauge and Size
Exact gauge is not required, but every piece must use compatible yarn and tension. The 56-stitch head is intentionally broad, so loose fabric can expose stuffing. Move down 0.25-0.5 mm if gaps appear. If the fabric becomes painful to work, move up one hook size. Use the same gray yarn for head, body, paws and tail so seams blend naturally.
The source sample used approximately 1.5 mm yarn with a 2 mm hook. Thicker yarn creates a larger plush and increases the weight of the head, so reinforce the neck seam and use firmer body stuffing. For a smaller ornament-style cat, use fingering cotton and omit loose accessories.

US Crochet Abbreviations
| Abbreviation | US meaning |
|---|---|
| MR | magic ring |
| ch | chain |
| sl st | slip stitch |
| sc | single crochet |
| inc | 2 sc in the same stitch |
| dec | single crochet 2 stitches together; invisible decrease recommended |
| FLO | work in the front loop only |
| BLO | work in the back loop only |
| st(s) | stitch(es) |
| R | round |
| FO | fasten off |
Important Corrections and Construction Notes
- Head R6 is corrected to 48 stitches. The written repeat produces 48, not the 44 printed in the source, and R7 begins with 48.
- The hind paws belong at the lower front of the body, not on the head.
- Work the head and body in continuous spirals, moving the marker every round.
- The body begins at the lower gray base and grows upward into the red sweater.
- R10 joins half of each front paw to the body. R11 works over the exposed half to complete the integrated paw shape.
- The original tail uses wire. This tutorial defaults to a safer yarn-only curved tail and gives an adult-display wire option separately.
- Embroider the face before closing and stuffing the head completely.
Complete Christmas Crochet Cat Pattern
Head
R1: With gray, work 8 sc in a MR. [8]
R2: Inc in each st around. [16]
R3: (Sc, inc) 8 times. [24]
R4: (Sc in next 2 sts, inc) 8 times. [32]
R5: (Sc in next 3 sts, inc) 8 times. [40]
R6: (Sc in next 2 sts, inc, sc in next 2 sts) 8 times. [48]
R7-10: Sc in each st around. [48]
R11: Sc in next 6 sts, (inc, sc in next 3 sts) 4 times, sc in next 4 sts, (sc in next 3 sts, inc) 4 times, sc in final 6 sts. [56]
R12-17: Sc in each st around. [56]
R18: Sc in next 6 sts, (dec, sc in next 3 sts) 4 times, sc in next 4 sts, (sc in next 3 sts, dec) 4 times, sc in final 6 sts. [48]
R19: (Sc in next 6 sts, dec) 6 times. [42]
R20: (Sc in next 5 sts, dec) 6 times. [36]
R21: (Sc in next 4 sts, dec) 6 times. [30]
R22: (Sc in next 3 sts, dec) 6 times; sl st in next st. [24]
After R17, embroider the face while the opening is still comfortable to access. Begin stuffing after R18, using small tufts around the outer walls. Keep the lower 24-stitch opening unclosed because it will be sewn to the body. FO after R22 with a long sewing tail.
Face Embroidery
Mark the closed eyes between R13 and R14, approximately ten to twelve stitches apart. Make each eye with one relaxed curved black stitch and one tiny lash at the outer edge. Place the pink triangular nose between R14 and R15. Bring black thread down from the center of the nose, then form two shallow curves for the smiling mouth. Add three whiskers on each side and short pink cheek stitches behind them.
Check the face from several angles before tying knots. The center of the nose should align with the start-of-round marker at the back or with your chosen front-center guide. Do not pull embroidery tightly; the head should remain smooth and rounded.
Ears – Make Two
R1: With gray, work 6 sc in a MR. [6]
R2: (Inc, sc) 3 times. [9]
R3: (Inc, sc in next 2 sts) 3 times. [12]
R4: (Inc, sc in next 3 sts) 3 times. [15]
R5: (Sc in next 2 sts, inc, sc in next 2 sts) 3 times. [18]
R6: Sc in each st around. [18]
Do not stuff. Flatten each ear and FO with a long sewing tail. Pin the ears to the upper sides of the head with approximately ten to twelve stitches between their inner edges. Angle the tips slightly outward. Sew through both ear layers along the lower edge, then add one small anchoring stitch near each inner corner.
Hind Paws – Make Two
R1: With gray, work 6 sc in a MR. [6]
R2: (Sc, inc) 3 times. [9]
FO with a long tail. Leave the tiny circles flat or add only a trace of stuffing. Fold slightly and sew them to the lower front of the body after the body is complete. They should sit side by side without covering the gray sweater edge.
Front Paws – Make Two
R1: With gray, work 6 sc in a MR. [6]
R2: (Inc, sc) 3 times. [9]
R3: (Inc, sc in next 2 sts) 3 times. [12]
R4: Change to red. Sc in each st around. [12]
R5-6: Sc in each st around. [12]
Add a small amount of stuffing only to the gray paw area. Leave the red sleeve open. Flatten each opening so six stitches sit on the front and six on the back. Keep both paws ready for joining during body R10 and R11.
Body and Integrated Front Paws
R1: With gray, work 8 sc in a MR. [8]
R2: Inc in each st around. [16]
R3: (Sc, inc) 8 times. [24]
R4: (Sc in next 2 sts, inc) 8 times. [32]
R5: (Sc in next 3 sts, inc) 8 times. [40]
R6: (Sc in next 2 sts, inc, sc in next 2 sts) 8 times. [48]
R7-8: Sc in each st around. [48]
R9: Change to red. Working FLO, sc in each st around. [48]
R10: Sc in next 18 body sts, join the first front paw with 6 sc through paw and body together, sc in next body st, join the second paw with 6 sc through paw and body together, sc in final 17 body sts. [48]
R11: Sc in next 18 body sts, sc in the 6 exposed sts of first paw, sc in next body st, sc in the 6 exposed sts of second paw, sc in final 17 body sts. [48]
R12: (Dec, sc in next 4 sts) 8 times. [40]
R13: Sc in each st around. [40]
R14: (Dec, sc in next 8 sts) 4 times. [36]
R15: Sc in each st around. [36]
R16: (Sc in next 4 sts, dec) 6 times. [30]
R17-18: Sc in each st around. [30]
R19: (Sc in next 3 sts, dec) 6 times. [24]
Before R10, pin the paws at the sides and confirm that the gray ends point downward. During R10, crochet through one six-stitch layer of each paw and the matching body stitches together. During R11, work across the six exposed paw stitches instead of the joined body section. This completes the outside half of each paw while keeping the round at 48 stitches.
Begin stuffing after R14. Keep the lower gray base softly rounded and the upper body firm enough to support the large head. After R19, FO with a long tail and leave the 24-stitch neck opening unclosed.
White Sweater Motifs
With white embroidery floss, make small V-shaped stitches across the red sweater. Each motif uses two diagonal stitches meeting at the lower center. Stagger the motifs between rows rather than placing them in rigid columns. Keep them clear of the front paws and stop at least one round below the neck opening.
Wire-Free Curved Tail
R1: With gray, work 8 sc in a MR. [8]
R2: (Inc, sc) 4 times. [12]
R3-5: Sc in each st around. [12]
R6: (Dec, sc in next 4 sts) 2 times. [10]
R7-8: Sc in each st around. [10]
R9: (Dec, sc in next 3 sts) 2 times. [8]
R10-23: Sc in each st around. [8]
R24: Flatten the opening and sc through both layers 3 times. [3]
Stuff R1-R9 lightly, then continue with smaller tufts so the tail remains flexible. After closing R24, thread a long gray strand along the inside edge of the tail using a loose running stitch. Pull gently until the tail curves, then knot securely and bury the ends. Sew the base to the lower back with several passes and add one hidden tack higher on the body if you want the tail to remain upright.
Adult-Display Tail Option
If the cat is strictly decorative for adults, a smooth flexible craft wire may be fully wrapped, capped and enclosed inside the tail. No sharp end should be exposed. Do not use wire for babies, children, pets, ornaments handled frequently or any item sold as a toy. The yarn-only method above is the recommended default.
Scarf
Quick cord version: With red, ch 45 and FO, leaving tails for small knots at both ends. Wrap once around the neck and tie loosely at the side.
Flat scarf version: Ch 46. Starting in the second ch from the hook, sc across 45. FO. Add short yarn fringes only for adult decor; omit fringe for children. The scarf must remain loose enough that it does not distort the neck seam.
Assembly Order

- Complete the face embroidery and finish stuffing the head.
- Sew the ears symmetrically to the upper head.
- Finish the body, sweater motifs and integrated front paws.
- Pin the 24-stitch head opening to the 24-stitch body opening, matching front, back and both sides.
- Sew the neck with mattress stitch, adding stuffing before the final section closes.
- Sew the hind paws to the lower front of the body.
- Shape and attach the yarn-only tail to the lower back.
- Add the scarf, hide every tail and remove all pins.
🧶 Crochet Essentials You’ll Love
Explore useful supplies for your next project
As an Amazon Associate, I earn from qualifying purchases.
How to Create a Strong Head-to-Body Seam
The head and body both finish with 24 stitches, which makes a clean one-to-one seam possible. Mark the front center, back center and both sides on each opening. Pin the four markers together, then distribute the remaining stitches evenly. Use the long head tail and mattress stitch through corresponding loops.
Stop when approximately 2 in / 5 cm remains open. Add firm stuffing to the neck without overfilling the head. Finish the seam, pass the yarn through the neck once more for reinforcement and bury the tail inside the body. The scarf should decorate the seam, not hold the head upright.
Christmas Gift Variations
- Cat-lover gift: Match the yarn to the recipient’s pet and embroider distinctive markings.
- Memorial keepsake: Add a small initial or year beneath the tail using embroidery.
- Family set: Make gray, white, black, orange and calico-inspired versions with coordinated sweaters.
- First Christmas: Use ivory and muted red, omit wire and add an embroidered year on the back.
- Winter version: Replace the red sweater with navy, forest green or pale blue.
- Market duo: Pair one gray cat with one white cat and photograph them as a coordinated set.
- Year-round version: Omit the scarf and white motifs, then use the sweater color of your choice.
Batch-Making Tips
Make one complete sample first and record the hook, yarn, finished height and exact face placement. Then work in stages: crochet all heads, embroider all faces, make ear pairs, prepare front paws, crochet bodies and finish tails last. Keep each cat’s components in a labeled project bag.
Use a paper face template or count from the center stitch so eyes and whiskers remain consistent. Block scarf pieces together and pre-cut equal lengths of white embroidery floss for the sweater motifs. Photograph every finished cat from front, side and back before packaging; asymmetry is easier to see in a photograph.
Troubleshooting
The Head Has the Wrong Stitch Count After R6
The correct total is 48. Each repeat uses five existing stitches and creates six stitches: sc 2, inc, sc 2. Repeat eight times. Ignore the incorrect 44-stitch total printed in the source.
The Face Looks Off Center
Mark a vertical center line before embroidering. Position the nose first, then balance the eyes and whiskers around it. Do not use the spiral seam as the face center unless it happens to sit at the back.
The Ears Flop Backward
Do not stuff them. Sew through both lower layers and add a small anchoring stitch near the inner corner. Pin the ears at a slight outward angle before sewing.
The Front Paws Twist During R10
Flatten each paw and mark the six front stitches. Pin both paws to the body with gray ends downward. Join the same layer on both sides, then work the exposed layer during R11.
The Neck Is Floppy
Add firm stuffing through the final seam opening and reinforce the one-to-one mattress seam. Do not use a stick, wire or the scarf as structural support.
The Tail Will Not Hold Its Curve
Reduce the stuffing in the narrow section and tighten the running stitch slightly. Add one hidden tack between the tail and body. For child-safe pieces, keep the curve gentle instead of inserting wire.
The Sweater Motifs Look Uneven
Use two-stitch V shapes of equal height and stagger the rows. Mark positions with pins before embroidering. Keep thread tension relaxed so the red fabric does not pucker.
Safety and Care Guidance
For children under three, use only embroidered facial details, omit wire and scarf fringe, and secure every separate part with several passes of strong yarn. The removable scarf can become an entanglement hazard; sew it permanently at the neck or omit it for young children. Remove every pin and check ears, paws, head and tail with a gentle pull.
Spot clean with cool water and mild soap. Press moisture out in a towel without twisting, reshape the ears and tail, and air-dry completely. If a decorative adult version contains wire, do not machine wash it. This handmade pattern does not replace formal toy-safety testing for commercial products.
Gift Packaging and Product Presentation
Choose a box that does not compress the ears or tail. Use acid-free tissue and a paper band around the body rather than plastic ties through the crochet. Include fiber content, care instructions, decorative-versus-toy use and the year made. If the colors match a real pet, add a small card explaining the personalization.
More HooksyLane Crochet Resources
Explore more amigurumi crochet patterns, browse free crochet patterns, and build your skills with crochet for beginners tutorials. Follow HooksyLane on Pinterest for seasonal crochet ideas and visit the HooksyLane Gumroad store for printable resources.
Final Quality Checklist
- Head R6 contains the corrected total of 48 stitches.
- The face is centered and the embroidery does not pucker.
- Both ears are symmetrical and securely anchored.
- The front paws are joined evenly during body R10-R11.
- The head and body openings both contain 24 stitches before sewing.
- The hind paws sit at the lower front, not on the head.
- The wire-free tail is curved, secure and balanced.
- The scarf is appropriate for the recipient and does not distort the neck.
- All yarn tails are hidden, every pin is removed and care information is included.
This Christmas crochet cat pattern combines a high-interest cat theme with clear seasonal styling and many personalization options. Follow the corrected 48-stitch head round, join the front paws carefully, reinforce the 24-stitch neck seam and use the wire-free tail for a safer finish. The result is a polished handmade cat that can become a Christmas gift, pet-inspired keepsake or winter decoration.