Easy Crochet Turkey Pattern for Thanksgiving
Table of Contents
A handmade turkey can bring a bit of Thanksgiving color to a shelf or table without taking up much space. This small amigurumi-style decoration gives you a cheerful way to mark the holiday with yarn. Its simple shape suits a seasonal project you can make at home.
The directions use one crocheted body, with separate details that you attach after making them. You will crochet the pieces, stuff the body, and sew the details together. The work is manageable if you can follow basic stitches and keep track of your rounds.
The pattern gives no verified completion time or finished dimensions, so expect the result to vary with your yarn and crochet tension. You can use the finished decoration on a shelf or table, or add it to a holiday display. Move from the project overview to choosing the yarn, hook, and tools you need.
What Supplies and Yarn Should You Gather?
Set out four yarn colors and a 4 mm hook before you begin, so you can keep the body and colorful details organized. You need brown, yellow, orange, and red yarn for this easy turkey amigurumi. Use 4/Medium weight yarn and a 4 mm crochet hook.
Gather these supplies before you start:
- 4/Medium weight yarn in brown, yellow, orange, and red
- A 4 mm crochet hook
- 9 mm safety eyes, or embroidery floss for the eyes
- Stuffing, such as fiberfill
- A tapestry needle and scissors
“4/Medium” tells you the yarn’s weight, or thickness. The weight and your stitch tension both affect the size of the finished piece. A stitch marker is useful for tracking rounds, even though the pattern does not list one as a required supply.
If you are making this for a baby or young child, embroider the eyes instead of using safety eyes. Safety eyes can pose a risk if they come loose. This crochet turkey pattern for beginners is labeled easy, but you should feel comfortable counting stitches and following increases and decreases.
The magic ring is an adjustable loop that you crochet into to begin a round, then pull tight to close the center. With the materials ready, start the main piece at the top and shape it into the head and body.
How Do You Work the Crochet Turkey Pattern?
Begin with six single crochet stitches in a magic ring, then increase evenly to form the rounded top of the head. Work the body in brown yarn, in continuous rounds, without joining at the end of each round. Count every round and check its stitch total before moving on.

The magic ring starts the head, and increases add stitches to widen the shape. A decrease joins stitches and narrows the fabric. “Repeat” means work the listed group around the round the stated number of times; the stitch count in parentheses is the total.
R1: 6 single crochet (sc) in a magic ring (6). R2: increase (inc) in every stitch (12). R3: Repeat inc, sc around (18). R4: Repeat inc, 2 sc around (24). R5: Repeat inc, 3 sc around (30).
R6: Repeat inc, 4 sc around (36). R7-8: Sc around (36). R9: Sc 15, mark the next stitch, sc 4, mark the next stitch, sc 15 (36). R10-11: Sc around (36). R12: Repeat inc, 5 sc around (42).
R13: Sc around (42). R14-17: Repeat a decrease (dec) followed by 5, 4, 3, then 2 sc, respectively. The totals are 36, 30, 24, and 18. R18: In the front loop only, repeat inc, 2 sc around (24).
R19: Through both loops, repeat inc, 3 sc around (30). R20-21: Sc around (30). R22: Repeat inc, 4 sc around (36). R23: Repeat inc, 5 sc around (42). R24-27: Sc around (42).
R28-30: Repeat dec followed by 5, 4, then 3 sc, respectively, ending at 24 stitches. Stuff the body. R31: Repeat dec, 2 sc around (18). R32: Repeat dec, sc around (12). R33: Decrease around (6), then finish and close the opening.
This free crochet turkey pattern gives you a simple crochet turkey pattern with a rounded head and body. Its repeat counts also make it a simple crochet turkey free pattern to follow, as long as you check each total. Once the continuous body is complete, make the face and wings as separate pieces.
How Do You Crochet the Face and Wings?
The yellow beak is a compact four-round piece, while the red wattle is made from a short chain. These small parts add the recognizable face before assembly. Check the eye positions from the front before securing them.
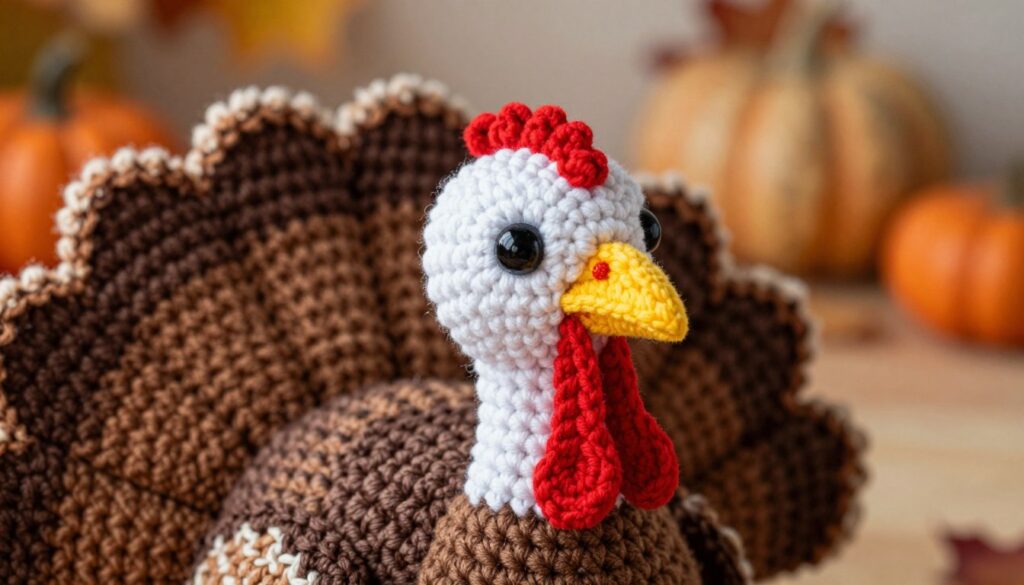
Use yellow yarn for the beak. R1: Work 4 sc in a magic ring. R2: Sc around, listed as 6 stitches. R3: Repeat inc, sc around (9). R4: Sc around (9). The R2 direction has a count mismatch: four stitches worked around stay four, not six.
Do not add unlisted stitches to hide that mismatch. Check the intended R2 count before continuing, since R3 also depends on the count. The beak sits below the center of the eyes, and the wattle lies over the beak’s top.
For the red wattle, chain 6. Put 3 sc in the second chain from the hook, sc in the next 2 stitches, then slip stitch in the last 2. Leave a yarn end long enough to sew the wattle to the beak.
Make 2 brown wings. R1: Work 6 sc in a magic ring. R2: Repeat inc, sc around (9). R3: Sc around (9). R4: Repeat inc, 2 sc around (12). R5: Sc around (12). Leave a sewing tail on each wing.
The pattern marks two eye positions in R9, with four stitches between them, but separately says to install the eyes at R13. Those directions do not agree. Hold the eyes at both marked positions and check their alignment before securing them. Set these details aside and crochet the fan, tail, and feet before attaching the pieces.
How Do You Make the Feathers, Tail, and Feet?
Five bright feathers form the fan: two red, two yellow, and one orange. Their curved shape comes from working along both sides of a starting chain. Keep the stitch path in order so each feather has a matching edge.
For each feather, chain 17. Work single crochet (sc), half double crochet (hdc), double crochet (dc), and treble crochet (trc) down one side of the chain. Put 4 trc in the final chain to turn around the tip.
Work the same stitch progression back along the other side, moving from trc to dc, hdc, and sc. The pattern’s US stitch terms use sc for single crochet, hdc for half double crochet, dc for double crochet, and trc for treble crochet. To make a thicker, sturdier feather, crochet a second matching set and sew each pair together.
For the brown tail, chain 7. Put 3 dc in the second chain from the hook, then slip stitch in the next chain. Repeat 3 dc in the next chain and a slip stitch in the next chain twice. This chain-and-shell shape forms the tail without a separate round.
Make 2 yellow feet, each starting with 6 sc in a magic ring. Use slip stitches and three toe clusters, with 3 dc in each cluster, to form the toes. The directions do not give the exact stitch placement for those clusters, so check their intended positions rather than guessing at a stitch count.
These flat and curved pieces can shift as you sew, so pin them in place before joining them to the body. Once the small parts are crocheted, arrange them around the stuffed body and sew them in place.
How Do You Assemble the Turkey?
Pin the pieces in place first, then check that the face and tail look balanced from the front. The body is worked as one piece, so you do not need a separate head-to-body seam. Check the full shape before tightening the final yarn ends.
Use this order to assemble the turkey:
- Stuff the body, then close its opening.
- Pin the face features in place and sew them on.
- Position the wings on the sides and sew them securely.
- Sew the feet to the lower body.
- Pin the feathers and tail, then sew them firmly in place.
Before you sew, look at the turkey from the front and check the eyes, beak, and feather fan. Small shifts can change the face’s expression or make the tail look off-center. Adjust the pins until the pieces sit where you want them.
After sewing, weave in each loose yarn end with a tapestry needle. Pull the yarn through the nearby stitches without drawing the fabric tight. The body has no joining seam between the head and torso, so focus your finishing checks on the attached pieces.
Once the seams are secure, consider how yarn choice and small adjustments will affect the finished decoration.
How Can You Adjust the Pattern and Finish Neatly?
Changing yarn weight or tension can change the turkey’s finished size, so decide whether you want a compact or larger decoration before you crochet. For a smaller version, choose lighter yarn and a hook sized for that yarn. The finished size depends on yarn weight and your crochet tension.
The mini turkey crochet pattern free variation has no promised measurement. The pattern gives no gauge or finished dimensions, so a smaller hook and yarn do not guarantee a set size. Make a small stitch sample if you change materials, then check how firm and large the fabric feels.
Dense, even stitches help keep the stuffing from showing through the body. If gaps appear, try a smaller hook that still lets you crochet comfortably. Keep your tension steady, since loose stitches can leave visible spaces and uneven tension can alter the shape.
You can also change the feather colors while keeping the basic construction the same. Brown, red, yellow, and orange give the decoration a familiar fall look, but other color choices can suit your display. This crochet turkey amigurumi works best when its small parts remain easy to see against the body.
For a baby or young child, replace safety eyes with embroidered eyes. Check that the stitches and loose ends stay secure, too. These choices can help your crochet turkey amigurumi look neat from the front and the back.
The pattern does not specify yarn yardage or total completion time. Your stitch pace, material choice, and sewing work affect how much yarn you use and how long the project takes. Use those checks to choose a version that suits your materials, then finish with the display advice in the conclusion.
Conclusion
A few carefully placed details are what turn a simple stuffed shape into a festive display piece. Count stitches carefully as you shape the body, and pin the parts before sewing so you can check their placement. Those two habits help the turkey keep its shape and face the way you intend.
Set the finished decoration on a flat shelf or table among your Thanksgiving items. To get started, gather the four yarn colors and tools, then begin the body with a magic ring. Choose your colors and begin crocheting the first round.