Under the Sea Crochet Patterns: Cute Ocean Animals to Make
Table of Contents
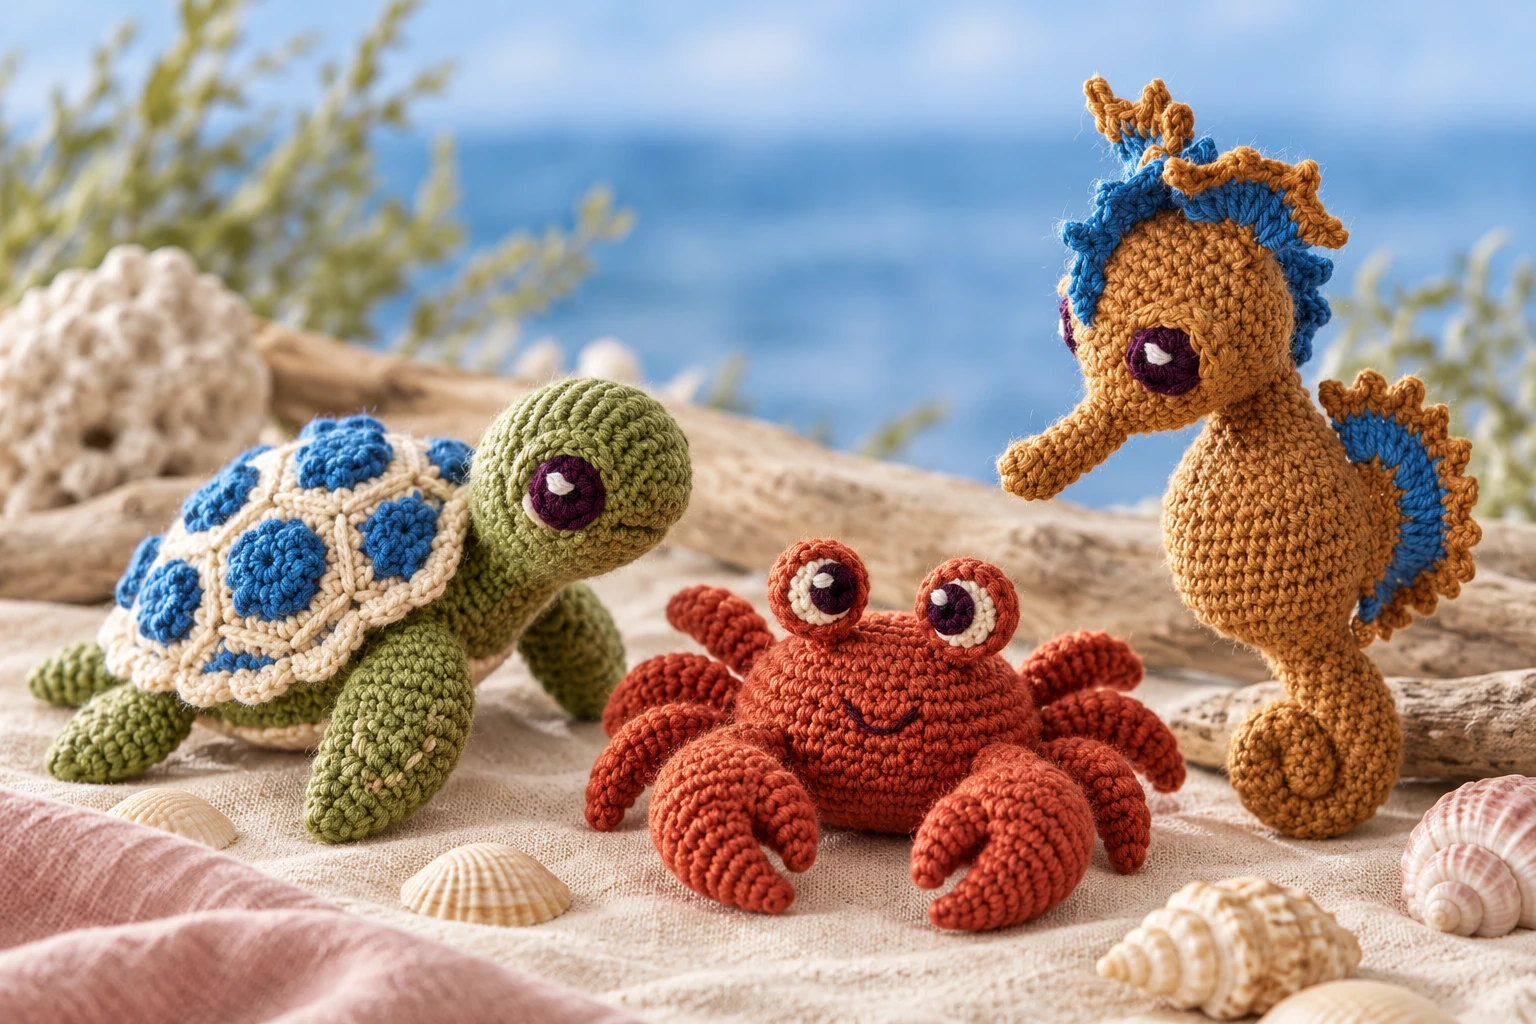
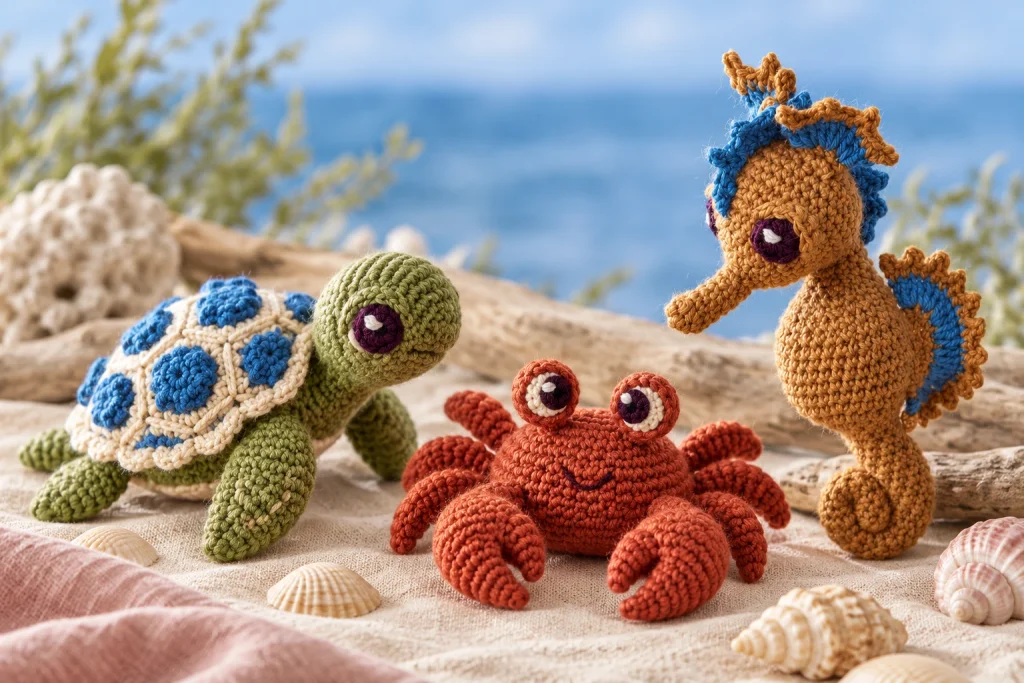
These under the sea crochet patterns bring an entire handmade ocean crew to your hook: Coco the Crab, Ernest the Sea Turtle and Sam the Seahorse. This complete US-terms collection includes every round, color-change guidance, assembly order, stuffing advice and practical troubleshooting so you can finish three sturdy, expressive amigurumi toys with confidence.
The original Under the Sea designs are by Kate Hancock .
What You Will Make
- Coco the Crab: a 6.5-inch crab with joined pincers, eight shaped legs and crocheted eyes.
- Ernest the Sea Turtle: a 5-inch turtle with four shaped flippers and a raised two-color cluster shell.
- Sam the Seahorse: an 8-inch seahorse with a shaped snout, curled tail, picot mane and layered fins.
Materials and Yarn Substitution
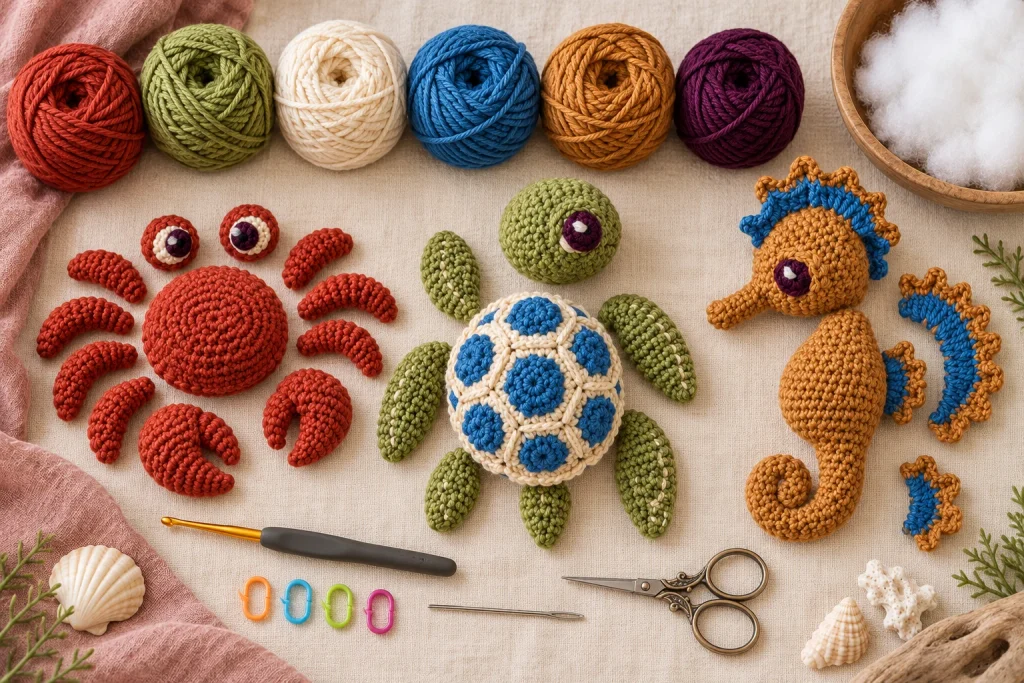
The source projects use DK-weight superwash merino and a US E/4 / 3.5 mm hook. You may substitute cotton, acrylic or a washable wool blend as long as the fabric is dense enough to contain stuffing. Make a small amigurumi swatch first: if white stuffing shows between stitches, move down a hook size; if your hands strain or the fabric feels rigid, move up slightly.
Exact yardage varies with tension, but one 50 g ball is generally sufficient for each main animal color. Keep small quantities of cream, blue, black, white and plum for shell clusters, eyes and highlights.
US Crochet Terms and Special Stitches
| Abbreviation | Meaning |
|---|---|
| ch | chain |
| dc | double crochet (US) |
| hdc | half double crochet (US) |
| sc | single crochet (US) |
| sc2tog | single crochet two stitches together |
| sl st | slip stitch |
| st(s) | stitch(es) |
| RS | right side |
| rep | repeat |
| yo | yarn over |
Magic ring: Form an adjustable loop, crochet the required stitches into it, then pull the yarn tail firmly to close the center.
Invisible decrease option: Insert the hook under the front loop of each of the next two stitches, yarn over and pull through both front loops, yarn over and complete one single crochet. Use this method wherever the pattern says sc2tog if you prefer a smoother surface.
5-dc cluster: (Yarn over, insert hook in the indicated stitch, yarn over and pull up a loop, yarn over and draw through two loops) five times in the same stitch; yarn over and draw through all six loops.
Picot: Chain 3, then slip stitch in the third chain from the hook.
Before You Start: Reliable Amigurumi Workflow
- Read one complete animal pattern before making the first piece.
- Mark the first stitch of every spiral round and count at the end of each shaped round.
- Stuff gradually with small tufts instead of one large piece.
- Leave sewing tails where instructed and label repeated parts.
- Pin every limb and facial feature before sewing permanently.
- Photograph the pinned placement from the front, side and top to check symmetry.
Coco the Crab Crochet Pattern
Finished size: Approximately 6.5 in / 16 cm across from leg tip to leg tip.
Materials
- DK-weight yarn: about 1 ball / 50 g in rust red (Yarn A)
- Small amounts of black and white yarn for crocheted eyes and highlights
- US E/4 / 3.5 mm crochet hook
- Polyester toy stuffing, stitch marker and tapestry needle
Pincer arms – make 2
Each pincer is made in two claw parts. Make the first claw, fasten off, then join it to the second claw during Round 6.
First claw – Round 1: With Yarn A, make a magic ring and work 6 sc into the ring. [6 sts]
First claw – Rounds 2-3: Sc in each st around. Fasten off.
Second claw – Round 1: With Yarn A, make a magic ring and work 6 sc into the ring. [6 sts]
Second claw – Round 2: Sc in each st around.
Second claw – Round 3: Work 2 sc in each st around. [12 sts]
Second claw – Rounds 4-5: Sc in each st around.
Second claw – Round 6: Sc in next st; sc in next 5 sts of first claw; sc2tog over the last st and edge of first claw; sc2tog over the edge of second claw and next st; sc in next 10 sts of second claw. [18 sts]
The two claws are now joined and worked as one.
Round 7: Sc in each st around. [18 sts] Begin stuffing and continue as you work.
Round 8: (Sc2tog, sc in next st) 6 times. [12 sts]
Round 9: Sc in each st around.
Round 10: (Sc2tog, sc in next st) 4 times. [8 sts]
Rounds 11-15: Sc in each st around.
Round 16: Sc2tog, sc in next st, 2 sc in each of next 2 sts, sc in next st, sc2tog. [8 sts]
Rounds 17-19: Sc in each st around.
Flatten the top. Sc in next 2 sts, pinch closed, sc through the next st and last st made, then work 3 more sc across the top through both layers. [4 sts] Fasten off and weave in ends.
Legs – make 8
Round 1: With Yarn A, make a magic ring and work 4 sc into the ring. [4 sts]
Round 2: Sc in each st around.
Round 3: (2 sc in next st, sc in next st) twice. [6 sts]
Rounds 4-7: Sc in each st around. Stuff lightly and continue stuffing as you work.
Round 8: Sc2tog twice, 2 sc in each of next 2 sts. [6 sts]
Rounds 9-12: Sc in each st around.
Pinch the top closed. Sc through the next st and the final st of Round 12, then work 2 sc across the top through both layers. [3 sts] Fasten off and weave in ends.

Body and joined limbs
The body is worked from the top of the shell toward the belly.
Round 1: With Yarn A, make a magic ring and work 6 sc into the ring. [6 sts]
Round 2: (Sc in next st, 2 sc in next st) 3 times. [9 sts]
Round 3: (Sc in next st, 2 sc in each of next 2 sts) 3 times. [15 sts]
Round 4: (Sc in next 2 sts, 2 sc in each of next 2 sts, sc in next st) 3 times. [21 sts]
Round 5: (Sc in next 3 sts, 2 sc in each of next 2 sts, sc in next 2 sts) 3 times. [27 sts]
Round 6: (Sc in next 4 sts, 2 sc in each of next 2 sts, sc in next 3 sts) 3 times. [33 sts]
Round 7: (Sc in next 5 sts, 2 sc in each of next 2 sts, sc in next 4 sts) 3 times. [39 sts]
Round 8: (Sc in next 4 sts, 2 sc in next st, sc in next 4 sts, 2 sc in next st, sc in next 3 sts) 3 times. [45 sts]
Round 9: (Sc in next 5 sts, 2 sc in next st, sc in next 4 sts, 2 sc in next st, sc in next 4 sts) 3 times. Mark the 44th stitch. [51 sts]
Round 10: (Sc in next 6 sts, 2 sc in next st, sc in next 4 sts, 2 sc in next st, sc in next 5 sts) twice, sc in next st. Fasten off, leaving remaining stitches unworked. [39 worked sts]
Rejoin Yarn A at the marked stitch; this is the new beginning of round.
Rounds 11-12: Sc in each st around. [55 sts] Place a marker in the front loop of the first stitch of Round 12 for the shell edge.
Round 13: Work through back loops on the body while joining limbs through both layers. Sc in next 3 body sts. Join Legs 1-2 with 3 sc each, both pointing toward the back. Join Legs 3-4 with 3 sc each, both pointing toward the front. Join the first pincer with 4 sc, pointing forward. Sc in next 17 body sts. Join the second pincer with 4 sc, pointing forward. Join Legs 5-6 with 3 sc each, pointing toward the front; join Legs 7-8 with 3 sc each, pointing toward the back. Sc in remaining 3 sts. [55 sts]
Round 14: Sc in next 14 sts, sc2tog, sc in next 4 sts, sc2tog, sc in next 11 sts, sc2tog, sc in next 4 sts, sc2tog, sc in next 14 sts. [51 sts]
Round 15: (Sc in next 2 sts, sc2tog, sc in next 9 sts, sc2tog, sc in next 2 sts) 3 times. [45 sts]
Round 16: (Sc in next 2 sts, sc2tog, sc in next 7 sts, sc2tog, sc in next 2 sts) 3 times. [39 sts]
Sc in the next stitch, move the marker to the first stitch of Round 17, and continue.
Round 17: (Sc2tog, sc in next 9 sts, sc2tog) 3 times. [33 sts]
Round 18: (Sc2tog, sc in next 7 sts, sc2tog) 3 times. [27 sts]
Round 19: (Sc2tog, sc in next 5 sts, sc2tog) 3 times. [21 sts] Stuff firmly and continue stuffing.
Round 20: (Sc2tog, sc in next 3 sts, sc2tog) 3 times. [15 sts]
Round 21: (Sc2tog, sc in next st, sc2tog) 3 times. [9 sts]
Round 22: (Sc2tog, sc in next st) 3 times. [6 sts] Fasten off with a long tail, thread through the final stitches, pull closed and secure.
Shell edge and face
Shell edge: With the top of the shell facing you, rejoin Yarn A in the marked front loop from Round 12. Sc in next 27 loops, 3 sc in next loop, sc in next 27 loops, sl st to first sc. [57 sts] Fasten off.
Eyes – make 2: With black yarn, make a magic ring. Ch 2 (counts as hdc), work 11 hdc into the ring, sl st to top of beginning ch-2. [12 sts] Fasten off with a long tail.
First eyelid: With Yarn A, ch 7. Sc in second ch from hook, hdc in next ch, dc in next ch, hdc in next ch, sc in next ch, sl st in last ch. Fasten off with a long tail.
Second eyelid: With Yarn A, ch 7. Sl st in second ch from hook, sc in next ch, hdc in next ch, dc in next ch, hdc in next ch, sc in last ch. Fasten off with a long tail.
Assembly: Use the 3-sc point on the shell edge to locate the center of the face. Sew eyes 5 stitches apart with their lower edges against the shell edge. Curve and sew the eyelids around the eyes. Embroider three small white straight stitches on each eye as highlights. Weave in all ends.
Ernest the Sea Turtle Crochet Pattern
Finished size: Approximately 5 in / 13 cm from nose to back.
Materials
- DK-weight yarn: olive green (Yarn A), cream (Yarn B) and ocean blue (Yarn C)
- Small amounts of black and white yarn for crocheted eyes and highlights
- US E/4 / 3.5 mm crochet hook
- Polyester toy stuffing, stitch marker and tapestry needle
Head
Round 1: With Yarn A, make a magic ring and work 6 sc into the ring. [6 sts]
Round 2: Sc in each st around.
Round 3: Work 2 sc in each st around. [12 sts]
Round 4: Work 2 sc in each of next 6 sts; sc in each of next 6 sts. [18 sts] The increased side becomes the top of the head.
Rounds 5-9: Sc in each st around.
Round 10: (Sc2tog, sc in next st) 6 times. [12 sts]
Round 11: Sc in each st around, sl st to first sc. Fasten off. Stuff the head; the opening becomes the neck edge.
Body
Round 1: With Yarn A, make a magic ring and work 6 sc into the ring. [6 sts]
Round 2: Work 2 sc in each st around. [12 sts]
Round 3: Sc in each st around.
Round 4: (2 sc in next st, sc in next st) 6 times. [18 sts]
Round 5: Sc in each st around.
Round 6: (2 sc in next st, sc in next 2 sts) 6 times. [24 sts]
Round 7: Sc in each st around.
Round 8: (2 sc in next st, sc in next 3 sts) 6 times. [30 sts]
Round 9: Sc in each st around.
Round 10: (Sc2tog, sc in next 3 sts) 6 times. [24 sts]
Round 11: Sc in each st around.
Round 12: (Sc2tog, sc in next 2 sts) 6 times. [18 sts]
Round 13: Sc in each st around.
Round 14: (Sc2tog, sc in next st) 6 times. [12 sts]
Rounds 15-16: Sc in each st around. At the end of Round 16, sl st to first sc. Fasten off with a long tail and stuff.
Eye sockets, eyes and eyelids
Eye sockets – make 2: With Yarn A, make a magic ring. Ch 2 (counts as hdc), work 11 hdc into ring. [12 sts] Round 2: Sc in each st around, sl st to first sc. Fasten off with a long tail.
Eyes – make 2: With black yarn, make a magic ring. Ch 2 (counts as hdc), work 11 hdc into ring, sl st to top of beginning ch-2. [12 sts] Fasten off with a long tail.
First eyelid: With Yarn A, ch 7. Sc in second ch from hook, hdc in next ch, dc in next ch, hdc in next ch, sc in next ch, sl st in last ch. Fasten off with a long tail.
Second eyelid: With Yarn A, ch 7. Sl st in second ch from hook, sc in next ch, hdc in next ch, dc in next ch, hdc in next ch, sc in last ch. Fasten off with a long tail.
Shell
5-dc cluster (US): (Yo, insert hook in indicated stitch, yo and pull up a loop, yo and draw through 2 loops) 5 times in the same stitch; yo and draw through all 6 loops on hook.
Work every 5-dc cluster in Yarn C and all other stitches in Yarn B. For a clean color change, complete the final pull-through of each cluster with Yarn B. Carry unused yarn loosely on the wrong side.
Round 1: With Yarn B, make a magic ring and work 6 sc into the ring. [6 sts]
Round 2: Work 2 sc in each st around. [12 sts]
Round 3: (2 sc in next st, 5-dc cluster in next st) 6 times. [18 sts]
Round 4: (2 sc in next st, sc in next 2 sts) 6 times. [24 sts]
Round 5: (2 sc in next st, 5-dc cluster in next st, sc in next st, 5-dc cluster in next st) 6 times. [30 sts]
Round 6: (2 sc in next st, sc in next 4 sts) 6 times. [36 sts]
Round 7: (2 sc in next st, sc in next 5 sts) 6 times. [42 sts]
Rounds 8-11: Sc in each st around.
Round 12: Sc in each st around, sl st to first sc. Fasten off with a long tail. Roll the edge upward so it rests on the shell at Round 8, then sew it in place.
Front flippers – make 2
Round 1: With Yarn A, make a magic ring and work 4 sc into the ring. [4 sts]
Round 2: Work 2 sc in each st around. [8 sts]
Rounds 3-4: Sc in each st around.
Round 5: (2 sc in next st, sc in next st) 4 times. [12 sts]
Rounds 6-13: Sc in each st around. Stuff lightly and continue stuffing.
Rounds 14-15: Sc2tog twice, sc in next 3 sts, 2 sc in each of next 2 sts, sc in next 3 sts. [12 sts]
Round 16: Sc2tog twice, sc in remaining 8 sts. [10 sts]
Round 17: Sc2tog twice, sc in remaining 6 sts, sl st to first sc. [8 sts] Fasten off with a long tail and stuff lightly.
Back flippers – make 2
Round 1: With Yarn A, make a magic ring and work 4 sc into the ring. [4 sts]
Round 2: Sc in each st around.
Round 3: Work 2 sc in each st around. [8 sts]
Round 4: Sc in each st around.
Round 5: (2 sc in next st, sc in next st) 4 times. [12 sts]
Rounds 6-9: Sc2tog twice, sc in next 3 sts, 2 sc in each of next 2 sts, sc in next 3 sts; at the end of Round 9, sl st to first sc. [12 sts] Fasten off with a long tail and stuff lightly.
Assembly
Sew the head to the body along the neck edges. Sew each eye firmly inside an eye socket. With the pointed nose on the lower half of the head, position the socket centers between Head Rounds 7 and 8 on opposite sides. Sew securely.
Curve and sew the eyelids around the eyes, then embroider three small white straight stitches as highlights.
Starting near Body Round 14, sew the front flippers to the lower half of the body. Starting near Body Round 6, sew the back flippers to the lower body on both sides.
Center the shell on top of the body and sew it firmly around the edge. Weave in all ends.
Sam the Seahorse Crochet Pattern
Finished size: Approximately 8 in / 20 cm from the top of the mane to the tail tip.
Materials
- DK-weight yarn: caramel brown (Yarn A) and ocean blue (Yarn B)
- Small amounts of plum and white yarn for crocheted eyes and highlights
- US E/4 / 3.5 mm crochet hook
- Polyester toy stuffing, stitch marker and tapestry needle
Head
The head is worked from the snout toward the back.
Round 1: With Yarn A, make a magic ring and work 6 sc into the ring. [6 sts]
Round 2: Work 2 sc in each of next 3 sts, sc in next 3 sts. [9 sts]
Round 3: Sc2tog 3 times, sc in next 3 sts. [6 sts]
Rounds 4-9: Sc in each st around. Stuff the snout firmly and continue stuffing.
Round 10: Work 2 sc in each st around. [12 sts]
Round 11: Sc in each st around.
Round 12: (2 sc in next st, sc in next st) 6 times. [18 sts]
Round 13: Sc in next st, 2 sc in each of next 2 sts, sc in next 6 sts, 2 sc in each of next 2 sts, sc in next 3 sts, 2 sc in each of next 2 sts, sc in next 2 sts. [24 sts]
Round 14: Sc in each st around.
Round 15: Sc in next st, (2 sc in next st, sc in next st) twice, sc in next 6 sts, (2 sc in next st, sc in next st) twice, sc in next 3 sts, (2 sc in next st, sc in next st) twice, sc in next 2 sts. [30 sts]
Round 16: Sc in each st around.
Round 17: Sc in next st, (2 sc in next st, sc in next 2 sts) twice, sc in next 6 sts, (2 sc in next st, sc in next 2 sts) twice, sc in next 3 sts, (2 sc in next st, sc in next 2 sts) twice, sc in next 2 sts. [36 sts]
Rounds 18-20: Sc in each st around.
Round 21: Sc in next 3 sts, (sc2tog, sc in next 2 sts) twice, sc in next 6 sts, (sc2tog, sc in next 2 sts) twice, sc in next 3 sts, (sc2tog, sc in next 2 sts) twice. [30 sts]
Round 22: Sc in next 3 sts, (sc2tog, sc in next st) twice, sc in next 6 sts, (sc2tog, sc in next st) twice, sc in next 3 sts, (sc2tog, sc in next st) twice. [24 sts]
Round 23: Sc in next 3 sts, sc2tog twice, sc in next 6 sts, sc2tog twice, sc in next 3 sts, sc2tog twice. [18 sts]
Round 24: (Sc2tog, sc in next st) 6 times. [12 sts]
Round 25: Sc2tog 6 times, sl st to first sc. [6 sts] Fasten off with a long tail, finish stuffing, thread through final stitches and close securely.
Body and curled tail
The body is worked from the tail tip toward the neck. Leave a long starting tail for sewing the curl later.
Round 1: With Yarn A, make a magic ring and work 6 sc into the ring. [6 sts]
Rounds 2-11: Sc in each st around. Stuff the tail lightly and continue stuffing.
Round 12: Work 2 sc in next st, sc in next 5 sts. [7 sts]
Rounds 13-15: Sc in each st around.
Round 16: Work 2 sc in next st, sc in next 6 sts. [8 sts]
Rounds 17-19: Sc in each st around. Stuff more firmly from here onward.
Round 20: Work 2 sc in next st, sc in next 7 sts. [9 sts]
Rounds 21-23: Sc in each st around.
Round 24: Work 2 sc in next st, sc in next 8 sts. [10 sts]
Rounds 25-27: Sc in each st around.
Round 28: Work 2 sc in next st, sc in next 9 sts. [11 sts]
Rounds 29-31: Sc in each st around.
Round 32: Work 2 sc in next st, sc in next 10 sts. [12 sts]
Round 33: Sc in each st around.
Round 34: Sc in next 2 sts, work 2 sc in each of next 6 sts, sc in next 4 sts. [18 sts]
Round 35: Sc in next 2 sts, (2 sc in next st, sc in next st) 6 times, sc in next 4 sts. [24 sts]
Round 36: (2 sc in next st, sc in next 3 sts) 6 times. [30 sts]
Rounds 37-41: Sc in each st around.
Round 42: (Sc2tog, sc in next 3 sts) 6 times. [24 sts]
Round 43: Sc in each st around.
Round 44: Sc in next 3 sts, (sc2tog, sc in next st) 6 times, sc in next 3 sts. [18 sts]
Round 45: Sc in each st around.
Round 46: Sc in next 3 sts, sc2tog 6 times, sc in next 3 sts. [12 sts]
Rounds 47-48: Sc in each st around.
Round 49: Sc in next 2 sts, sl st in next 8 sts, sc in next 2 sts. [12 sts]
Round 50: Sc in next 2 sts, sl st in next st. Fasten off with a long tail, leaving remaining stitches unworked.
Eyes and eyelids
Eyes – make 2: With plum yarn, make a magic ring. Ch 2 (counts as hdc), work 11 hdc into ring, sl st to top of beginning ch-2. [12 hdc] Fasten off with a long tail.
First eyelid: With Yarn A, ch 7. Sc in second ch from hook, hdc in next ch, dc in next ch, hdc in next ch, sc in next ch, sl st in last ch. Fasten off with a long tail.
Second eyelid: With Yarn A, ch 7. Sl st in second ch from hook, sc in next ch, hdc in next ch, dc in next ch, hdc in next ch, sc in last ch. Fasten off with a long tail.
Mane
Picot: Ch 3, sl st in third ch from hook.
Leave a long starting tail. With Yarn B, ch 21.
Row 1: Sl st in second ch from hook, sl st in next ch, sc in next 18 ch, turn. [20 sts]
Row 2: Picot, sc in first sc, (sc in next sc, picot, sc in next st) 9 times, (sc, picot, sl st) in last st. [20 sc and 11 picots] Fasten off. The fastened-off end becomes the front of the mane.
Dorsal fin
Leave a long starting tail. With Yarn A, ch 7.
Row 1: Sc in second ch from hook and in next 5 ch, turn. [6 sts]
Row 2: Ch 1 (does not count as a stitch), 2 sc in first sc, sc in next 4 sts, 2 sc in last st, turn. [8 sts] Fasten off Yarn A.
Row 3: Join Yarn B in first st, ch 3 (counts as dc), 2 dc in the same st, 3 dc in each of next 7 sts, turn. [24 sts] Fasten off Yarn B.
Row 4: Join Yarn A in first st, picot, sc in first st, (sc in next st, picot, sc in next st) 11 times, (sc, picot, sl st) in last st. [24 sc and 13 picots] Fasten off.
Pectoral fins – make 2
Leave a long starting tail. With Yarn A, make a magic ring.
Row 1: Work 3 sc into ring, turn. [3 sts]
Row 2: Ch 1 (does not count as a stitch), sc in each st across. [3 sts] Fasten off Yarn A.
Row 3: Join Yarn B in first st, ch 3 (counts as dc), 2 dc in same st, 3 dc in each of next 2 sts. [9 sts] Fasten off Yarn B.
Row 4: Join Yarn A in first st, picot, sc in first st, (sc in next 2 sts, picot, sc in next st) twice, sc in next st, (sc, picot, sl st) in last st. [9 sc and 4 picots] Fasten off.
Assembly
Sew eyes to the head with their centers between Head Rounds 14 and 15 and their edges 6 stitches apart. Curve and sew the eyelids around the eyes. Embroider three small white straight stitches on each eye as highlights.
Place the head on the neck opening with the back of the neck resting along Head Round 19. Sew securely.
Place the mane from the center back of the neck to the center of the face. Sew along its foundation chain from the first picot tip to the final picot tip between the eyes.
Pin the pectoral fins along Head Round 21 on either side of the mane and sew firmly. Sew the dorsal fin to the lower back.
Curl the tail upward and use the long starting tail to sew the curl in place. Weave in all ends.
Assembly, Expression and Finishing
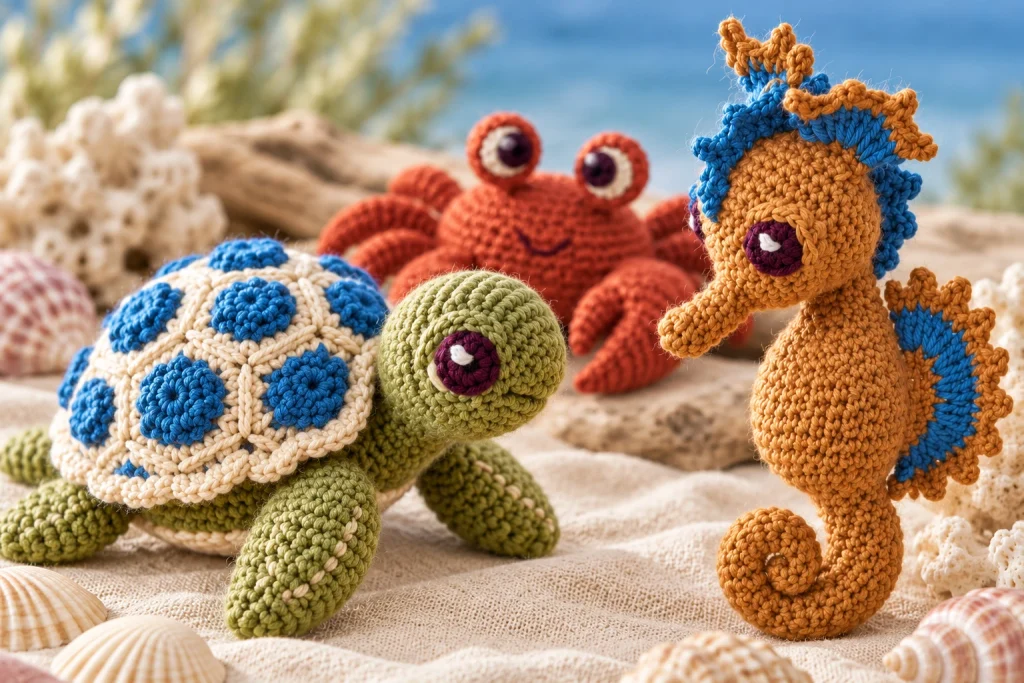
Pin facial pieces with the toy resting in its natural position. A few millimeters can change the expression, so compare both sides before sewing. Use a curved or blunt tapestry needle and make small stitches that pass through the crocheted fabric rather than only around surface loops. Knot securely inside the toy, bury the tail through several centimeters of stuffing, then trim.
For the turtle shell and crab limbs, sew around the full attachment edge and gently pull-test every seam. For Sam’s mane and fins, keep the picots free while securing the foundation edge. Shape the seahorse tail curl only after the body is fully stuffed.
Troubleshooting These Under the Sea Crochet Patterns
Stuffing Shows Through the Stitches
Your hook may be too large for the yarn or your tension may be loose. Change hook size before starting a new component. On a finished piece, redistribute the stuffing instead of pulling the fabric wider.
The Crab Legs Point in the Wrong Direction
Round 13 joins the legs while crocheting the body. Stop after pinning all eight legs and two pincers, then check the front and back orientation before working through both layers.
The Turtle Shell Buckles
Carry the unused color loosely and finish each blue cluster with cream yarn. If the carried strand is tight, it will pull the shell inward. Block the shell lightly before sewing it to the body.
The Seahorse Tail Will Not Hold a Curl
Stuff the narrow tail lightly and the body more firmly. Curl the tail only after assembly, then sew through several neighboring rounds so the curve is supported rather than fixed at one point.
The Eyes Look Uneven
Count rounds and stitches from the same reference point on both sides. Pin both eyes and eyelids first, then view the toy from arm’s length before sewing.
Toy Safety and Care
- These designs use crocheted eyes, which are preferable to detachable plastic eyes for young children, but every seam still requires inspection.
- Embroider facial details securely and bury all yarn tails inside the toy.
- Do not add beads, buttons or loose embellishments to a toy intended for a child under three.
- Use washable, colorfast yarn and stuffing suitable for toys.
- Wash gently according to the yarn label, reshape and air-dry completely.
- Inspect limbs, fins and eyes regularly; repair any loose seam before the toy is used again.
Get the Printable HooksyLane Collection
Prefer an organized printable version? The HooksyLane PDF includes all three complete patterns in US crochet terms, materials, abbreviation guidance, assembly order, troubleshooting and safety notes.
Get the printable Under the Sea pattern collection
More from HooksyLane
Explore more amigurumi crochet patterns, browse free crochet patterns, learn practical techniques in the HooksyLane crochet learning library, save new ideas from HooksyLane on Pinterest, and find printable collections in the HooksyLane store.