Easy Crochet Baby Cardigan Pattern for Beginners
Table of Contents
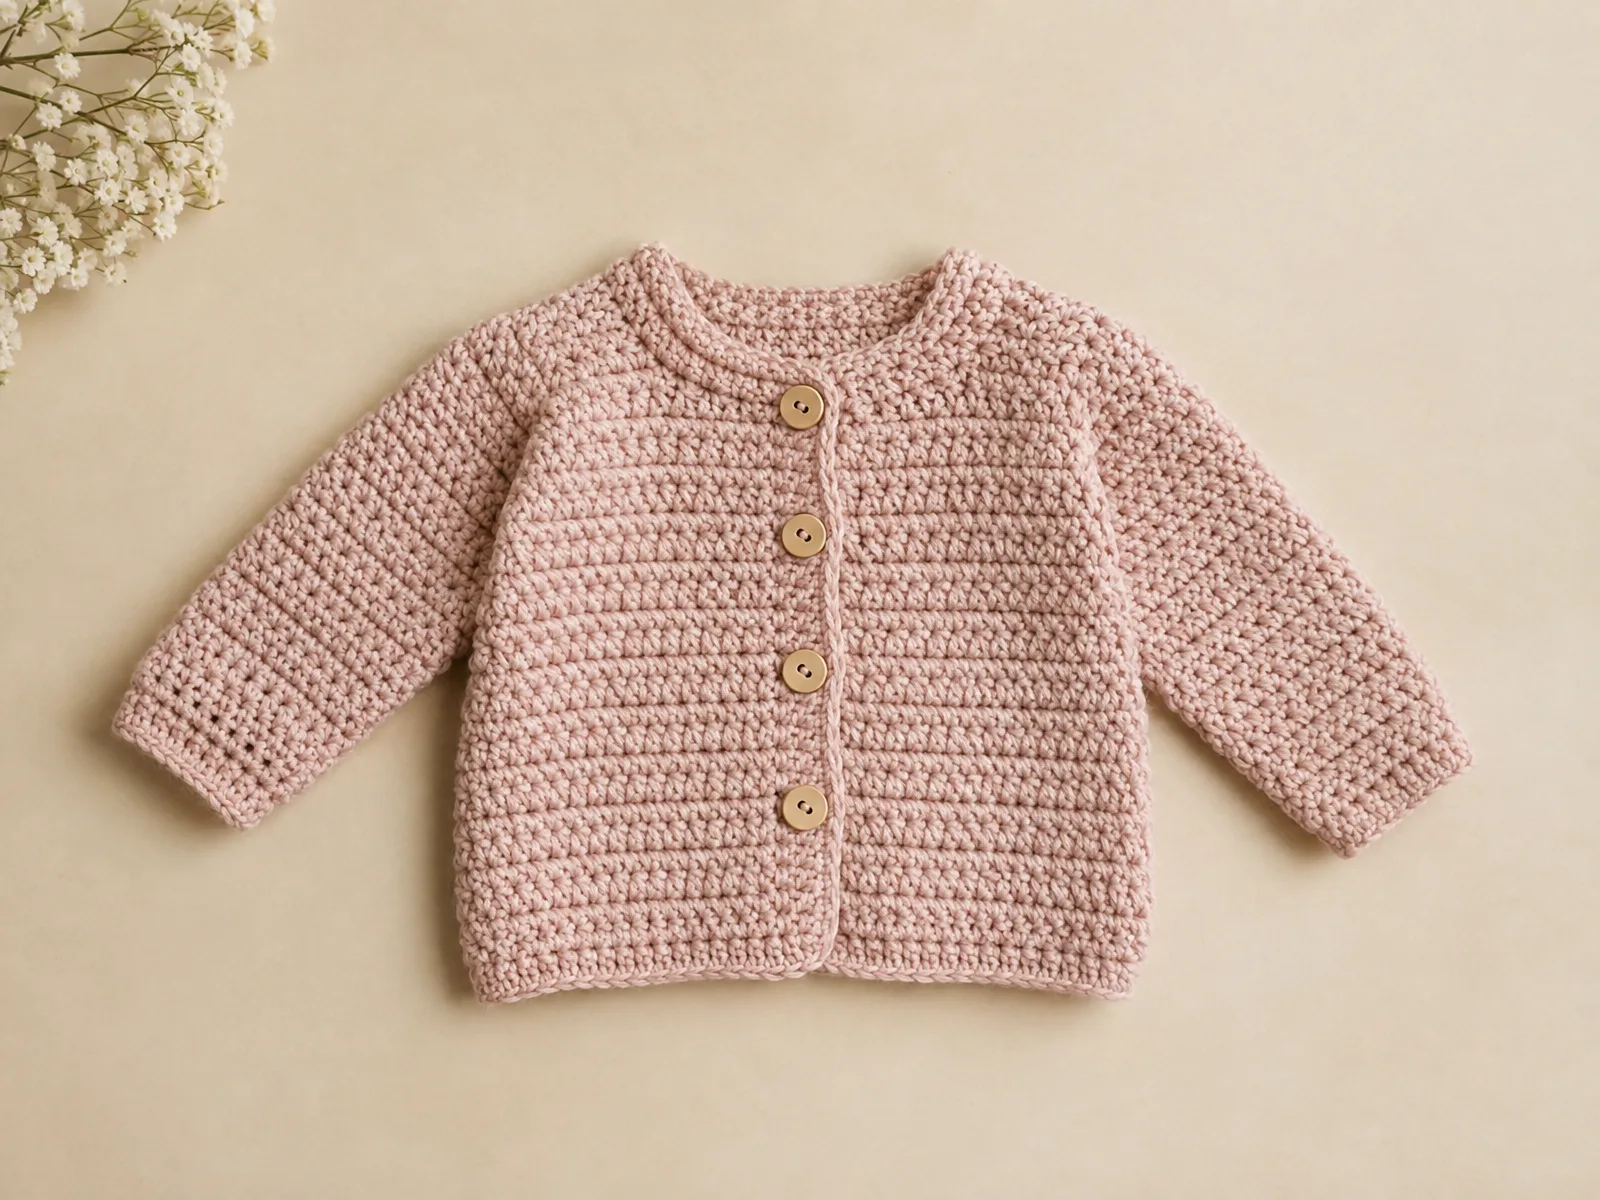
A cozy little cardigan is one of the most rewarding projects a new crocheter can make, and this crochet baby cardigan pattern is designed with beginners in mind. You’ll build the whole garment from the neckline down using simple single crochet stitches, so there’s no seaming pieces together at the end and very little counting math to keep track of.
This project works well for anyone comfortable with basic chains, single crochet, and following a stitch count, even if you’ve never made a garment before. Before you start, it helps to know that finished sizing will vary depending on the yarn, hook, and tension you use, since exact gauge isn’t fixed here. Read through the whole pattern once before picking up your hook so the raglan shaping makes sense as you go.
Project Overview
| Detail | Information |
|---|---|
| Skill level | Beginner-friendly |
| Crochet terminology | US terms |
| Construction method | Top-down raglan, worked in rows for the yoke and body, joined in the round for the sleeves |
| Yarn type | Soft, machine-washable DK or worsted weight baby yarn |
| Hook | Main hook sized to your yarn’s gauge, plus a smaller hook for edging |
Materials and Tools
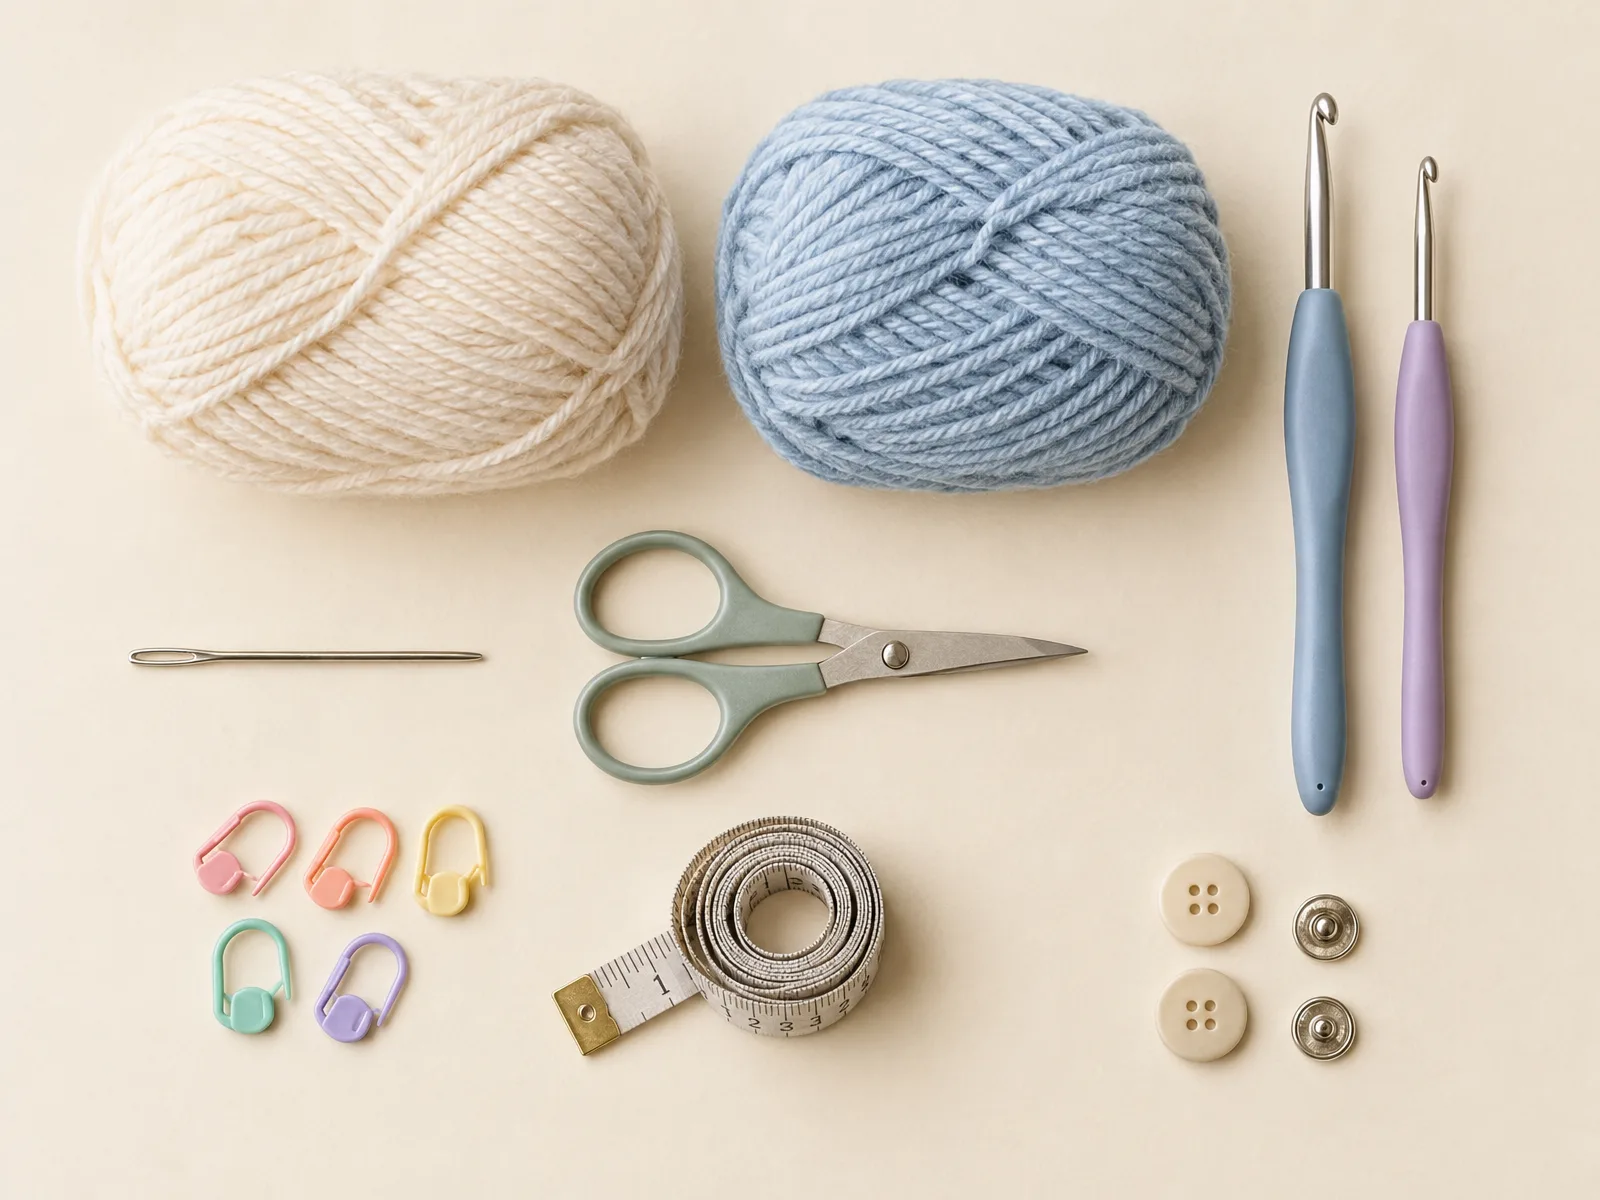
Essential materials:
- Soft, machine-washable DK or worsted weight baby yarn
- Main crochet hook matched to your yarn’s gauge
- Smaller crochet hook for the edging and button band
- Tapestry needle
- Scissors
- Stitch markers
- Tape measure
Optional additions:
- Flat buttons or snaps (check that any closures are attached securely before the cardigan is worn)
Crochet Abbreviations
- ch – chain
- sc – single crochet
- inc – increase (work 2 sc in the same stitch)
- sl st – slip stitch
- st(s) – stitch(es)
- rep – repeat
- rnd(s) – round(s)
- pm – place marker
- RS/WS – right side / wrong side
Important Notes Before You Begin
This cardigan is worked flat in rows for the yoke and body, then joined in continuous rounds for the sleeves. Because rows and rounds require different handling, pay attention to the heading of each section.
Stitch markers matter here. You’ll place four markers in Row 1 to mark the raglan lines that separate the fronts, back, and sleeves. Move each marker up to the corresponding stitch every row so you always know where the increases belong.
Keep your tension even, especially through the increase rows in the yoke — working too tightly around the raglan lines can pull the fabric and distort the shoulder shape. Check your stitch count at the end of every row against the number in parentheses before moving on.
When you reach the sleeves, you’ll be joining in the round rather than turning rows, so watch for twisting on your first round and join with a slip stitch to keep the tube straight.
Because this is a baby garment, take a moment to think about closures. Buttons and snaps can present a choking hazard if they ever come loose, and embroidered or fabric-based closures are generally a safer choice for very young infants than small detachable hardware. A handmade cardigan, no matter how carefully finished, should not be considered certified safe for unsupervised wear.
Crochet Pattern Instructions
Yoke (Neckline and Raglan Shaping)
Make 1.
Row 1 (RS): Ch 45. Sc in 2nd ch from hook and in each ch across, placing markers as you go: sc 7 (right front), pm, sc 9 (sleeve), pm, sc 12 (back), pm, sc 9 (sleeve), pm, sc 7 (left front). Turn. (44 sc)
Row 2 (increase row): Ch 1, sc across to 1 st before the first marker, inc, sc in marked st, inc, continue this before-and-after increase at each of the 4 markers, sc in remaining sts. Move each marker up onto the same raglan-line stitch. Turn. (52 sc)
Rows 3–8: Repeat the Row 2 increase pattern in every row.
- Row 3: (60 sc)
- Row 4: (68 sc)
- Row 5: (76 sc)
- Row 6: (84 sc)
- Row 7: (92 sc)
- Row 8: (100 sc)
This depth suits a smaller baby cardigan. For a bigger size, keep repeating the increase row a few more times, adding 8 stitches each round, before moving on to the divide row.
Dividing for Body and Sleeves
Row 9: Sc across right front (14 sts), ch 2 (underarm gap), skip next 23 sts and set the sleeve stitches aside, sc across back (26 sts), ch 2 (second underarm gap), skip next 23 sts, sc across left front (14 sts). Turn. (58 sc)
Body
Continue working even rows (sc in each st across, turn) on these 58 sts. Work until the body reaches the length you want from underarm to hem, ending after a wrong-side row so both fronts stay even. Because length depends heavily on yarn weight, hook size, and tension, check the piece against your baby or a similarly sized garment rather than relying on a fixed row count.
Fasten off, weaving the tail through the last row, or leave the yarn attached if you’re moving straight into the edging.
Sleeves (make 2)
With the main hook, join yarn at one underarm chain-2.
Round 1: Sc evenly into the 2 chain sts and the 23 held sleeve sts, join with sl st to first sc, pm in first st. (25 sc)
Rounds 2 and on: Sc in each st around, joining each round with a sl st. Continue even until the sleeve reaches the desired length. (25 sc)
Cuff: Switch to the smaller hook. Work 2–3 rounds of sc through the back loop only for a ribbed texture, keeping the same count throughout. (25 sc)
Fasten off and weave in the tail. Repeat for the second sleeve at the opposite underarm.
Edging and Button Band
With the smaller hook, join yarn at the bottom corner of the right front edge.
Round 1: Sc evenly up the right front edge, sc across the neckline working 1 sc in each of the 44 foundation-row stitches, sc evenly down the left front edge to match, then sc across the bottom hem working 1 sc in each of the 58 sts, join with a sl st to the first sc. The neckline and hem sections have fixed counts of 44 sc and 58 sc; the front edge counts will vary depending on how many body rows you worked, so simply space stitches evenly so the edge lies flat without ruffling or pulling in.
If you want buttonholes, work them on this round along the front edge that will sit underneath the other. Space the positions evenly and, at each one, work (ch 2, skip next 2 sts) instead of two single crochets, then continue on to the next position.
Round 2 (optional): Sc in each stitch around, working a single sc into each buttonhole chain-space to keep the openings clean. Fasten off and weave in all ends.
Assembly and Finishing
Because this cardigan is built mostly in one piece, there isn’t much traditional seaming. Start by checking both underarm chain-2 gaps; if a small hole remains after the sleeve is joined, close it with a few whip stitches using a matching yarn tail.
Weave in every remaining tail along the wrong side of the fabric, running the needle through a few stitches in one direction and back through a few in the other so nothing works loose in the wash.
Give the finished cardigan a light block by laying it flat and gently shaping the edges and sleeves while damp, letting it air dry completely before dressing your baby in it.
If you added buttonholes, sew buttons onto the opposite front edge, lining each one up with its buttonhole. Sew through the button shank and the fabric several times, knotting off securely on the wrong side. If you’re using snaps instead, stitch them to the inside edges of the front bands in the same aligned positions.
Customization Ideas
- Work the cuffs and bottom hem in a contrasting color for a simple color-block look.
- Swap buttons for fabric ties or ribbon loops on cardigans intended for very young infants.
- Add a small embroidered motif near one front corner instead of a decorative button.
- Try a subtly heavier yarn with a larger hook for a cozier, thicker cardigan, adjusting your row counts to match the new gauge.
For more color and styling ideas for baby garments, you can browse project photos on our Pinterest boards.
Care and Safety
Follow the washing instructions on your yarn label, since machine-washable baby yarns vary in whether they prefer a gentle cycle, a mesh bag, or flat drying. Avoid high heat when drying to protect stitch definition and prevent shrinkage.
If this cardigan will be worn by a baby or young child, check buttons or snaps regularly for looseness, since small detachable pieces can be a choking hazard. Embroidered details or fabric ties are generally a safer alternative to hardware closures for very young infants. No handmade garment, however carefully finished, should be assumed to be certified safe without appropriate testing.
Common Mistakes and Troubleshooting
| Problem | Likely cause | How to fix it |
|---|---|---|
| Yoke puckers along the raglan lines | Increases were skipped or worked in the wrong stitch | Recount stitches after every row and confirm both increases were worked at each marker |
| Sleeve twists when joined | First round wasn’t joined correctly or stitches were dropped | Check that the join is a clean slip stitch and that the round matches the stated stitch count before continuing |
| Buttonholes don’t line up with buttons | Band was worked before final button placement was decided | Mark intended button positions with pins or scrap yarn before crocheting the buttonhole round |
| Visible gap at the underarm | Chain-2 stretched or wasn’t fully closed | Whipstitch the small opening closed with a matching yarn tail |
| Front edges look uneven | Edging stitches spaced inconsistently along the row ends | Work the edging in smaller sections, checking that it lies flat before continuing to the next side |
Frequently Asked Questions
What size will this cardigan turn out to be?
Finished size depends on your yarn weight, hook size, and personal tension, so there isn’t one fixed measurement. You can size the cardigan up by repeating the yoke increase rows more times and working additional body and sleeve rounds.
Can I use worsted weight yarn instead of DK?
Yes. Worsted yarn will produce a slightly thicker, warmer cardigan. Just use a hook that matches that yarn’s gauge and keep an eye on how quickly the yoke grows compared to DK weight.
Are buttons safe to use on a baby cardigan?
Buttons can loosen over time and present a choking risk, so they should always be checked and reattached if needed. Ribbon ties, fabric loops, or snaps sewn securely to the inside of the band are often considered a gentler alternative for very young babies.
Do I need to add a button band at all?
No. The cardigan can be left as a simple open front with just the neckline, front, and hem edging, which works well if you’d rather skip closures entirely.
How do I make the sleeves longer or shorter?
Simply add or remove even rounds before starting the ribbed cuff. The stitch count stays the same throughout, so length is the only variable to adjust.
What stitch does this pattern mainly use?
Almost the entire cardigan is single crochet, which keeps the shaping predictable and makes this a comfortable project for someone making their first garment.
Final Thoughts
You’ve now walked through a full top-down raglan cardigan, from the increase-shaped yoke to the sleeves and finishing edging, all built around a simple stitch count you can check row by row. With careful tension and a bit of patience through the raglan increases, this project turns into a sweet, wearable little garment.
If you give this cardigan a try, we’d love to see how it turns out, so feel free to share your finished piece or leave a comment with any questions along the way. For more beginner-friendly designs like this one, take a look through our full collection of baby crochet patterns for your next project.