Free Crochet Duck Pattern: Make a Sweet Amigurumi Duckling
Table of Contents
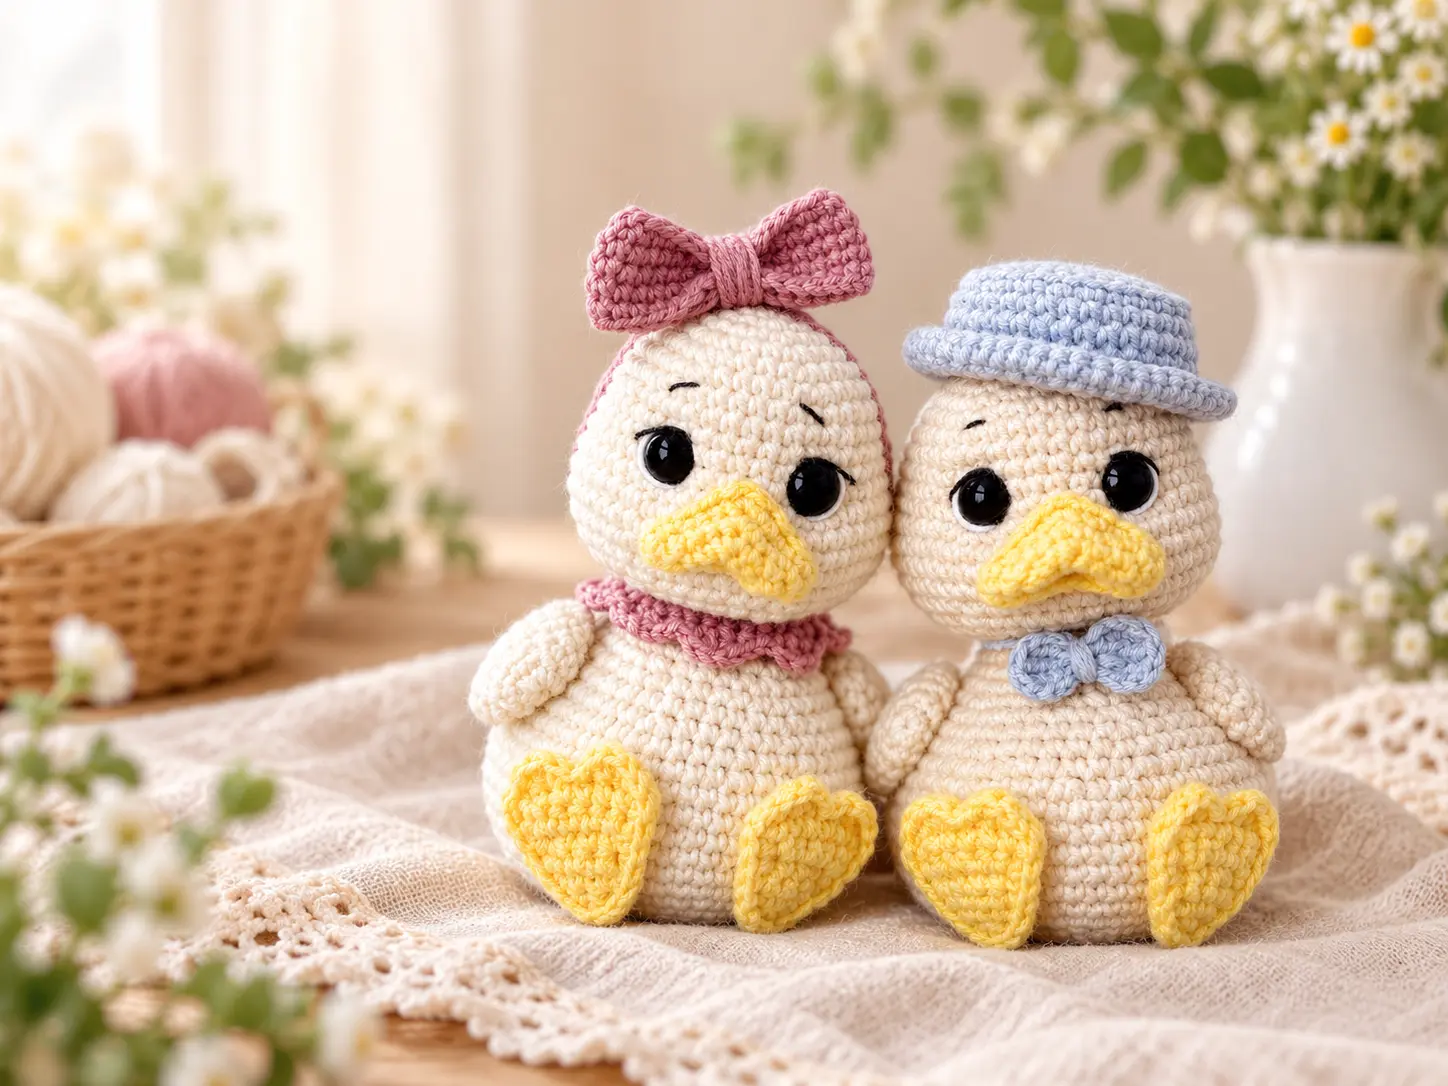
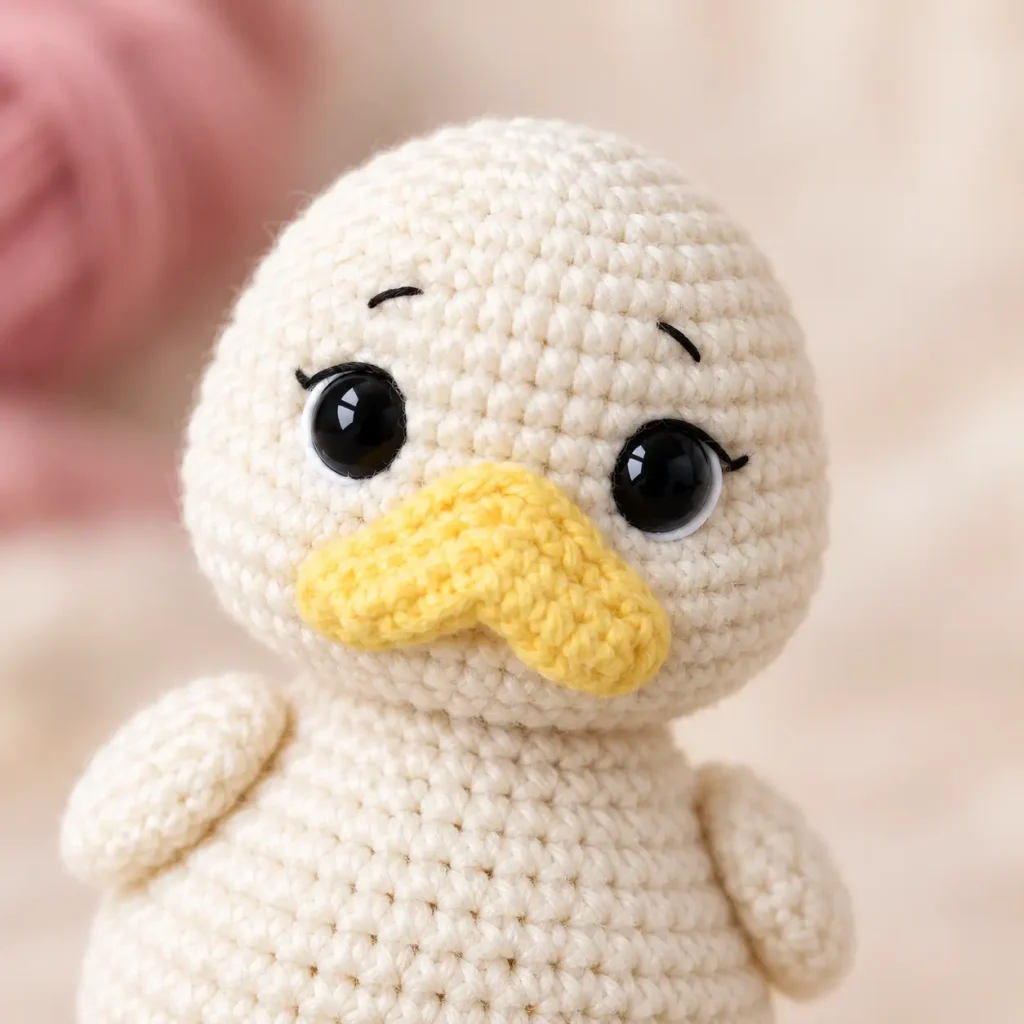
Looking for a free crochet duck pattern with plenty of personality? This sweet duckling has a softly rounded head, a cuddly body, expressive eyes, a shaped yellow beak, tiny wings, and cheerful webbed feet. The complete pattern is written below in clear US crochet terms, followed by practical assembly and finishing tips to help you create a polished result.
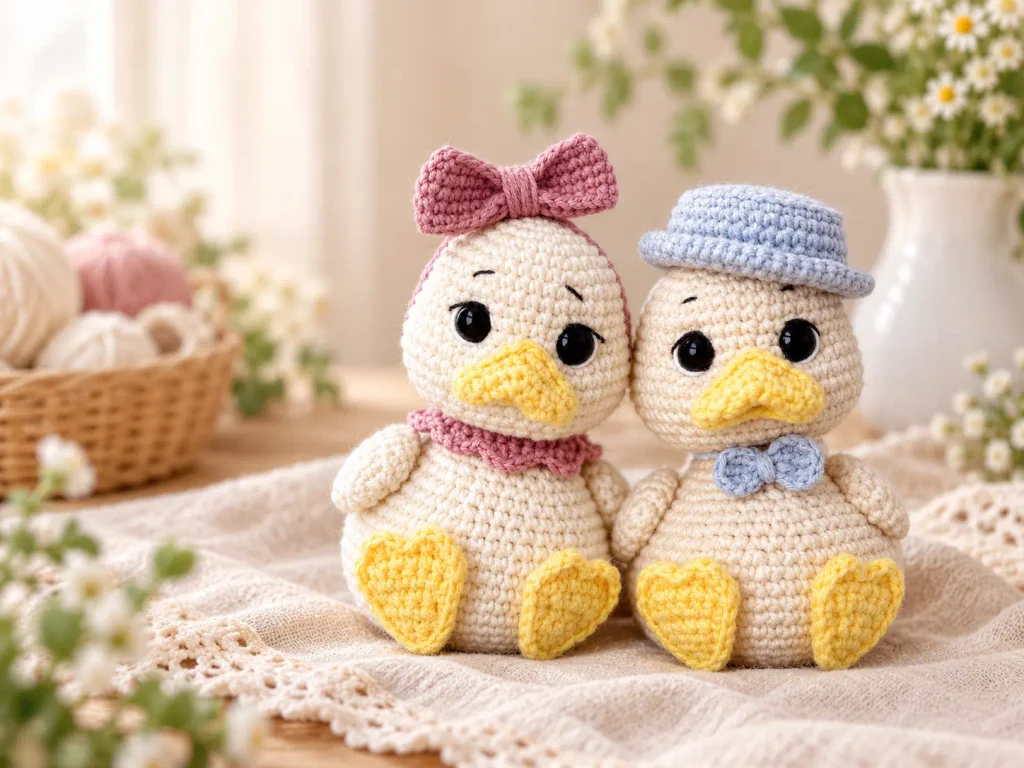
This project is a lovely choice for spring decor, Easter baskets, nursery shelves, handmade gifts, or simply a relaxing amigurumi weekend. The duckling is assembled from separate pieces, so you can take your time shaping the head, body, beak, feet, and wings before sewing everything together.
Pattern at a Glance
| Skill level | Confident beginner to intermediate |
|---|---|
| Terminology | US crochet terms |
| Construction | Head and body worked in continuous rounds; beak and feet worked in rows; wings worked in rounds |
| Main techniques | Magic ring, single crochet, increases, invisible decreases, simple shaping, stuffing, and sewing |
| Finished size | Varies with your yarn, hook, tension, and stuffing |
Why You Will Love This Crochet Duckling
- Full written pattern: every piece and assembly step is included on this page.
- Expressive details: the shaped beak and gentle eye sculpting give the face a charming character.
- Easy to personalize: change the main yarn color or add removable bows, collars, or hats.
- Gift-friendly: the finished duckling makes a thoughtful handmade keepsake.
- Printable option: a clean PDF can be offered for crocheters who prefer an ad-free copy.
Materials and Tools
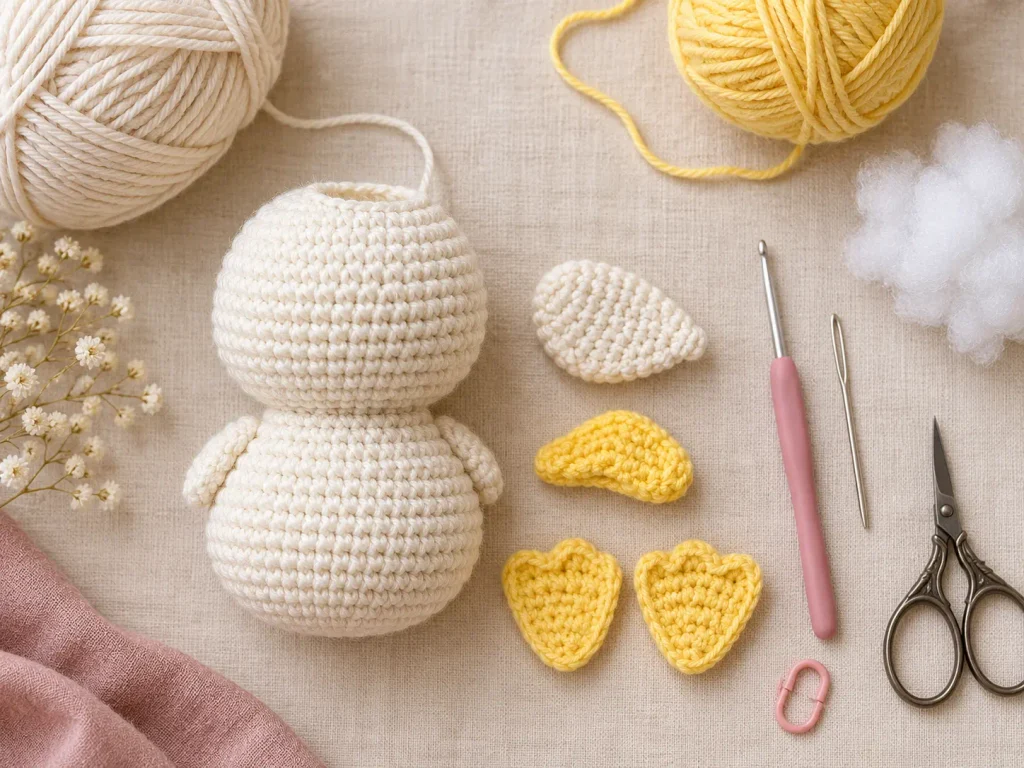
- Yarn: YarnArt Jeans, 50 g / 160 m, or a comparable smooth yarn in a light neutral color for the head, body, and wings
- Contrast yarn: yellow for the beak and feet
- Crochet hook: 2.0 mm; use 1.75 mm if your tension is loose
- Safety eyes: two 8 mm eyes
- Stuffing: polyester fiberfill or holofiber
- Notions: yarn needle, scissors, stitch marker, and pins
- Optional: black embroidery thread for brows and lashes
Yarn substitution tip: Choose a smooth yarn that shows stitch definition. If you change the yarn weight, use a hook small enough to create dense fabric so the stuffing does not show. Your finished duckling will become larger or smaller accordingly.
Abbreviations – US Terms
| Abbreviation | Meaning |
|---|---|
| MR | magic ring |
| ch | chain |
| t-ch | turning chain |
| sc | single crochet |
| sl st | slip stitch |
| hdc | half double crochet |
| dc | double crochet |
| inc | increase: work 2 sc in the same stitch |
| dec | decrease: single crochet 2 stitches together; an invisible decrease is recommended |
| 3 sc in one st | work 3 single crochet stitches into the same stitch |
| [ ] | stitch count at the end of the round or row |
For standard US crochet terminology, you can also consult the Craft Yarn Council crochet abbreviations.
Important Pattern Notes
- Work the head, body, and wings in continuous spiral rounds unless the instruction says otherwise.
- Place a stitch marker in the first stitch of every round and move it up as you work.
- Use an invisible decrease for the neatest surface.
- Stuff gradually in small pieces. This helps prevent lumps and keeps the shape balanced.
- Pin every part before sewing. Check the duckling from the front, side, and top before committing to placement.
- The decorative hat and bows shown in styled photos are optional presentation ideas; instructions for those accessories are not included in this pattern.
Toy safety: Safety eyes can be a choking hazard and are not suitable for children under age three. For a baby or toddler gift, embroider the eyes securely instead. Double-check every seam and yarn tail before gifting.
Free Crochet Duck Pattern
Head
Use the light neutral body color. Work in continuous rounds.
Rnd 1: 6 sc in MR. [6]
Rnd 2: Inc in each stitch around. [12]
Rnd 3: (1 sc, inc) x 6. [18]
Rnd 4: (2 sc, inc) x 6. [24]
Rnd 5: (3 sc, inc) x 6. [30]
Rnd 6: (4 sc, inc) x 6. [36]
Rnd 7: (5 sc, inc) x 6. [42]
Rnds 8-9: Sc in each stitch around. [42]
Rnd 10: (5 sc, dec) x 6. [36]
Rnd 11: (5 sc, inc) x 6. [42]
Rnd 12: (6 sc, inc) x 6. [48]
Rnd 13: (7 sc, inc) x 6. [54]
Rnds 14-16: Sc in each stitch around. [54]
Rnd 17: (7 sc, dec) x 6. [48]
Rnd 18: (6 sc, dec) x 6. [42]
Rnd 19: (5 sc, dec) x 6. [36]
Rnd 20: (4 sc, dec) x 6. [30]
Rnd 21: (3 sc, dec) x 6. [24]
Insert the eyes between Rounds 11 and 12, with approximately 7 stitches between them. Adjust slightly if needed so the face looks centered. Stuff the head evenly, keeping the lower opening accessible. Fasten off and leave a long tail for sewing.
Body
Use the light neutral body color. Work in continuous rounds.
Rnd 1: 6 sc in MR. [6]
Rnd 2: Inc in each stitch around. [12]
Rnd 3: (1 sc, inc) x 6. [18]
Rnd 4: (2 sc, inc) x 6. [24]
Rnd 5: (3 sc, inc) x 6. [30]
Rnd 6: (4 sc, inc) x 6. [36]
Rnd 7: (5 sc, inc) x 6. [42]
Rnd 8: (6 sc, inc) x 6. [48]
Rnd 9: (7 sc, inc) x 6. [54]
Rnd 10: (8 sc, inc) x 6. [60]
Rnd 11: (9 sc, inc) x 6. [66]
Rnds 12-16: Sc in each stitch around. [66]
Rnd 17: (9 sc, dec) x 6. [60]
Rnd 18: 3 sc, dec, 6 sc, dec, 6 sc, dec, 5 sc, dec, 1 sc, dec, 1 sc, dec, 5 sc, dec, 6 sc, dec, 6 sc, dec, 3 sc. [51]
Rnd 19: 24 sc, 2 dec, 23 sc. [49]
Rnd 20: 3 sc, dec, (5 sc, dec) x 6, 2 sc. [42]
Rnd 21: Sc in each stitch around. [42]
Rnd 22: (5 sc, dec) x 6. [36]
Rnd 23: (4 sc, dec) x 6. [30]
Rnd 24: Sc in each stitch around. [30]
Rnd 25: (3 sc, dec) x 6. [24]
Rnds 26-27: Sc in each stitch around. [24]
Finish stuffing the body so it is firm but still soft enough to shape. Fasten off. Leave a long yarn tail if you plan to use the body yarn to sew the head in place.
Beak
Use yellow yarn. The beak begins with a chain and is worked around both sides of the foundation chain.
Foundation: Ch 5, then ch 1 for turning.
Row 1: Starting in the second ch from the hook, inc, 1 sc, 3 sc in one st, 1 sc, 3 sc in one st, then 4 sc along the opposite side of the chain.
Row 2: 3 sc in one st, 3 sc, 3 sc in one st, 3 sc, 3 sc in one st, 5 sc.
Row 3: 1 sc, 3 sc in one st, 5 sc, 3 sc in one st, 5 sc, 3 sc in one st, 6 sc.
Fasten off and leave a long tail. Shape the center of the beak into a gentle inverted V before pinning it to the face.
Feet – Make 4 Flat Pieces
Use yellow yarn. You will join two flat pieces to create each finished foot, so make four pieces in total.
Foundation: Ch 2, then ch 1 for turning.
Row 1: Starting in the second ch from the hook, 2 sc. [2]
Row 2: Inc in each stitch. [4]
Rows 3-4: 4 sc. [4]
Row 5: Inc, 2 sc, inc. [6]
Row 6: 6 sc. [6]
Chain 1 at the end of each row for turning. Place two matching pieces together and single crochet around both layers to join them. When you reach the top edge that forms the toes, work:
1 sc; (1 hdc, 1 dc, 1 hdc) in the next stitch; 2 sl st; (1 hdc, 1 dc, 1 hdc) in the next stitch; 1 sc.
Fasten off and leave a long tail for sewing. Repeat with the remaining two pieces to make the second foot.
Wings – Make 2
Use the light neutral body color. Work in continuous rounds. Do not stuff.
Rnd 1: 6 sc in MR. [6]
Rnd 2: Inc in each stitch around. [12]
Rnd 3: Sc in each stitch around. [12]
Rnd 4: (2 sc, inc) x 4. [16]
Rnds 5-6: Sc in each stitch around. [16]
Rnd 7: (2 sc, dec) x 4. [12]
Rnds 8-9: Sc in each stitch around. [12]
Rnd 10: (1 sc, dec) x 4. [8]
Rnd 11: (2 sc, dec) x 2. [6]
Rnd 12: (1 sc, dec) x 2. [4]
Close the small opening and hide that yarn tail. Leave a separate long tail for attaching each wing to the body.
How to Assemble the Duckling
- Join the head and body. Align the 24 stitches at the head opening with the 24 stitches at the top of the body. Pin around the neck, inspect the doll from every angle, and sew securely. Add a little extra stuffing before closing the final section if the neck needs support.
- Attach the beak. Pin the beak across approximately Head Rounds 12-18. Keep the center shaped like a soft inverted V and check that it sits evenly beneath the eyes. Sew around the edge.
- Sculpt the eyes. With a long needle and strong matching thread, make gentle tightening stitches around the eye area. Work gradually and use equal tension on both sides so the face remains balanced.
- Embroider the expression. Add small brows and optional lashes with black thread. Keep each stitch short and secure the ends inside the head.
- Attach the feet. Pin the feet low on the front of the body with the toes angled slightly outward. Sew around the upper and side edges, leaving the toe shape visible.
- Attach the wings. Pin the wings along approximately Body Rounds 4-11. Sew the inner edge securely while allowing the outer edge to sit slightly free for a natural wing shape.
Finishing Tips for a Polished Amigurumi Duck
Keep the Stitch Fabric Dense
If stuffing is visible through the fabric, move down one hook size rather than pulling every stitch painfully tight. Consistent tension creates a smoother result than excessive force.
Shape While You Stuff
Add small amounts of fiberfill and press each layer outward toward the crocheted fabric. Avoid pushing one large clump into the center. The head should remain rounded, while the lower body can be slightly fuller to help the duckling sit.
Pin Before Every Seam
The expression depends heavily on placement. Pin the beak, feet, and wings, then place the duckling on a flat surface and photograph it from the front. A quick photo often reveals uneven placement that is harder to notice while holding the toy.
Sew Through Full Stitches
Pass the needle beneath complete crochet stitches rather than splitting individual yarn strands. Pull firmly enough to secure the part, but not so tightly that the seam puckers.
Troubleshooting
| Problem | Likely cause | What to do |
|---|---|---|
| The head looks uneven | A missed increase, decrease, or stitch marker shift | Count at the end of every shaping round and move the stitch marker immediately after the first stitch. |
| Stuffing shows through | Hook is too large or tension is too loose | Use a smaller hook and an invisible decrease. Avoid overstuffing. |
| The duckling tips forward | Head is overstuffed or feet are placed too high | Use slightly less stuffing in the head and pin the feet lower before sewing. |
| The beak curls or twists | Uneven tension around the foundation chain | Block it gently with your fingers, reshape the inverted V, and pin all around before sewing. |
| The eyes look uneven | Different placement or uneven sculpting tension | Confirm placement before locking the backs, then sculpt each side in small alternating steps. |
| The neck feels floppy | Not enough stuffing at the join | Add small pieces of fiberfill to the neck opening before the last section of the seam is closed. |
Easy Ways to Personalize Your Crochet Duckling
- Use soft yellow yarn for a classic spring duckling.
- Choose cream, beige, or white for a modern nursery palette.
- Add a simple removable bow or collar in dusty rose, sage, blue, or plum.
- Embroider sleepy eyes instead of using plastic safety eyes.
- Work the duckling in a thicker yarn with a suitable hook for a larger cuddly version, remembering that the final size and yarn quantity will change.
Prefer a Clean Printable Copy?
Keep the complete pattern beside your project with the organized, ad-free HooksyLane PDF in US terms.
Frequently Asked Questions
Is this crochet duck pattern suitable for beginners?
It is best for a confident beginner who already knows how to make a magic ring, single crochet, increase, decrease, work in continuous rounds, and sew amigurumi parts. The body shaping and facial finishing require careful counting and patient assembly.
What crochet terms does the pattern use?
The pattern is written in US crochet terms. In particular, “sc” means US single crochet.
Can I use a different yarn?
Yes. A smooth cotton, cotton blend, or acrylic yarn can work well. Match it with a hook that creates dense fabric. Changing the yarn weight changes the finished size and the amount of yarn and stuffing required.
How big will my crochet duckling be?
The source pattern does not specify one exact finished measurement. Your result depends on yarn thickness, hook size, personal tension, and stuffing.
Can I use embroidered eyes?
Absolutely. Embroidered eyes are the safer choice for a toy intended for a baby or child under three. Secure every stitch and yarn tail carefully.
Are the hat and bows included in this pattern?
No. Those accessories are styling ideas shown in the photographs. The instructions on this page cover the duckling’s head, body, beak, feet, wings, face details, and assembly.
Make Your Own Sweet Amigurumi Duck
This free crochet duck pattern combines classic amigurumi construction with a wonderfully expressive face. Take your time with the stitch counts, stuff in small layers, and pin every part before sewing. Those simple habits make the biggest difference in the finished duckling.
If you make this project, save the page for later and share your color palette with the HooksyLane community. We would love to know whether you chose classic yellow, warm cream, or a completely unexpected shade.
Pattern credit: Original design by @tarasyuk_olia. Article text and editorial layout by HooksyLane. Please respect the original designer’s authorship when sharing finished work or linking to this pattern.