How to Crochet: Learn Stitches and Make Your First Piece
Table of Contents
A few basic motions are enough to start making fabric, even if your first stitches look a little uneven. Practice helps your hands learn the moves, and mistakes are a normal part of starting.
Crochet uses one hooked tool to form fabric from loops of yarn. Tension is the steady amount of pull on the yarn that affects how large and even your stitches are.
With a little time and patience, you can learn to make a small square or another simple first piece. You will begin with a yarn and hook, then practice a few stitches and finish your work.
Your hand will soon find a rhythm that feels comfortable, though it may take several tries. A loose or missed stitch is something you can learn to spot and fix.
Gather a simple yarn-and-hook setup, then choose supplies that make your first stitches easy to see.
What do you need to start crocheting?
A beginner can start with just yarn and one crochet hook. Medium-weight, light-colored yarn makes stitches easier to see while you practice.
Check the yarn label for its suggested hook size, then choose a hook that feels comfortable in your hand. The label’s hook symbol or written size gives you a useful starting point, though your pattern may call for another size.
Start with medium-weight, light-colored yarn and a hook size recommended on its label.
Choose yarn that makes stitches easy to see
Yarn comes in different weights, colors, and fibers. Medium-weight yarn is thick enough to handle without being bulky, and a pale, solid color helps you see each loop.
Acrylic yarn often feels smooth and is easy to find. Cotton can feel firm, while wool often feels springy. Each fiber handles differently, so try a small amount before choosing yarn for a larger piece.
| Fiber | General feel or handling | Common use |
|---|---|---|
| Acrylic | Smooth and easy to handle | Practice pieces and blankets |
| Cotton | Firm with clear stitch shape | Dishcloths and other household items |
| Wool | Springy and warm | Hats, scarves, and warm layers |
Match the crochet hook to the yarn
Hook size refers to the thickness of the crochet hook, not the size of your stitches. A larger hook usually makes larger loops, while a smaller hook makes tighter ones.
Yarn labels often show a recommended hook size in millimeters, with a letter or number beside it. Match that size for your first practice, then follow your pattern if it gives a different size.
Hooks come in metal, plastic, bamboo, and wood. Metal feels smooth, while bamboo and wood may feel less slippery; plastic hooks are light. The best choice is the one you can hold without strain.
Set up a simple first attempt for kids
How to crochet for kids starts with a safe, calm setup and close adult supervision. A child can try the motions with easy-to-handle yarn and a hook that feels comfortable, but no single age suits every learner.
For how to crochet with yarn, choose a light color and a smooth strand that does not split easily. Keep scissors nearby for an adult to handle, and let the child pause when hands feel tired.
- Scissors for cutting yarn
- A yarn needle for loose ends
- Stitch markers to mark a stitch or row
- A flexible measuring tape for checking size
These tools are useful but optional at the start. For how to crochet for beginners, a hook and yarn are enough to practice the first motions.
Choose a comfortable hook and easy-to-see yarn, then get ready to hold them.
How should you hold the hook and yarn?
One crocheter may hold a hook like a pencil, while another uses a knife grip. Both can work, so choose the position that lets your hand move without strain.
Steady tension helps keep your stitches more even. A tighter pull generally makes smaller stitches, while a looser pull makes larger stitches.
Try the pencil grip or knife grip
For the pencil grip, hold the crochet hook between your thumb and index finger, much like a pencil. Rest its handle against your middle finger for support.
For the knife grip, hold the hook in your palm and guide it with your thumb and index finger. Your other fingers can help steady the handle as it turns.
Neither grip is the only correct choice. Try each one with a few practice motions, then use the grip that feels easy to repeat.
Guide the yarn with your non-dominant hand
Let the hand opposite your hook guide the working yarn. One workable route is to bring it over your index finger, under your middle finger, then across your palm.
Your thumb and middle finger can hold the fabric or starting loop. Relax the fingers around the yarn so it feeds smoothly instead of catching.
If your stitches tighten as you work, pause and loosen your finger hold rather than forcing the hook through. A hook that catches often signals that the yarn is too tight.
Settle on a relaxed grip, then make the first adjustable loop.
How do you make a slip knot?
If the yarn loop sits too tight to move on the hook, loosen it. Snug, not cinched, is the goal for a slip knot.
The loop should slide along the hook without falling off. Leave a tail long enough to weave in at the end of your work.
The tail is the cut end of yarn. The working yarn is the strand connected to the yarn ball, and you will pull from it as you crochet.
- Make a loop with the yarn, leaving a tail of several inches.
- Pass the crochet hook through the loop.
- Catch the working yarn with the hook.
- Draw a loop of working yarn through the first loop.
- Pull the tail gently to snug the knot around the hook.
Keep the new loop on the hook and test its movement. If the hook cannot slide through it, ease the knot rather than pulling harder on the tail.
The slip knot is an adjustable starting loop, not a stitch in your chain. The working yarn stays attached to the ball as you begin.
Leave one loop on the hook, then pull yarn through it to form chains.
How to Crochet a Foundation Chain
Pull the yarn through the loop on your hook once, and one chain link appears below it. Each pull makes one link in the foundation chain.
The live loop on the hook and the slip knot do not count as chain stitches. The working yarn feeds each new chain as you repeat the motion.
- Hold the slip knot steady without squeezing it.
- Bring the hook under and over the working yarn, from back to front. This is called yarning over.
- Pull the yarn through the loop already on the hook.
- Keep the new loop on the hook; the link below it is one chain stitch.
- Repeat the yarn-over and pull-through motions until your chain reaches the needed length.
Practice with a short chain before making the longer chain a pattern requires. Short practice makes it easier to watch how the yarn moves through the loop.
Keep the chain loose enough for the hook to enter later. If the loops are difficult to work into, your foundation chain is likely too tight.
A chain that twists or changes size can still help you learn. Focus on keeping each link open and similar to the ones beside it.
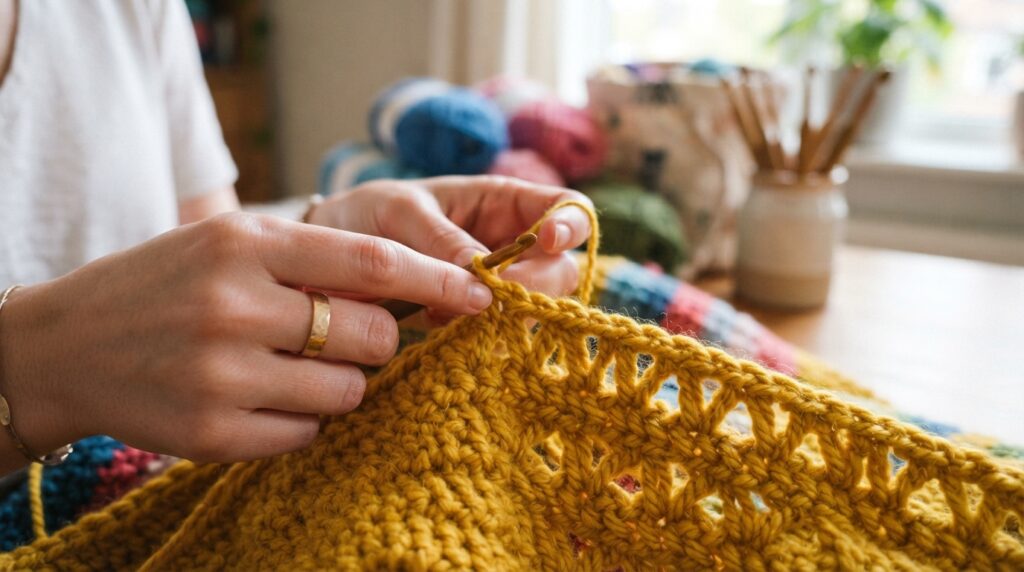
Inspect the chain’s V-shaped links and count them before working into the foundation.
How do you count chains and find the first stitch?
The loop sitting on your hook is an easy counting mistake: it is not a chain stitch. Start counting at the first V-shaped link below that loop.
Do not count the slip knot or the live loop on the hook. Count each chain V as you move away from the hook toward the tail.
Look at the top of the chain for small V shapes, one after another. The first V nearest the hook can be hard to see, so turn the chain slightly toward you.
A tight foundation can make the chain hard to enter with your hook. For practice, a hook one or two sizes larger can create a looser chain that is easier to work into.
After the foundation chain, switch back to the hook size required by your yarn label or pattern. Keep the larger hook for practice chains rather than changing the size of the whole project.
If you keep losing the first stitch location, place a stitch marker through that chain V. The marker gives your eyes a clear place to return to.
In a common US single-crochet row, the first stitch goes into the second chain from the hook. Follow your pattern if it gives a different starting point.
Insert the hook in the correct chain and begin a single crochet.
How do you make a single crochet stitch?
For a common US single-crochet row, insert your hook into the second chain from the hook. This is the usual start, though a pattern may tell you to begin elsewhere.
A completed single crochet leaves one loop on the hook. In US crochet terms, the stitch is often shortened to sc in patterns.
Work the first single crochet into the chain
- Insert the hook into the chosen chain stitch.
- Yarn over and pull the working yarn through the chain. Two loops now sit on your hook.
- Yarn over again.
- Pull the yarn through both loops. One loop remains, and the stitch is complete.
Repeat the same four motions in the next chain. Keep your work turned toward you so you can see where each new stitch begins.
If the starting chain differs from the common second-chain start, follow the pattern’s instructions. That rule matters because a pattern may use a different count or stitch setup.
Use pictures to check your first row
Each chain has a V-shaped link along its top. In a close-up view, a completed single crochet shows a small V at its top, with two strands forming the stitch.
After you finish a stitch, one loop remains on the hook. After pulling up yarn in the middle of the stitch, two loops appear there before you pull through both.
A close-up photo should show the hook passing into one chain, two loops after pulling up yarn, and one loop after the stitch ends. If a picture shows more loops, compare the stage of the stitch before changing your work.
Count the completed stitches, then learn to turn and begin the next row.
How do you turn your work and keep rows straight?
At the row’s end, you may see no obvious stitch beyond the last V. That edge stitch is easy to miss when you turn your work.
Count your stitches at the end of every row to catch a missed or added stitch before it changes the next row.
For a single-crochet row, make one chain after the last stitch, then turn the work. The chain gives you room to begin the next row.
Look across the top edge for the V shapes made by each stitch. Insert your hook under both strands of the next V unless your pattern says otherwise.
Whether the turning chain counts as a stitch depends on the pattern. Read that instruction carefully, because counting it when the pattern excludes it can add a stitch.
The last V at the row edge can sit close to the turning chain. Check that spot before you turn again, especially if your row count suddenly changes.
When your row edges stay steady, a taller stitch can add a different fabric texture.
When should you learn double crochet?
Single crochet makes a lower, denser fabric than double crochet. Try double crochet when you want a taller stitch and a more open fabric.
In US crochet terms, double crochet is abbreviated dc. It commonly starts with a turning chain of three, but a pattern can set another count or treat that chain differently.
To make a double crochet, yarn over, then insert the hook into the stitch. Yarn over and pull up a loop, leaving three loops on the hook.
Yarn over and pull through the first two loops. Then yarn over again and pull through the last two loops to complete the stitch.
Single crochet and double crochet use different steps and make different fabrics. A chain stitch forms a foundation or space, rather than a row of either stitch.
| Stitch | Hook setup or loop count | Resulting fabric or purpose |
|---|---|---|
| Chain stitch | Yarn over, pull through one loop | Foundation chain or open spaces |
| Single crochet | Pull up a loop, then pass through two | Lower, denser fabric |
| Double crochet | Yarn over first, then work through loops in pairs | Taller stitch with more space |
A pattern may say whether the turning chain counts as a stitch. Follow that direction so the row edges keep the intended stitch count.
Use either stitch for a small practice piece, then choose a first project that fits your patience and interests.

What should your first crochet project be?
You can make a small square for quick practice or choose a blanket for a longer commitment. A small square gives you room to repeat the same stitch without managing a large piece.
Make a small swatch first to check your stitch consistency and practice counting rows. A swatch is a small sample of the fabric your project will use.
Make a small practice square first
| Project | Shape or construction | Skill it practices |
|---|---|---|
| Small square | Flat rows with matching sides | Repeating stitches and counting rows |
| Simple dishcloth | One flat rectangle or square | Even edges and steady stitch size |
| Blanket | Repeated rows or smaller motifs | Keeping count over a larger project |
Use the same stitch across the square, then compare its rows. If the edges widen or narrow, check your stitch count before adding more rows.
A simple dishcloth is another useful first crochet project. It is flat and small enough to practice even edges, while still becoming a usable item.
How to crochet a blanket after a swatch
How to crochet a blanket depends on the pattern, yarn, and construction you choose. A beginner can use a simple repeated stitch or join smaller squares instead of starting with a complex design.
A large project can magnify uneven tension or a changing stitch count. A small swatch gives you a chance to notice those issues before they affect many rows.
For project ideas beyond a square, browse beginner-friendly crochet patterns and project ideas. You can also explore Hooksylane on Pinterest as a separate place to browse crochet ideas.
Once you have chosen a piece and followed its pattern, secure the final loop and hide the yarn ends.
How do you finish a crochet project neatly?
At the final loop, secure the yarn so the last stitch cannot unravel. A firm finish keeps the work in place without pulling the edge out of shape.
Leave a tail about 6 inches (15 cm) long when you fasten off. That length gives you enough yarn to weave through nearby stitches.
Leave about 6 inches (15 cm) of yarn at the end, then weave it through stitches without puckering the fabric.
- Cut the yarn, leaving a tail about 6 inches (15 cm) long.
- Pull the tail through the final loop to secure it.
- Thread the tail through a yarn needle.
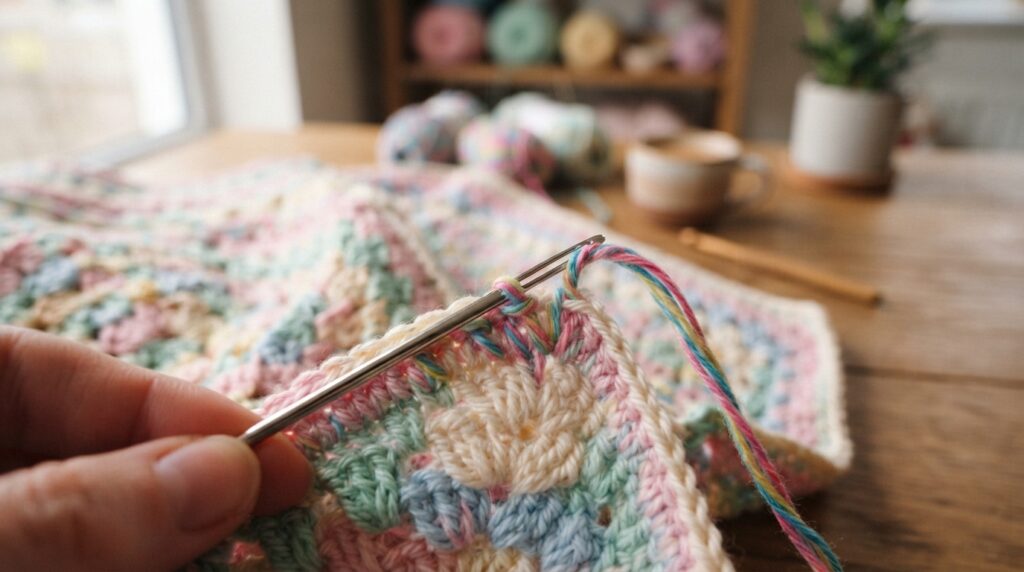
- Weave it through nearby stitches without puckering the fabric.
- Trim the extra yarn after the end feels secure.
Weave the tail through the backs of several stitches, following their path rather than pulling them tight. If the fabric gathers, loosen the tail before trimming it.
Blocking is optional and depends on the fiber and project. It can help shape some pieces, but it is not needed for every first attempt.
Decorative edges are optional, too. Follow your pattern’s finishing directions when they differ from these steps.
A beginner crochet book can sit beside written patterns and offer stitch diagrams or photographs. Those visuals can help when you want to compare your hook position with a finished stitch.
Try one more small practice piece or a simple pattern, then keep practicing at a comfortable pace.
Conclusion
Your first piece does not need to be perfect to be complete. Comfort and practice matter more than making every early stitch look alike.
Counting helps keep a small project on track. Check your stitch count at each row’s end, and you can catch a change before it spreads.
Make a short practice square using single crochet. Count the stitches and rows, then finish the loose ends.
Start that square with relaxed yarn tension, and let your hands learn the motions at a comfortable pace.