How to Improve Your Crochet: 10 Techniques for Neater Results
Table of Contents
Small, steady changes can make your stitches and edges look more polished. If your first rows feel frustrating, you can improve by spotting what changes and practicing one habit at a time.
A turning chain is the chain stitches worked at the end of a row to bring your hook to the height needed for the next row. This article uses US crochet terms; UK patterns use different stitch names, such as double crochet for US single crochet.
Neatness grows through close observation and practice, not one perfect row. Use these headings to find the topic you need:
- How Can You Spot the Source of Uneven Results?
- How to Improve Crochet With More Consistent Tension
- Which Hook and Yarn Make Stitches Easier to See?
- How Do You Keep Stitch Height Consistent?
- How Can You Make a Neater Foundation Chain?
- How Do You Keep Crochet Edges Straight?
- How Do You Check Stitch Counts Without Losing Your Place?
- How Can You Make Color Changes Neater?
- How Do You Correct Common Stitch Errors?
- When Does Blocking Help Crochet Look Neater?
- How Do You Finish Projects Without Bulky Ends?
- Conclusion
Begin by identifying what looks uneven in your current work, then choose one skill to examine first.
How Can You Spot the Source of Uneven Results?
A swatch may look fine in the middle while its edges flare outward. Work several rows with your project yarn and hook before deciding what needs to change.
Look across the fabric, not just at one stitch. Check whether the rows widen or narrow, and notice where the change first appears.
Use this quick check after completing several rows:
- Compare the width of each row.
- Inspect the first and last stitches.
- Look for loops that seem tight or loose.
- Record the hook size and yarn used.
A crochet swatch gives you a small area to study without risking a large project. Check whether stitch size changes near the beginning, middle, or end of a row.
One uneven row tells you less than a pattern that repeats. If several rows flare at the same edge, inspect how you work there before changing other habits.
Write down what you see in plain terms, such as “last stitch gets taller” or “left edge widens.” A brief note helps you compare later attempts.
Use the observed problem to choose the next technique to practice.
How to Improve Crochet With More Consistent Tension
Adjust the way your yarn feeds first when your stitches vary in size. Consistent tension starts with a steady yarn path and repeatable loops.
Technique 1 focuses on controlling the yarn without squeezing it. A tight grip is not the same as controlled tension; it can make your hand stiff and your loops hard to form.
- Settle into a comfortable yarn hold. Guide the yarn around your fingers in a way that lets it slide.
- Keep the working yarn moving at a steady pace. Let out more yarn as needed instead of tugging sharply.
- Make each loop using the same part of the hook. A repeated motion helps keep loop size alike.
Try the hold for a few stitches, then pause and check how the yarn moves. If your fingers clamp down, loosen them before continuing.
When your hands stiffen, set the hook down and relax your fingers. A short pause can make it easier to return to a smooth, even motion.
Do not force every stitch to feel identical by pulling hard. Aim for yarn that moves freely while each loop stays close in size to its neighbors.
Practice on a small swatch and compare a few stitches side by side. If one row tightens, notice whether your hand began gripping more firmly.
Once the yarn feeds more evenly, choose a hook and yarn that make each stitch easy to see.
Which Hook and Yarn Make Stitches Easier to See?
Light, smooth yarn makes stitch shapes easier to distinguish than dark or fuzzy yarn. Start with the yarn and crochet hook size named in your pattern, then judge the fabric with a swatch.
Technique 2 is choosing tools that let you see the loops and work comfortably. A swatch shows whether the fabric feels suitable and whether each stitch stands out clearly.
| Yarn or hook choice | What you can see | Useful for | Trade-off |
|---|---|---|---|
| Smooth light-colored yarn | Clear loops and stitch tops | Learning stitch placement | Shows small flaws clearly |
| Dark smooth yarn | Stitch shape, with less contrast | Projects needing a dark shade | Harder to read in dim light |
| Fuzzy or highly textured yarn | Less distinct stitch edges | Projects that call for texture | Can hide stitch tops |
| Hook one size larger | More open loops | Testing a tight-feeling swatch | Can loosen fabric and change gauge |
Gauge describes the size of your stitches and fabric. A larger hook can make a swatch looser and change the project’s finished size.
Test any hook change on a swatch rather than assuming it improves your work. Compare the fabric with the pattern’s stated gauge and feel.
Good lighting also helps you see the tops of stitches. Turn the swatch and view it from different angles if a stitch opening remains hard to spot.
Choose tools that support the pattern and let you read the fabric. Then focus on forming every stitch at a consistent height.
How Do You Keep Stitch Height Consistent?
A row with alternating tall and short stitches often points to uneven loop height. Draw each loop to a similar height before you finish the stitch.
Technique 3 builds on the yarn feed you have practiced. A loop should slide freely on the hook without becoming oversized or tight against it.
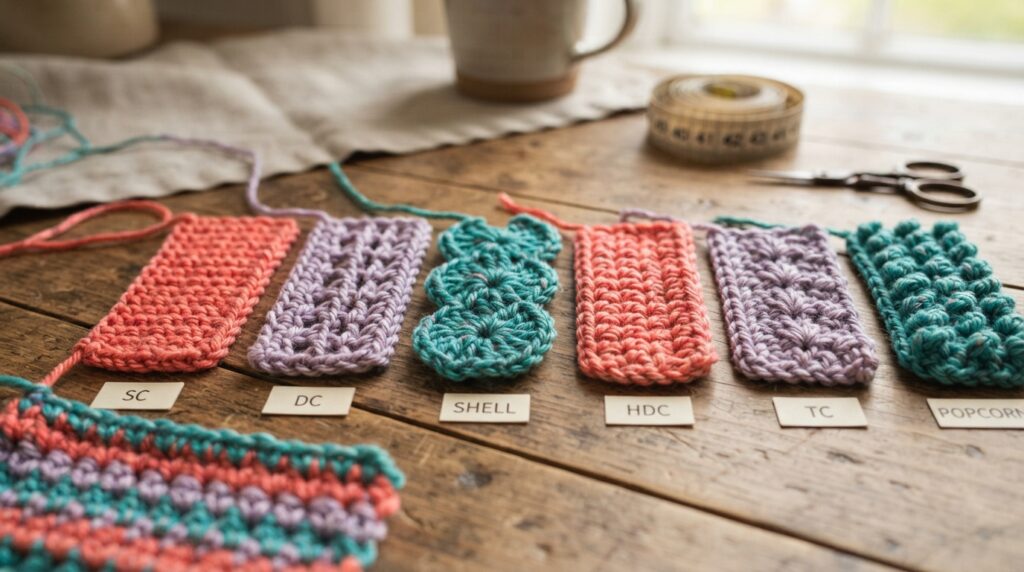
- Draw loops up to a consistent height. Check them against nearby stitches before finishing each one.
- Avoid pulling the working loop tight against the hook. Leave enough room for the hook to move smoothly.
- Repeat the same hook movement for each stitch. Keep the motion steady instead of changing your wrist angle.
A common mistake is tightening the working loop after every stitch. Reset it to a comfortable, consistent size rather than cinching it around the hook.
Compare several stitches side by side as you work. If one looks taller, check the loop on your hook and the movement you used.
Keep the hook in the same position as you draw up each loop. Small changes in how high you lift the yarn can make the row look uneven.
Do not stretch a loop to match a stitch that is already too tall. Make the next stitches with the same comfortable motion, then inspect the row.
Consistent stitch height helps the fabric look balanced, but the first row can still pull out of shape. Make your foundation chain as even as the rows above it.
How Can You Make a Neater Foundation Chain?
A first row that looks much tighter than the rows above it often starts with a tight foundation chain. Make the chain relaxed and even, then work into the openings specified by your pattern.
Technique 4 helps you create a starting edge that does not pull the fabric inward. A skipped chain or inconsistent insertion can distort the first row.
- Make each chain at a relaxed, even size. Avoid pulling each loop snug against the hook.
- Count the required chains carefully. Check the pattern before you begin the first row.
- Turn the chain the same way each time. A consistent position makes the openings easier to find.
- Insert the hook into the chain opening named by the pattern. Keep the same method across the row.
Some crocheters use a hook one size larger for the foundation chain. Check the pattern and test a swatch first, because this changes the starting edge.
Look along the chain before working into it. Each opening should be easy to find, and the chain should not curl tightly around your hook.
If you skip a chain, the first row may contain fewer stitches than planned. Working into different loops from one chain to another can also twist or pull the edge.
Count the chains as you make them, then check the number before starting. If the chain feels much tighter than your stitches, try a relaxed version on a swatch.
A straight foundation edge gives you a better start. Next, keep both sides of every row straight by following the pattern’s edge instructions.
How Do You Keep Crochet Edges Straight?
An edge becomes uneven when you repeatedly miss or add stitches at row ends. Follow the pattern’s turning-chain rule and identify the first and last stitch of every row.
Technique 5 is to use the pattern’s instructions, not a universal chain count. Marking an edge can help you find the right stitch without changing the pattern.
Turn chains that do not count as stitches
When the turning chain does not count, work the first stitch into the first actual stitch of the row. Do not treat the chain as an extra stitch.
At the far edge, work the final stitch into the last stitch from the previous row. That stitch can sit close to the turning chain, so check its top before moving on.
Place a stitch marker in the first or last stitch if the edge is hard to read. Move it up as you work, and use the pattern to confirm the row’s stitch count.
Turn chains that count as stitches
When the pattern counts the turning chain, it stands in for a stitch at the row edge. The next stitch usually goes into the following stitch, not beside the chain.
At the other edge, follow the pattern’s stated placement for the final stitch. Working another stitch beside a counted chain can add one to the row.
Turning-chain habits vary by stitch and pattern. The table shows common US conventions, but the pattern controls the count and placement.
| US stitch | Common turning chain | Does the chain count? |
|---|---|---|
| Single crochet | Chain 1 | Usually no, pattern controls |
| Half double crochet | Often chain 1 or 2 | Varies by pattern |
| Double crochet | Commonly chain 3 | May count, pattern controls |
US single crochet rows commonly begin with chain 1, which usually does not count as a stitch. US double crochet rows commonly use chain 3, which may count.
Half double crochet conventions vary. Check the pattern each time you start a new row type, especially when it gives a stitch count in parentheses.
Keeping the edge even depends on knowing where each row begins and ends. Count stitches consistently so the edge check becomes part of a reliable routine.
How Do You Check Stitch Counts Without Losing Your Place?
A project can gradually widen when one extra stitch goes unnoticed in each row. Check the stitch count before starting another row, then compare it with the pattern’s stated number.
Technique 6 is a short routine that catches count changes while they remain easy to find. It also helps you separate stitches from chain spaces when a pattern names both.
- Count the row’s stitches from one edge to the other.
- Mark the first or last stitch when its position is hard to see.
- Check your total against the count stated in the pattern.
- Recount before beginning any shaping, such as an increase or decrease.
A stitch marker is a small removable clip or ring that marks a stitch or position. It helps you find a place again, but it does not replace counting.
Read the pattern’s wording closely. A chain space is an opening made by chain stitches, and it may not count as a stitch.
If you lose your place, pause and count from a clear edge instead of guessing. A marker can hold the first stitch while you check the rest of the row.
For shaping, confirm the count before you make the planned change. That check helps you see whether an increase or decrease belongs in the right place.
Once the row count stays steady, you can change colors without letting the boundary add or hide a stitch.
How Can You Make Color Changes Neater?
A color join can look like a small knot or leave a gap at the edge. For a common color change, use the new yarn on the final yarn-over of the stitch before the change.
Technique 7 keeps the stitch body in the old color while the next loop begins in the new shade. The exact placement can depend on the pattern and stitch.
- Prepare the new color before finishing the stitch at the boundary.
- Complete that stitch with the new color on its final yarn-over.
- Continue with the new shade without pulling the transition too tight.
Keep the new strand snug enough to close the gap, but do not cinch it. A tight join can pull the edge inward and make the color shift look pinched.
Carrying yarn can add bulk or show through the front of the fabric. Carry it only when the pattern and fabric allow; otherwise, leave tails to secure later.
Turn the work and check the boundary from both sides. Loose loops, uneven tension, or visible carried yarn can make the color line look rough.
For a longer color project, use a consistent method at each change. The crochet color-change instructions explain how placement can vary across rows, rounds, and taller stitches.
A secure transition keeps the fabric stable as you continue. Fixing an error early is easier than correcting a gap after several more rows.
How Do You Correct Common Stitch Errors?
The easiest time to fix a stitch error is as soon as you spot it. Find the last correct stitch, then undo the work only as far as needed.
Technique 8 is to repair the fabric without forcing a later row to hide an earlier mistake. Pulling out work often looks cleaner than building a correction into the next row.
A missed stitch at the edge
A missed edge stitch can happen when you mistake the last stitch for the turning chain. Find the last correct stitch, then undo the row to that point if the pattern requires the missing stitch.
A small correction may work only when the pattern allows it and the fabric stays sound. Do not add a stitch in the next row just to disguise a missing one.
An extra stitch in a row
An extra stitch often comes from working into a counted turning chain or repeating a stitch by mistake. Trace the row back from the last correct stitch, then undo the extra work.
If the extra stitch sits in a place where the pattern allows an increase, keep it only when the instructions support that change. Otherwise, undo it before continuing.
A stitch worked in the wrong place
A twisted or misplaced stitch may come from inserting the hook into the wrong loop or space. Compare the stitch with nearby stitches to find where the row first changes.
Undo to the last correct stitch if the error changes the fabric’s structure. Make a small correction only when it follows the pattern and does not distort the row.
| What you notice | Likely cause | Practical fix | Prevention |
|---|---|---|---|
| Missed edge stitch | Last stitch mistaken for chain | Undo to the last correct stitch | Mark the edge stitch |
| Extra stitch | Worked twice or into chain | Undo the extra stitch | Check the pattern count |
| Visibly twisted stitch | Hook entered the wrong loop | Undo and work into the right place | Check the stitch top |
| Color-change gap | Loose transition loop | Undo to the join and redo it | Keep the new shade snug |
To help locate errors, compare the current row with the one below it. The common crochet mistake fixes cover errors from the starting chain through finishing.
Before setting the hook down, secure the working loop so it cannot pull loose. Resume by checking the last stitch you completed, not by guessing where you stopped.
Fixing the structure first gives you a sound piece to shape. Next, consider whether blocking can relax the finished fabric without hiding a construction error.
When Does Blocking Help Crochet Look Neater?
Blocking is most useful for shaping a sound piece, not hiding a construction error. It can relax or shape fabric, but it cannot correct the wrong stitch count or repair a structural mistake.
Technique 9 uses moisture or steam to help fabric settle into a shape. The right method depends on the fiber and the care instructions for your yarn.
Wet blocking means dampening the piece and shaping it as it dries. Steam blocking uses steam to relax the fabric, but some fibers may not suit that method.
Test a discreet swatch first to see how the yarn responds. Check the yarn label and care instructions before wetting or steaming the full piece.
Shape the fabric without stretching it beyond the pattern’s intended dimensions. Pins can hold an edge in place, but they should not force the work wider.
Use care around hot steam, which can burn skin. Keep the steamer or iron from pressing directly on fibers unless the care instructions allow it.
Blocking can help a sound piece lie flatter or hold a planned shape. It cannot make a skipped stitch reappear or fix an uneven count.
Once the fabric sits as intended, secure the yarn ends so the edges and tails stay tidy.
How Do You Finish Projects Without Bulky Ends?
A finished piece with visible loose tails can look incomplete, even when the stitches are neat. Leave a workable tail, weave it through several stitches in more than one direction, then trim after checking it.
Technique 10 makes the final fabric look tidy and helps keep yarn ends from slipping free. A very short tail is hard to secure, while thick yarn can form a lump in too few stitches.
- Leave a workable tail when you finish the yarn.
- Weave it through the backs of several stitches in more than one direction.
- Check that the end feels secure before trimming it close.
Use a yarn needle to pass the tail through the backs of stitches. Change direction once or more so the end does not rely on one straight path.
Thick yarn can show through if you weave it into too few stitches. Spread the tail through the fabric where the pattern and yarn allow.
After securing the ends, check the finished piece against this list:
- Edges lie as the pattern intends.
- Stitch counts match the pattern.
- No loose loops remain.
- Yarn tails feel secure.
- Care instructions suit the yarn.
For more finishing and edge ideas, browse Hooksylane on Pinterest as a separate source of crochet inspiration.
Choose one checklist item to practice on your next small project.
Conclusion
One focused adjustment is easier to assess than changing several habits at once. Keep checking the pattern’s stitch-count instructions as you work, since a neat edge depends on the right number of stitches.
Your next step is simple: make a small swatch and practice the technique that addresses its most visible issue. Keep the yarn and hook steady while you observe the change.
Start that swatch, then compare its next row with the previous one.