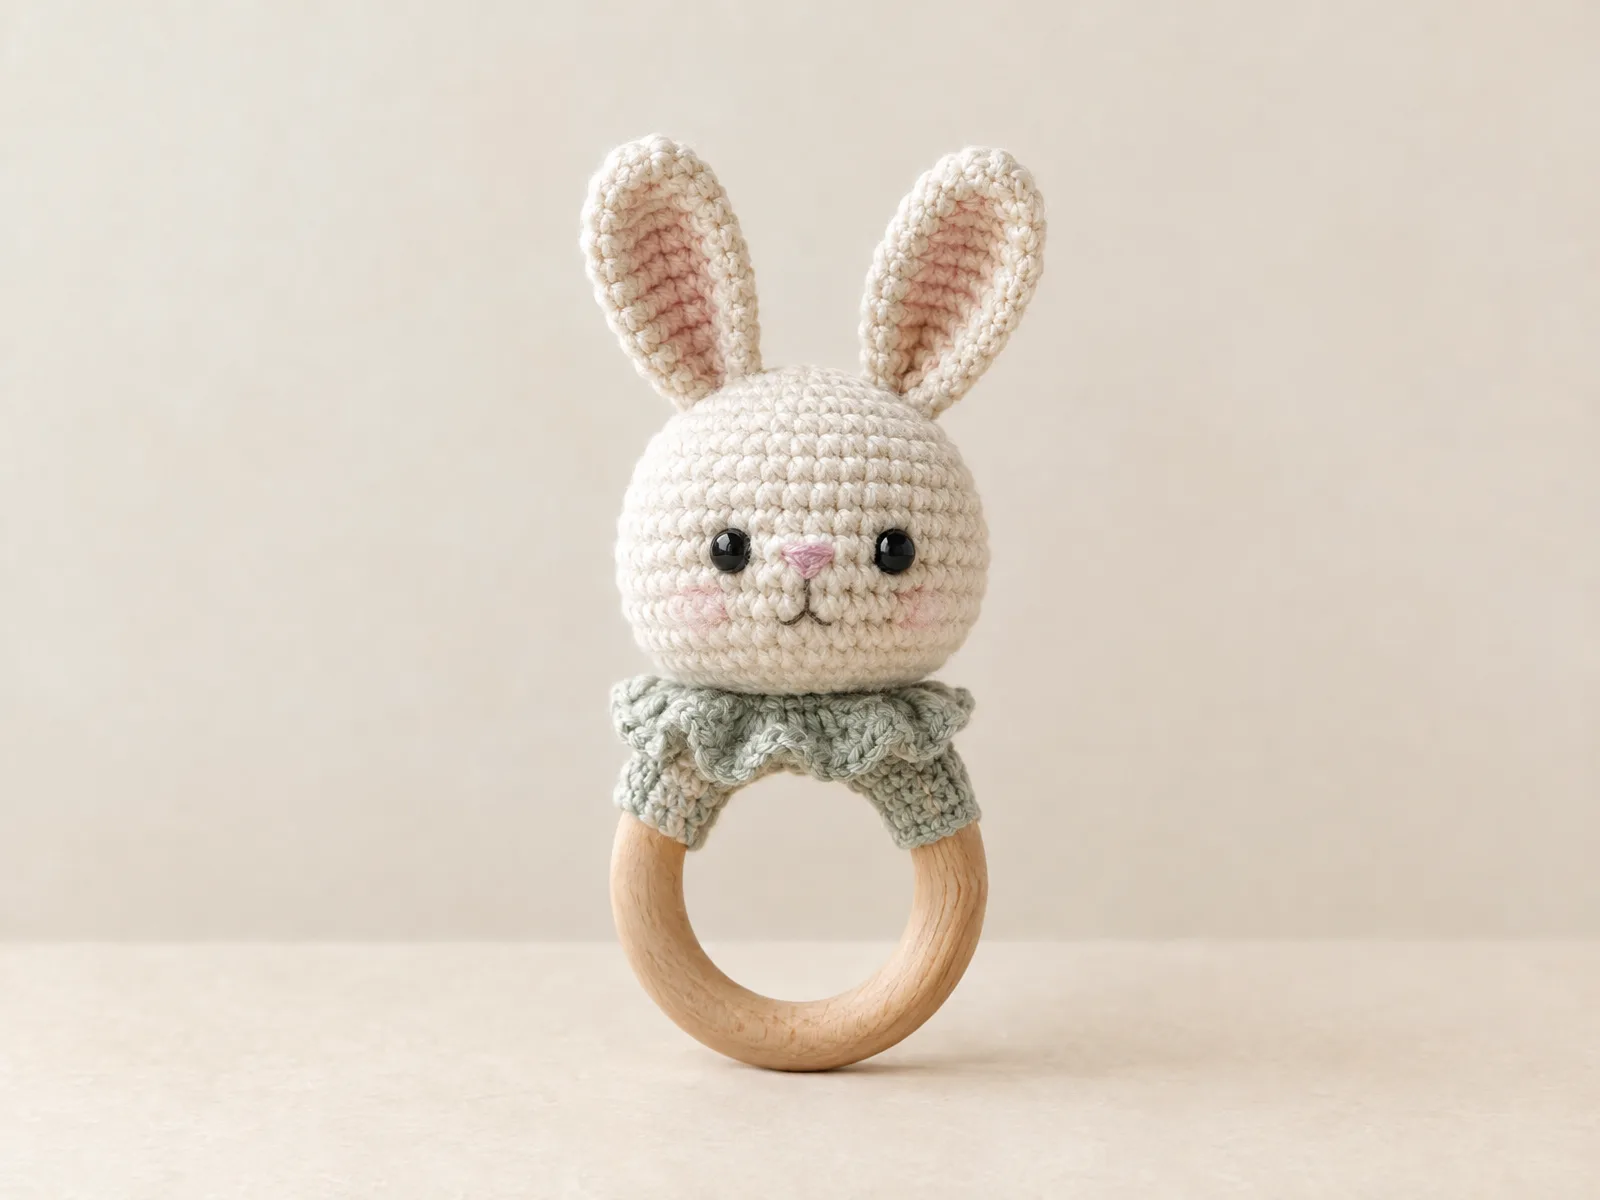
Crochet Baby Rattle Pattern with Embroidered Details
Crocheting a soft, huggable rattle is one of the sweetest ways to welcome a new baby into the world. Handmade toys carry a warmth that store-bought items simply can’t match, and a rattle is small enough to finish in a weekend while still feeling like a meaningful gift. This guide walks you through a complete crochet baby rattle pattern that uses embroidered facial details instead of any attachable pieces, making it a thoughtful choice for a baby-safe project.
This pattern is written for confident beginners and intermediate crocheters who are comfortable working in continuous rounds, increasing and decreasing, and using a tapestry needle for embroidery and assembly. Before you start, read through the safety notes and materials list carefully, since the choices you make here directly affect how appropriate the finished rattle is for a young child.
Project Overview
| Detail | Description |
|---|---|
| Skill level | Beginner-friendly with basic amigurumi experience |
| Crochet terminology | US terms |
| Construction method | Worked in continuous rounds, pieces joined by sewing |
| Yarn type | Washable cotton DK weight |
| Hook size | 2.5–3.5 mm |
| Facial details | Embroidered with floss, no attached hardware |
Finished measurements will vary depending on the yarn weight you choose, your hook size, and how tightly you crochet, so treat this pattern as a flexible guide rather than a fixed set of dimensions.
Materials and Tools
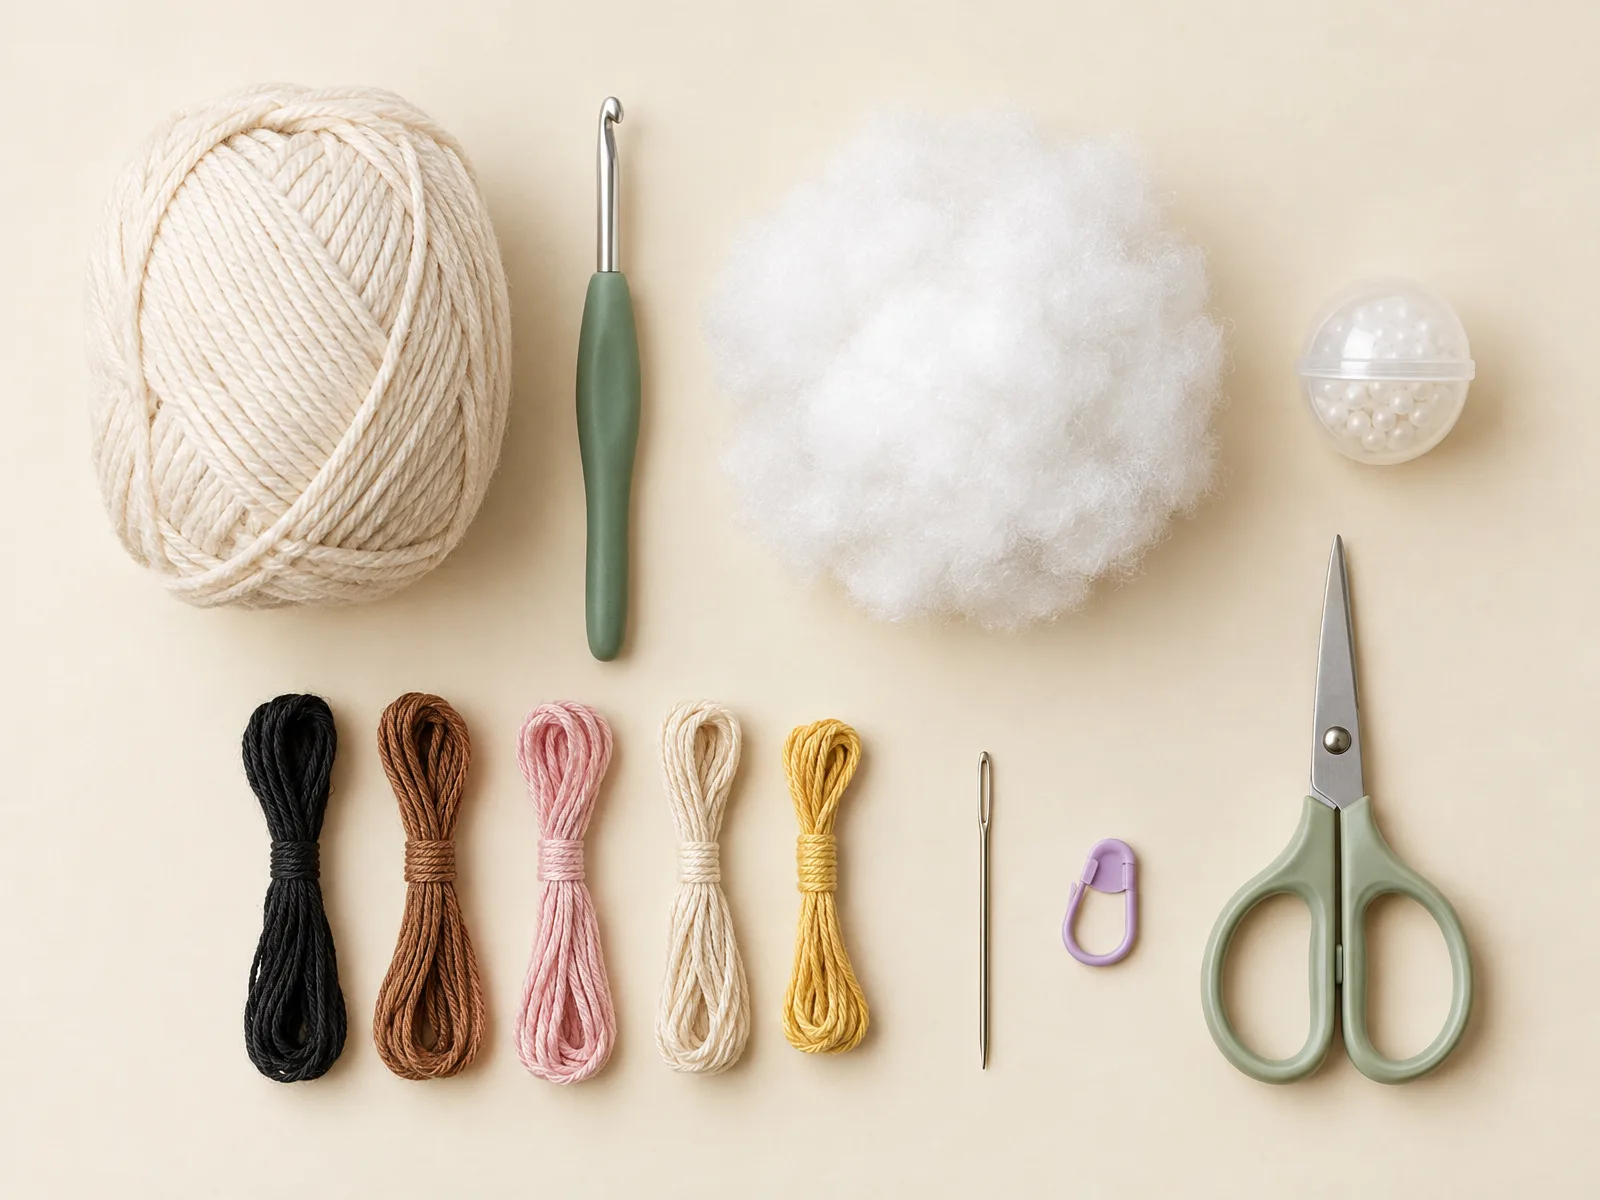
Essential materials:
- Washable cotton DK weight yarn
- 2.5–3.5 mm crochet hook, sized to create tight, gap-free stitches
- Polyester fiberfill for stuffing
- Embroidery floss for all facial details
- Tapestry needle for sewing and embroidery
- Stitch marker to track the start of each round
- Scissors
Optional add-on:
- A purpose-made sealed rattle insert, added along with the fiberfill for gentle sound
This pattern intentionally omits safety eyes, buttons, and beads. All facial features are embroidered directly onto the fabric, which keeps the rattle free of small, detachable parts.
Crochet Abbreviations
- mr – magic ring
- ch – chain
- sc – single crochet
- inc – increase (two single crochets in one stitch)
- dec – decrease (single crochet two stitches together)
- st(s) – stitch(es)
- rnd(s) – round(s)
- sl st – slip stitch
Important Notes Before You Begin
This rattle is worked in continuous rounds rather than joined rounds, so you will not slip stitch at the end of each round. Instead, place a stitch marker in the first stitch of every round and move it up as you go, so you always know where a new round begins.
Keep your tension firm and even throughout. Tight stitches matter more here than in most amigurumi projects because they help contain the stuffing and, if used, the rattle insert, without leaving gaps that fiberfill or floss could poke through.
Stuffing happens gradually as the body narrows near the top of the shaping, not all at once at the very end. Add small amounts of fiberfill as you work the decrease rounds, adjusting firmness as you go, and add the optional rattle insert once there is enough stuffing around it to keep it from shifting or being felt through the fabric.
When you sew pieces together, use a whipstitch or mattress stitch with a doubled length of yarn or floss and weave every tail back through the body of the work rather than tying visible knots on the surface. Because this project may be handled by a baby, embroidered facial features are the safer choice compared to plastic or wired safety eyes, which can work loose over time and present a choking hazard. No amount of careful construction makes a handmade toy officially child-safe or certified, so use your own judgment about the age and supervision level appropriate for this item.
Crochet Pattern Instructions
Body
Make 1.
- Rnd 1: 6 sc in a magic ring (6)
- Rnd 2: inc in each st around (12)
- Rnd 3: (sc, inc) around (18)
- Rnd 4: (2 sc, inc) around (24)
- Rnd 5: (3 sc, inc) around (30)
- Rnd 6: (4 sc, inc) around (36)
- Rnds 7–11: sc in each st around (36) — work 5 rounds even
- Rnd 12: (4 sc, dec) around (30) — begin adding fiberfill loosely
- Rnd 13: (3 sc, dec) around (24) — continue stuffing firmly
- Rnd 14: (2 sc, dec) around (18) — add the optional rattle insert now, nestled in the center of the fiberfill
- Rnd 15: (1 sc, dec) around (12)
- Rnd 16: dec around (6)
Fasten off, leaving a short tail. Thread the tail through the remaining 6 stitches, pull snugly to close the opening, and weave the end inside the body.
Ears
Make 2.
- Rnd 1: 6 sc in a magic ring (6)
- Rnd 2: inc in each st around (12)
Fasten off, leaving a long tail for sewing. These ears are worked flat and are not stuffed; they will be sewn directly onto the head area of the body for a soft, rounded shape.
Handle Loop
Make 1.
- Foundation: Chain 20, join with a sl st to the first chain to form a ring, being careful not to twist the chain.
- Rnd 1: sc in each chain around the ring (20)
Fasten off, leaving a tail for sewing. This loop is worked flat and left unstuffed, since its purpose is to give a baby something easy to grasp.
Assembly and Finishing
Begin by laying the finished body flat with Round 1 facing you as the center back and the closed decrease point at the top, which will serve as the crown of the head area.
Position the two ears on either side of the crown, roughly above Rounds 12–14 of the body, spacing them symmetrically. Pin or hold them in place, then whipstitch around the edge of each ear to secure it to the body, weaving in the tails afterward.
Attach the handle loop to the top center of the crown, directly over the closed opening, stitching it firmly around its base so it can withstand tugging and mouthing without pulling loose.
For the face, use embroidery floss and a tapestry needle to stitch simple features onto the front of the body, generally centered between Rounds 6 and 10. Small straight stitches or satin stitch work well for eyes, and a short curved line makes a simple smile. Secure every embroidery thread with a few small stitches on the inside of the work rather than a visible knot, then trim and tuck the ends away.
Customization Ideas
- Work the body in a soft pastel or gender-neutral color palette to suit different gift occasions.
- Give the rattle a simple animal look by shaping the ears differently, such as slightly longer ovals for a bunny-style rattle.
- Add a subtle textured row of stitches around the middle of the body to mimic a belly band without introducing extra pieces.
- Skip the handle loop entirely if you prefer a rounder, ball-style rattle that a baby can hold with both hands.
Any of these changes are cosmetic and do not affect the core shaping, so they can be mixed and matched freely.
Care and Safety
Because this rattle is made from washable cotton yarn, it can generally be laundered according to the yarn label’s care instructions, though hand washing and air drying will help it keep its shape longest over repeated use.
Embroidered facial features are a safer choice than plastic safety eyes or buttons for anything intended for a baby, since there are no small parts that can loosen and detach over time. Even so, a handmade toy like this one has not been safety tested or certified, so it should always be used with the supervision and judgment appropriate for the child’s age. If you choose to include the optional sealed rattle insert, make sure it stays fully and securely enclosed within the stuffing at all times.
Common Mistakes and Troubleshooting
| Problem | Likely cause | How to fix it |
|---|---|---|
| Body looks lumpy or uneven | Stuffing added unevenly or too loosely | Remove excess stuffing and redistribute in small, even amounts as you close the final rounds |
| Stitch count drifts off from the pattern | A stitch marker was skipped or an increase/decrease was missed | Count stitches at the end of each round and recheck against the stated totals before continuing |
| Ears sit lopsided | Ears were sewn on without measuring symmetry first | Pin both ears in place and compare their position before stitching either one permanently |
| Visible gaps between stitches | Hook size too large for the yarn weight | Switch to a smaller hook within the recommended range for tighter stitches |
| Handle loop feels floppy or twisted | Chain was twisted before joining into a ring | Undo the join, lay the chain flat to check for twists, then rejoin carefully |
| Rattle insert can be felt through the fabric | Not enough fiberfill surrounding the insert | Remove the insert, add more stuffing around it, then reinsert before closing the final rounds |
Frequently Asked Questions
Can I use a different yarn weight for this pattern?
Yes, though switching yarn weights will change the finished size and may require adjusting your hook size to keep stitches tight enough to contain the stuffing securely.
Is it safe to add a rattle insert for a newborn?
A sealed rattle insert can be a nice touch, but always make sure it is fully enclosed in fiberfill and check the finished toy periodically for wear, especially as a baby grows and begins mouthing toys more actively.
Why does the pattern avoid safety eyes and buttons?
Safety eyes, buttons, and beads can loosen over time and become a choking hazard, so this pattern relies entirely on embroidered features for a more cautious approach.
How do I keep my stitches tight enough?
Choosing a hook on the smaller end of the recommended range and crocheting with slightly firmer tension than usual will help keep gaps closed and stuffing contained.
Can I skip the handle loop?
Yes, the handle loop is optional. You can finish the rattle as a simple stuffed ball by completing the body and ears only, then embroidering the face directly onto the sphere.
What is the best way to check my finished size?
Because finished size depends on your yarn weight, hook size, and tension, the best way to estimate it is to measure your own swatch or completed body rather than relying on a fixed number.
Final Thoughts
With a stuffed body, sewn-on ears, a grasp-friendly loop, and entirely embroidered facial details, this rattle comes together using simple, repeatable shaping that’s easy to follow from start to finish. The result is a soft, thoughtfully constructed toy that avoids small attachable parts while still feeling charming and personal.
If you give this pattern a try, we’d love to see how your version turns out and hear about any color or embroidery choices you made along the way. Feel free to leave a comment with your experience, and browse more baby crochet ideas for your next project. For extra color and styling inspiration, you can also explore our crochet inspiration board for more baby-friendly design ideas.