Free Ghost Amigurumi Crochet Pattern: Halloween Witch Ghost
Table of Contents
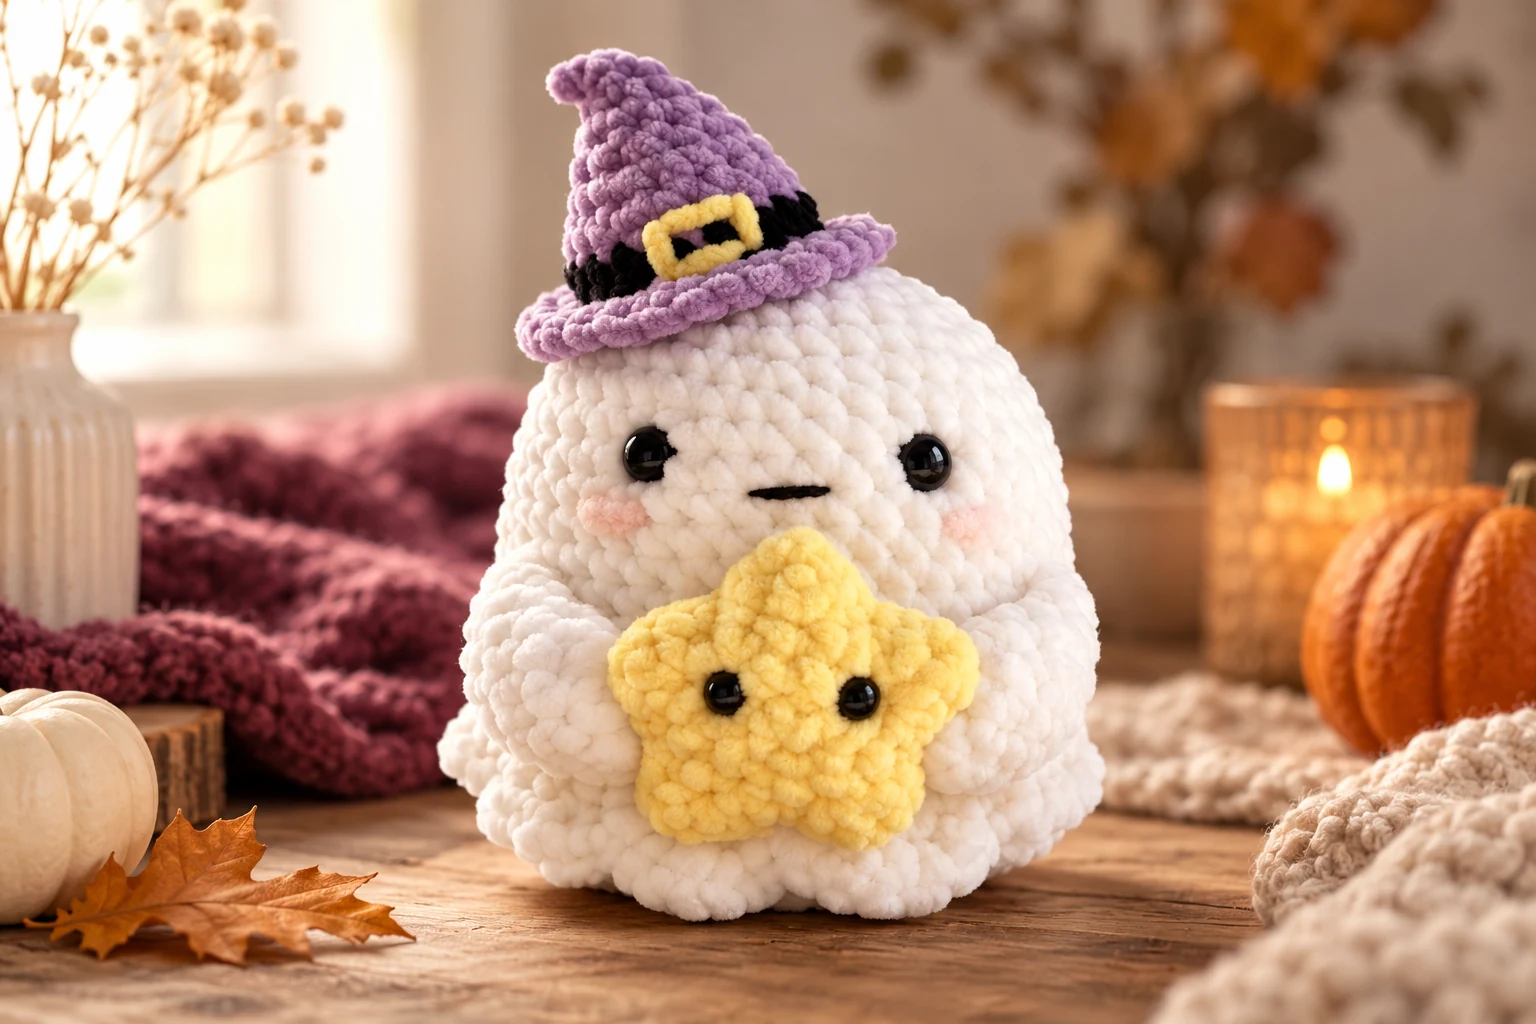
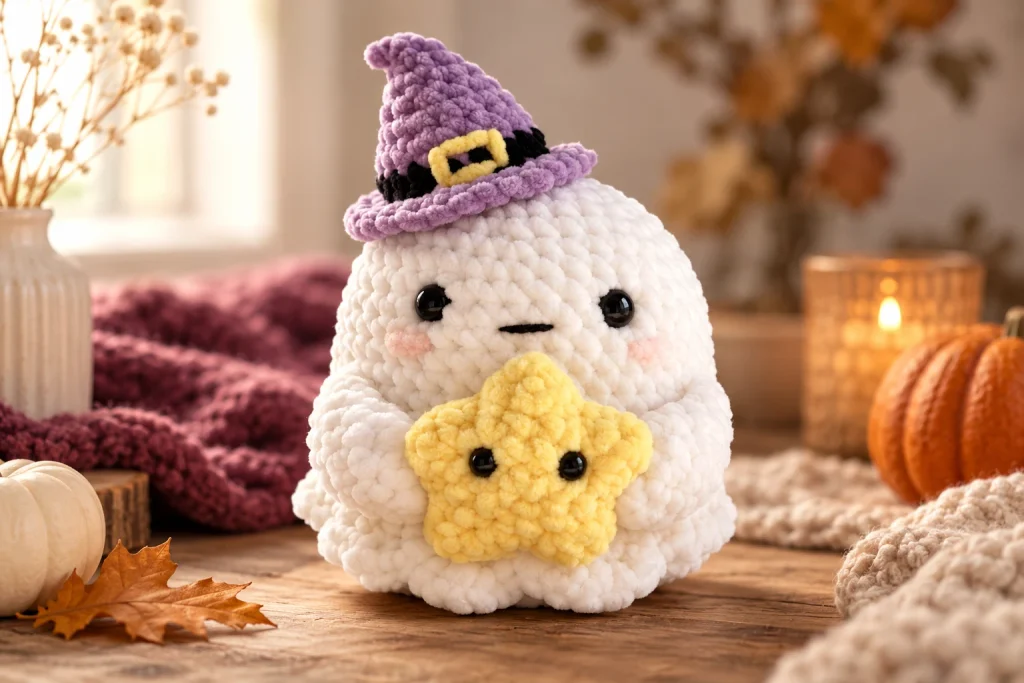
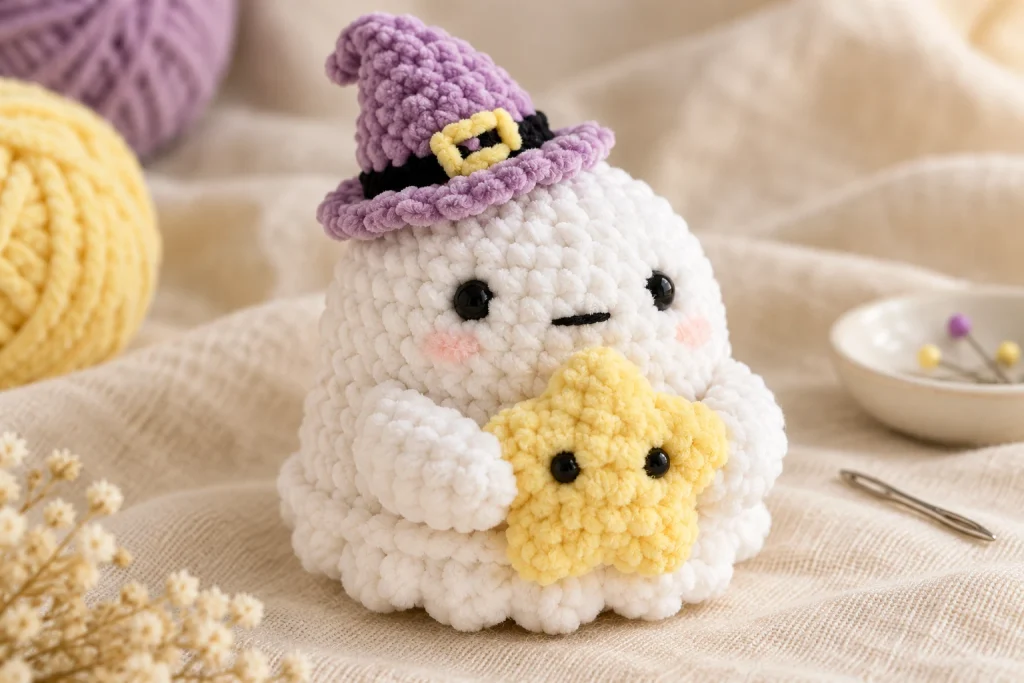
This ghost amigurumi crochet pattern turns soft chenille yarn into a chubby Halloween friend wearing a crooked purple witch hat and cuddling a tiny yellow star. The complete US-terms tutorial includes every round for the ghost, separate base, arms, stuffed star and hat, plus yarn substitution, facial placement, assembly, troubleshooting, safety and care guidance.
Ghost Buddy Pattern at a Glance
- Skill level: Confident beginner.
- Construction: The open ghost body is worked top-down, the flat base closes it, and the arms, star and hat are sewn on.
- Yarn: Plush chenille or another smooth yarn that makes a dense fabric.
- Main techniques: Magic ring, single crochet, increases, front-loop-only stitches, half double crochet, double crochet and simple seaming.
- Finished size: Varies with yarn and hook; thicker chenille produces a larger, squishier ghost.
- Best Yarn for Amigurumi Guide for Soft and Durable Toys
- Your Crochet Hook Size Conversion Chart for Beginners
Materials for the Ghost Amigurumi
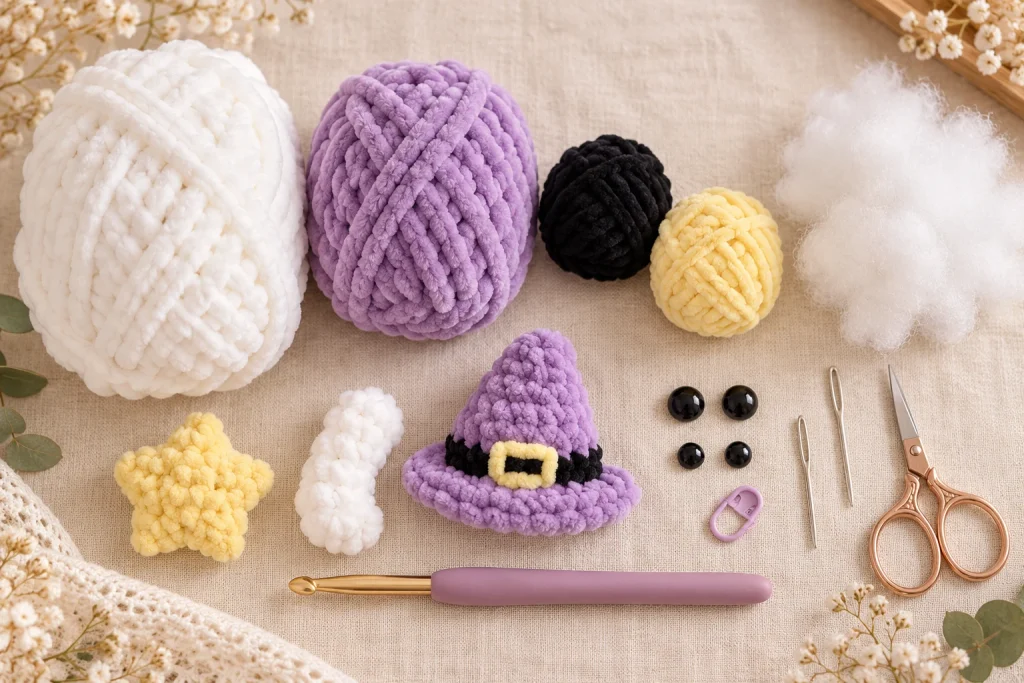
- White plush chenille yarn for the ghost body, base and arms.
- Purple plush yarn for the witch hat.
- Small amounts of black and yellow yarn for the hat band, buckle and star.
- A crochet hook appropriate for your yarn; choose a smaller size than the label suggests if needed to contain stuffing.
- Polyester toy stuffing, stitch marker, yarn needle, pins and scissors.
- Two safety eyes for the ghost and two optional smaller eyes for the star, or black yarn for embroidered eyes.
- Pink yarn or embroidery thread for optional blush.
Choosing Plush Yarn and Hook Size
The source pattern uses Honey Bunny and Baby Snuggle-style chenille. Plush yarn hides stitches, so keep a marker in the first stitch and count every shaping round. If the fabric stretches enough to expose stuffing, use a smaller hook. If your hook catches or the yarn sheds heavily, loosen your grip and use a hook with a smooth rounded head.

Using Regular Yarn Instead
You can make a smaller ghost with cotton or acrylic. Use one consistent yarn weight for the ghost, base and arms. The star and hat may be slightly lighter, but make a test round first: a large difference in thickness can make the hat too wide or the star too stiff.
US Crochet Abbreviations
| Abbreviation | US meaning |
|---|---|
| MR | magic ring |
| ch | chain |
| sl st | slip stitch |
| sc | single crochet |
| hdc | half double crochet |
| dc | double crochet |
| inc | work 2 stitches of the stated type in one stitch |
| FLO | front loop only |
| BLO | back loop only |
| R | round |
| st(s) | stitch(es) |
| FO | fasten off |
Before You Start
- Work all circular pieces in continuous spiral rounds unless a slip stitch is specifically written.
- Place the marker in the first stitch and move it after every round.
- Count the 40 body stitches before beginning the 15 straight rounds.
- Insert the ghost’s eyes before stuffing and before the base is attached.
- Stuff the body with small tufts, keeping the top rounded and the lower body chubby.
- Pin the arms, star and hat before sewing so the character looks balanced.
Complete Ghost Amigurumi Crochet Pattern
Ghost Body
R1: Work 6 sc in a MR. [6]
R2: Inc in each st around. [12]
R3: (Sc in next st, inc in next st) 6 times. [18]
R4: (Sc in next 2 sts, inc in next st) 6 times. [24]
R5: (Sc in next 3 sts, inc in next st) 6 times. [30]
R6: (Sc in next 4 sts, inc in next st) 6 times. [36]
R7: (Sc in next 8 sts, inc in next st) 4 times. [40]
R8-22: Sc in each st around. [40 for 15 rounds]
R23: Working in FLO, repeat 10 times: 2 sc in next st, 2 hdc in next st, 2 sc in next st, sl st in next st. Fasten off and weave in the end.
Eye placement: Insert the eyes between R9 and R10, approximately 7 stitches apart. Check the expression from the front before securing the backs. Embroider a small horizontal mouth one or two rounds below the eyes and add optional blush.
Stuffing: Fill the body gradually and make it pleasantly chubby. Keep the R23 ruffle free; the separate base will be sewn to the unused back loops of R22.
Bottom of the Ghost
R1: Work 6 sc in a MR. [6]
R2: Inc in each st around. [12]
R3: (Sc in next st, inc in next st) 6 times. [18]
R4: (Sc in next 2 sts, inc in next st) 6 times. [24]
R5: (Sc in next 3 sts, inc in next st) 6 times. [30]
R6: (Sc in next 4 sts, inc in next st) 6 times. [36]
R7: (Sc in next 8 sts, inc in next st) 4 times. [40]
Fasten off with a long sewing tail. Pin the base beneath the body and sew it to the unused back loops of body R22. Add more stuffing before closing the final section of the seam. The decorative R23 stitches should hang freely around the join.
Arms – Make Two
R1: Work 6 sc in a MR. [6]
R2: (Sc in next st, inc in next st) 3 times. [9]
R3-7: Sc in each st around. [9 for 5 rounds]
Stuff each arm lightly. Flatten the opening and work 4 sc across both layers to close it. Fasten off with a long tail for assembly.
Tiny Star – Make Two
R1: Work 5 sc in a MR. [5]
R2: Inc in each st around. [10]
R3: (Sc in next st, inc in next st) 5 times. [15]
R4: Repeat 5 times: work (hdc, dc, hdc) in the next st, then sl st in each of the next 2 sts. Fasten off; leave a long sewing tail on one star.
If desired, add small safety eyes between R2 and R3, about 2-3 stitches apart, before joining the two stars. Place the pieces wrong sides together, sew around the edge, stuff lightly before closing and shape all five points with your fingers.
Witch Hat
R1: Work 4 sc in a MR. [4]
R2: Inc in each st around. [8]
R3: (Sc in next st, inc in next st) 4 times. [12]
R4: Sc in each st around. [12]
R5: (Sc in next st, inc in next st) 6 times. [18]
R6: Sc in each st around. Change to black in the final sc. [18]
R7: With black, sc in each st around. Change back to purple in the final sc. [18]
R8: With purple and working in FLO, (sc in next 2 sts, inc in next st) 6 times. [24]
R9: Sc in next st, (inc in next st, sc in next 3 sts) 5 times, inc in next st, sc in final 2 sts. [30]
Fasten off with a long tail and lightly stuff the pointed crown. Add a small yellow embroidered or crocheted buckle over the black band. Keep the brim flexible so it can curve around the ghost’s head.
Assembly Order for a Polished Ghost Buddy
- Finish the face while the body opening is still accessible.
- Stuff the body and sew on the base through the unused BLO of body R22.
- Sew the inner sides of both arms to the star first.
- Pin the arms to the ghost between body R13 and R18, approximately 15 stitches apart and about 4 stitches from the eyes.
- Sew the flattened arm edges securely to the body, checking that the star sits centered.
- Place the witch hat slightly off-center for a playful crooked look.
- Sew the hat to the ghost through the unused back loops of hat R8 so the brim stays loose.
- Bury every yarn tail through several centimeters of stuffing before trimming.

How to Get a Smooth, Chubby Shape
Use small stuffing tufts: Large clumps create hard bumps. Add a little at a time and rotate the ghost after every few tufts.
Support the top: Place extra filling behind and above the eyes so the head stays rounded instead of collapsing.
Keep the bottom level: Pin the 40-stitch base at four evenly spaced points before sewing the full seam.
Do not overstuff the arms or hat: Lightly stuffed pieces bend naturally and are easier to sew flush against the body.
Color, Size and Display Variations
Classic Halloween: Keep the ghost white, use deep purple or black for the hat and choose golden yellow for the star. This combination gives the strongest contrast in photos.
Soft pastel version: Pair cream with dusty lavender, blush pink and pale lemon. Embroider the eyes and cheeks for a gentle nursery-style character.
Mini version: Use sport-weight cotton and a small hook. The construction and stitch counts stay the same, but the finished ghost becomes a compact ornament or desk decoration. Do not use a hanging loop or small detachable pieces on a toy for a young child.
Extra-squishy version: Use super-bulky chenille and a hook that still produces a closed fabric. Make the star with a slightly thinner yarn so it remains easy for the arms to hold.
You can also omit the hat for a year-round friendly ghost or change the star to orange, mint or rose. Keep the main body, base and arms in the same yarn weight so the proportions and assembly points remain reliable.
Final Finishing Checklist
- The ghost has 40 body stitches before R8-22 and 40 base stitches before assembly.
- The eyes are level between R9 and R10, approximately 7 stitches apart.
- The base is sewn to the unused back loops of body R22, leaving the R23 ruffle free.
- The star is lightly stuffed and centered between the arms.
- The two arms are attached at equal height and pull-tested.
- The hat crown is lightly stuffed, while the brim remains flexible.
- All yarn tails are knotted securely, buried inside and trimmed.
- The finished toy has no exposed stuffing, loose eyes or detachable decoration.
Troubleshooting This Ghost Amigurumi Crochet Pattern
I Cannot See My Chenille Stitches
Feel for the two top loops with your fingertips and use a marker in every first stitch. Work under bright side lighting; the shadows make stitch openings easier to see. Count each round rather than relying only on visual inspection.
The Body Does Not Have 40 Stitches
R7 contains four repeats of 8 sc followed by one increase. Each repeat uses 9 stitches and produces 10, giving 40 total. Correct the count before working R8-22.
The Ruffled Edge Curls Unevenly
R23 is worked in the front loops only. Check that each four-stitch repeat is 2 sc, 2 hdc, 2 sc and one slip stitch. Keep the slip stitches relaxed so they do not pull the edge upward.
The Base Looks Too Small
The base and body should each have 40 stitches at the join. If your tension changed, pin the pieces at quarters and ease the fabric evenly while sewing.
The Star Points Look Rounded
Do not overstuff. After sewing, pinch each point and move the filling toward the center so the five tips remain defined.
The Hat Brim Is Stiff
Use less stuffing in the hat and sew through the unused back loops of R8 instead of stitching through the outer edge. This keeps the brim loose and slightly wavy.
The Ghost Tips Forward
Redistribute stuffing toward the back and base. Make sure the star is lightly stuffed and the arms are attached at the same height.
Toy Safety and Care
- Plastic safety eyes are not suitable for children under three. Embroider all eyes and facial details for a baby or toddler.
- Do not add beads, buttons, wire, glue-on pieces or loose decorations to a young child’s toy.
- Sew the arms, star, base and hat through the crocheted fabric and pull-test each seam.
- Check the toy regularly and repair loose stitches before use.
- Follow every yarn label. Hand wash gently when possible, reshape and air-dry completely.
Get the Free Printable Pattern
The printable HooksyLane edition keeps the complete US pattern, materials, assembly order, troubleshooting and safety notes together. Because the original designer released Ghost Buddy as a free pattern, the recommended Gumroad price is $0.
Visit the HooksyLane store for the free printable edition.
More Crochet Inspiration from HooksyLane
Explore more amigurumi crochet patterns, browse free crochet patterns, and improve your technique in the HooksyLane crochet learning library. Save this ghost amigurumi crochet pattern from HooksyLane on Pinterest and find printable patterns in the HooksyLane Gumroad store.