Baby Seahorse Crochet Pattern: Easy Amigurumi Tutorial
Table of Contents
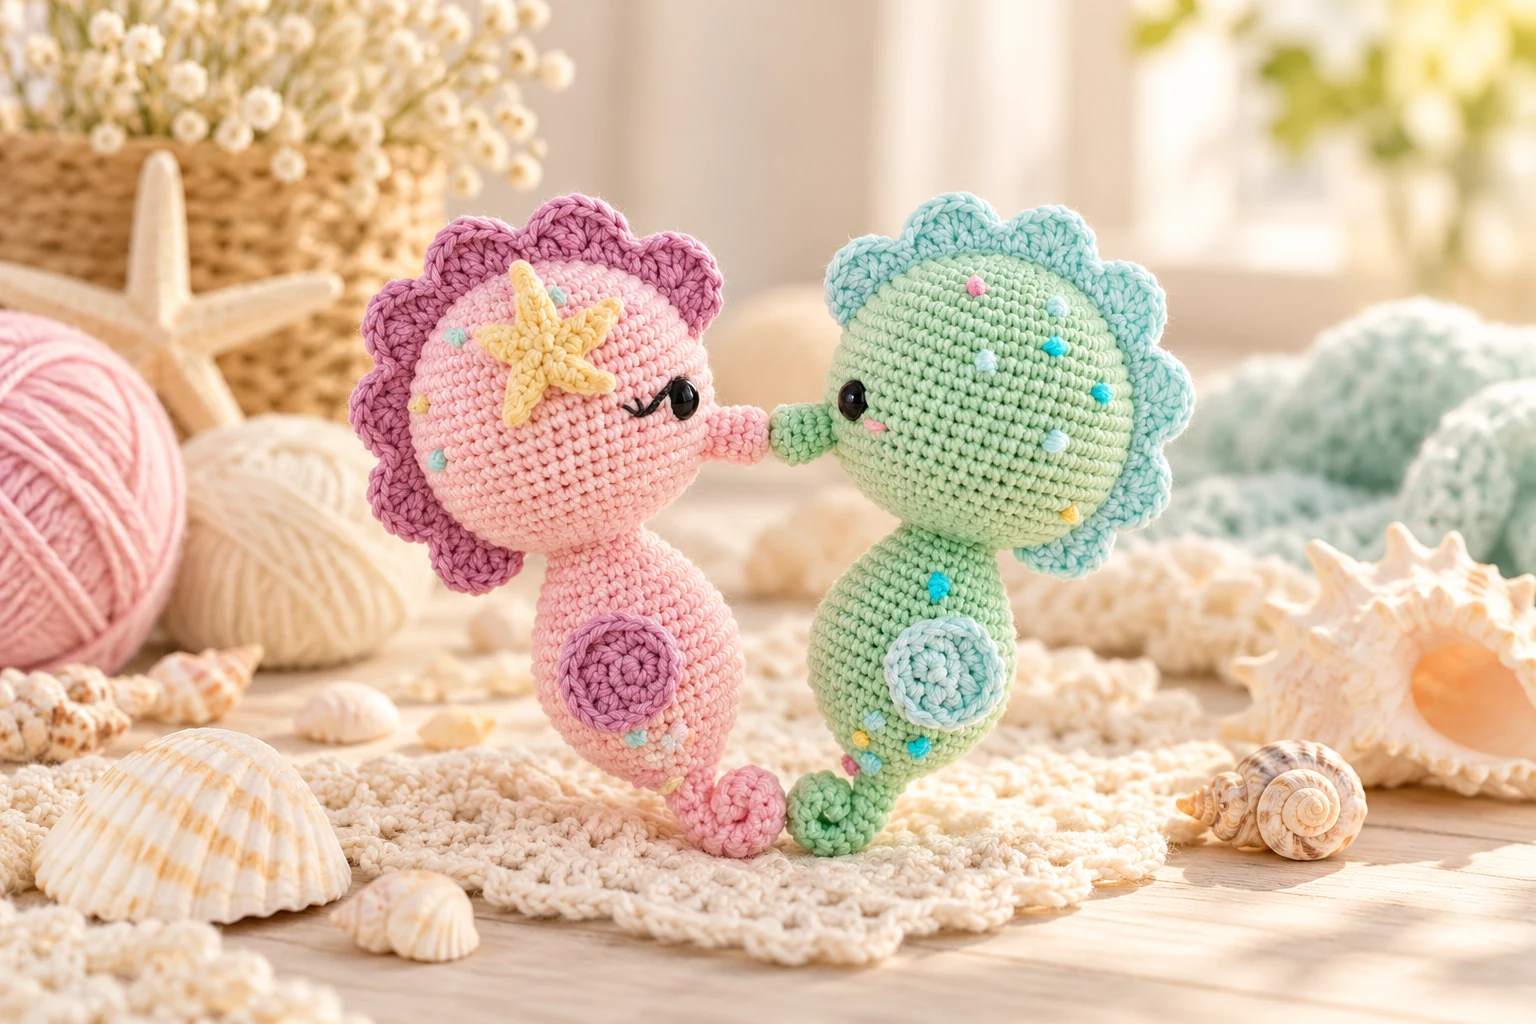
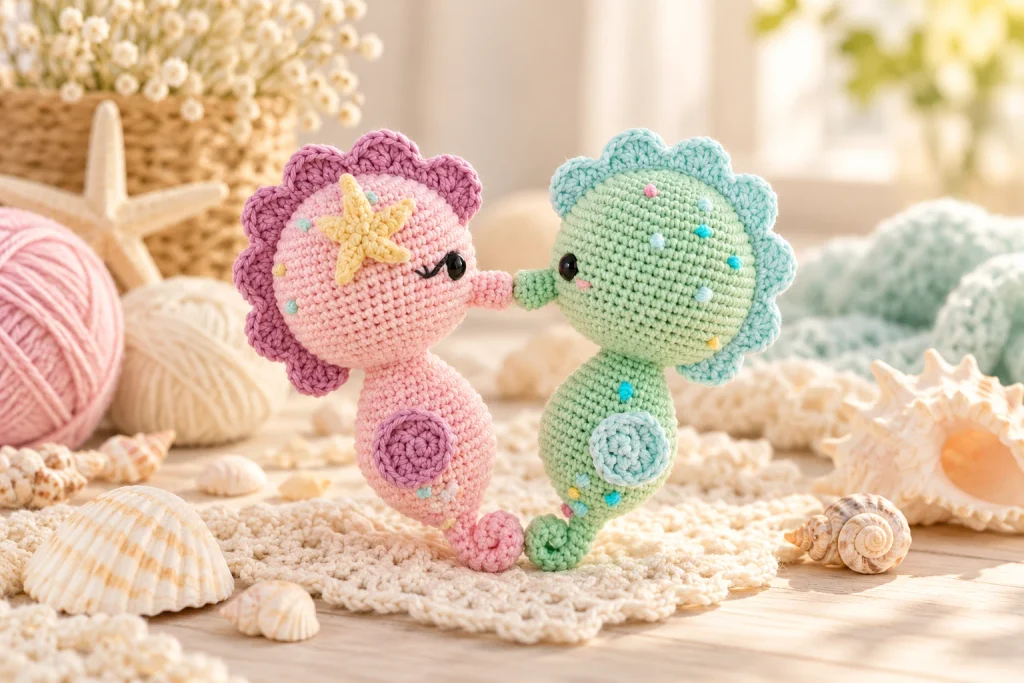
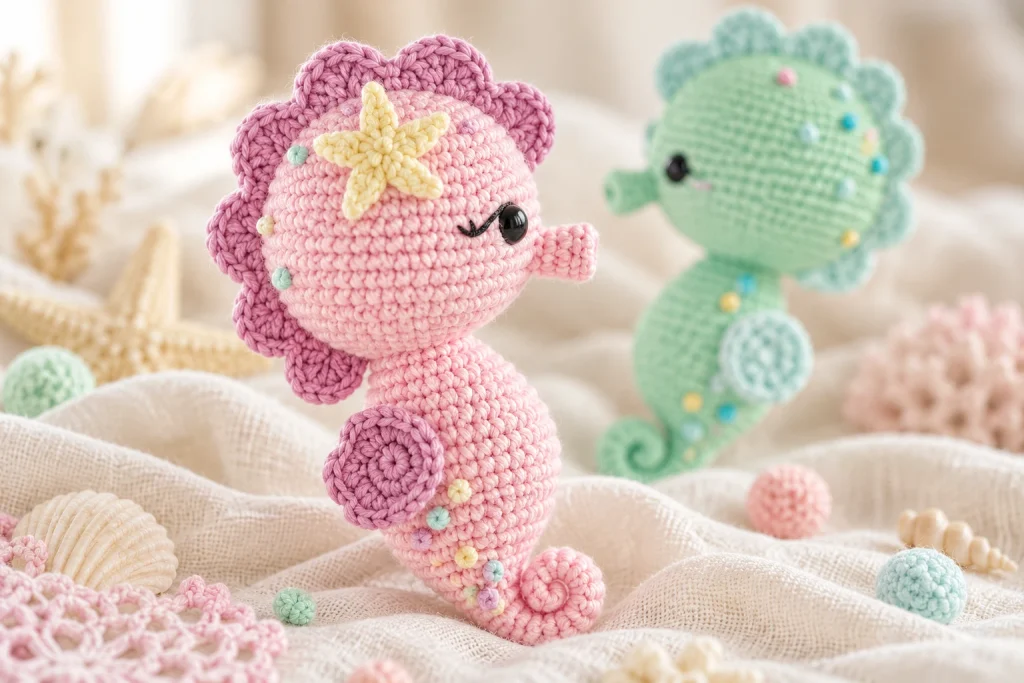
This baby seahorse crochet pattern shows you how to crochet a soft pastel sea creature with a rounded head, shaped snout, scalloped crest, side fins and a tightly curled tail. The complete tutorial uses US crochet terms and includes yarn advice, eye placement, stuffing control, assembly order, troubleshooting, care and toy-safety guidance—not just the round-by-round instructions.
Baby Seahorse Pattern at a Glance
- Skill level: Confident beginner to intermediate.
- Finished size: Approximately 7 in / 18 cm tall when made with the suggested yarn and hook.
- Construction: Head, neck, body and tail are crocheted continuously in spiral rounds; the snout, crest and two fins are made separately and sewn on.
- Main techniques: Magic ring, single crochet, increases, invisible decreases, back-loop stitches, taller stitches and simple seaming.
- Time estimate: About 5–8 hours, depending on experience and finishing detail.
Materials for the Baby Seahorse Amigurumi
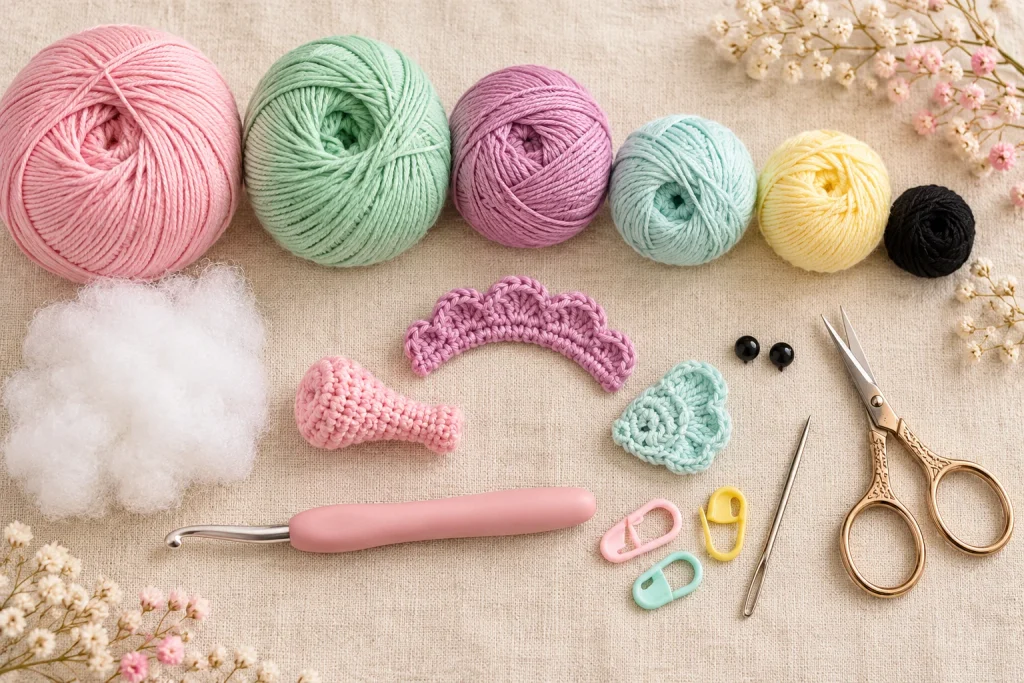
- Approximately 35 g of smooth 8/6 cotton or similar DK/light worsted yarn for the main body.
- Approximately 20 g in a contrasting color for the crest and fins.
- Small yarn scraps for optional embroidered sea dots, tiny stars or French knots.
- US C/2–D/3 / 2.5–2.75 mm crochet hook, or the size that produces a firm fabric.
- Two 10 mm safety eyes, or black embroidery yarn for child-safe embroidered eyes.
- Polyester toy stuffing, stitch marker, yarn needle, pins and embroidery scissors.
Choosing Yarn and Hook Size
A smooth cotton makes the shaping and decorative stitches easy to see, but acrylic or a washable cotton blend also works. Keep all components in the same yarn weight so the fins and crest remain proportional. Gauge is not measured as a traditional square; instead, crochet a small amigurumi sample. The stitches should touch without showing white stuffing. If gaps appear, move down a hook size. If the fabric feels board-like or your hands strain, move up by 0.25–0.5 mm.
- Best Yarn for Amigurumi Guide for Soft and Durable Toys
- Your Crochet Hook Size Conversion Chart for Beginners
Color Ideas
Try blush with mauve, mint with pale aqua, coral with cream, or navy with turquoise. A lighter crest makes the scallops easy to photograph. Keep embellishments restrained so the curved silhouette remains the main feature.

US Crochet Abbreviations
| Abbreviation | US meaning |
|---|---|
| MR | magic ring |
| ch | chain |
| sl st | slip stitch |
| sc | single crochet |
| dc | double crochet |
| tr | treble crochet |
| dtr | double treble crochet |
| inc | work 2 single crochets in the same stitch |
| dec | single crochet 2 stitches together; invisible decrease recommended |
| BLO | back loop only |
| R | round or row, as indicated |
| st(s) | stitch(es) |
Before You Crochet
- Work the main piece in continuous spiral rounds and keep a marker in the first stitch.
- Count after every increase or decrease round. The stitch count in brackets is the total after completing that round.
- Use an invisible decrease for a smoother amigurumi surface.
- Stuff with many small tufts. Large clumps create ridges and can widen the stitch gaps.
- Photograph the eye placement before locking safety-eye backs in place.
- Leave long tails on separately crocheted pieces for sewing.
Complete Baby Seahorse Crochet Pattern
Head, Neck, Body and Tail
Begin at the top of the head. The shaping narrows into the neck, expands through the body and continues directly into the tail.
R1: Work 6 sc in a MR. [6]
R2: Inc in each st around. [12]
R3: (Sc in next st, inc in next st) 6 times. [18]
R4: (Sc in next 2 sts, inc in next st) 6 times. [24]
R5: (Sc in next 3 sts, inc in next st) 6 times. [30]
R6: (Sc in next 4 sts, inc in next st) 6 times. [36]
R7: (Sc in next 5 sts, inc in next st) 6 times. [42]
R8: (Sc in next 6 sts, inc in next st) 6 times. [48]
R9: (Sc in next 7 sts, inc in next st) 6 times. [54]
R10–20: Sc in each st around. [54]
Eye placement: Insert the 10 mm safety eyes between R16 and R17, approximately 9–10 stitches apart. Check the face from the front and side before securing the backs. If the toy is intended for a baby or a child under three, omit plastic eyes and embroider the eyes after stuffing.
Stuffing note: Begin stuffing the head before the opening becomes small. Add compact tufts around the cheeks and eye backs, keeping the center evenly filled.
R21: (Sc in next 7 sts, dec) 6 times. [48]
R22: (Sc in next 6 sts, dec) 6 times. [42]
R23: (Sc in next 5 sts, dec) 6 times. [36]
R24: (Sc in next 4 sts, dec) 6 times. [30]
R25: (Sc in next 3 sts, dec) 6 times. [24]
R26: (Sc in next 2 sts, dec) 6 times. [18]
R27: (Sc in next st, dec) 6 times. [12]
R28: Sc in each st around. [12]
R29: (Sc in next st, inc in next st) 6 times. [18]
R30: (Sc in next 2 sts, inc in next st) 6 times. [24]
R31: Sc in each st around. [24]
R32: (Sc in next 3 sts, inc in next st) 6 times. [30]
R33: Sc in each st around. [30]
R34: (Sc in next 4 sts, inc in next st) 6 times. [36]
R35: Sc in each st around. [36]
R36: (Sc in next 5 sts, inc in next st) 6 times. [42]
R37–39: Sc in each st around. [42]
R40: (Sc in next 5 sts, dec) 6 times. [36]
Continue stuffing the neck lightly, then fill the body more firmly. Keep the neck narrow enough to preserve the seahorse profile.
R41: Sc in each st around. [36]
R42: (Sc in next 4 sts, dec) 6 times. [30]
R43: Sc in each st around. [30]
R44: (Sc in next 3 sts, dec) 6 times. [24]
R45: Sc in each st around. [24]
R46: (Sc in next 2 sts, dec) 6 times. [18]
R47: Sc in each st around. [18]
R48: (Sc in next 4 sts, dec) 3 times. [15]
R49: (Sc in next 3 sts, dec) 3 times. [12]
R50: (Sc in next 2 sts, dec) 3 times. [9]
R51–62: Sc in each st around. [9]
Tail transition: After R48, finish stuffing the body. Do not stuff the long narrow tail; leaving it unstuffed makes the final spiral flexible and neat.
R63: (Sc in next st, dec) 3 times. [6]
Fasten off with a long tail. Thread the tail through the remaining six stitches, pull closed and secure. Curl the narrow tail forward into a spiral. Use the long yarn tail to tack the spiral through several neighboring rounds so it keeps its shape without one tight, visible anchor point.
Snout
R1: Work 5 sc in a MR. [5]
R2: Inc in each st around. [10]
R3: Working in BLO, sc in each st around. [10]
R4: (Sc in next 3 sts, dec) 2 times. [8]
R5: Sc in each st around. [8]
Fasten off with a long tail. Add only a tiny amount of stuffing if needed. Pin the snout centrally between the eyes, spanning approximately head R17–19. Check that it projects straight forward, then sew around the entire open edge.
Scalloped Crest
R1: Ch 36. Starting in the second ch from the hook, sc in each of the next 35 ch. Ch 1 and turn. [35 sc]
R2: Repeat this five-stitch motif 7 times: sl st in next st, skip 1 st, work 5 dc in next st, skip 1 st, sl st in next st. Fasten off with a long sewing tail.
The seven five-double-crochet groups form the scallops. Pin the foundation edge along the back of the head, beginning near head R14 and ending around R26–27. Sew through the foundation chain while leaving the scalloped edge free.
Right Fin
R1: Work 6 sc in a MR. [6]
R2: Inc in each st around. [12]
R3: Ch 2; work 2 dc in next st; 1 tr in next st; 1 tr and 1 dtr in next st; ch 4; sl st in next st. Leave the remaining 6 stitches unworked. Fasten off with a long sewing tail.
Pin the right fin over body R34–39. Sew only through the six unworked stitches from R2 so the tall shaped edge remains free and dimensional.
Left Fin
R1: Work 6 sc in a MR. [6]
R2: Inc in each st around. [12]
R3: From the last stitch of R2, ch 4; work 1 dtr and 1 tr in next st; 1 tr in next st; 2 dc in next st; ch 2; sl st in next st. Leave the remaining 6 stitches unworked. Fasten off with a long sewing tail.
Pin the left fin at the same height as the right fin and sew through its six unworked stitches. View the toy from above to check that both fins angle evenly.
Assembly Order for a Clean Finish
- Finish stuffing and close the main body.
- Pin and sew the snout between the eyes.
- Pin the crest along the center back and sew only its foundation edge.
- Align the two fins and sew their flat attachment edges securely.
- Curl and tack the tail.
- Add optional embroidery only after all structural seams are complete.
- Bury every yarn tail through several centimeters of stuffing before trimming.
Optional Ocean Details
Add a few French knots or short straight stitches in pastel yarn. Place them asymmetrically across the head and body, staying clear of the eyes and seams. The decorative star shown in the styled photography is optional and is not part of the source instructions; if you add any separate embellishment, sew it around its full edge and follow the toy-safety guidance below.
How to Improve the Shape
Round head: Massage the stuffing outward with your fingertips before the head closes. Add more fill behind the eyes rather than directly under them.
Defined neck: Keep the neck less firmly stuffed than the head and body. Overstuffing this area hides the silhouette.
Smooth belly: Alternate where you place each new tuft of stuffing so one side does not become harder than the other.
Stable tail curl: Form the curve gradually from the tip toward the body. Make three or four small hidden tacking stitches instead of one large stitch.
Troubleshooting the Baby Seahorse Crochet Pattern
My Stitch Count Is Wrong
Stop at the end of the current round and compare the repeat with the expected total. If the error is within the last round, undo only that round. If the count changes by one repeatedly, the first stitch may be worked twice or the final stitch may be skipped. Move the marker before starting each new round.
Stuffing Shows Between Stitches
Your hook may be too large, the tension too loose or the piece overstuffed. For a new piece, use a smaller hook. On an existing piece, redistribute the filling and remove a small amount rather than pulling the fabric wider.
The Neck Looks Too Thick
Remove some stuffing through the body opening before finishing. Concentrate the fill in the head and lower body, leaving the narrow R27–29 area lightly filled.
The Snout Points Up or Down
Re-pin it while the toy is upright. The center of the snout should align with the space between the eyes. Make the first four attachment stitches at the top, bottom and both sides, then fill the gaps.
The Crest Twists
Block the strip lightly with steam held above the fabric—never press an acrylic yarn directly. Pin the foundation chain along the center back and sew every few stitches before making a second pass through any gaps.
The Fins Are Not Symmetrical
Count from the neck transition and pin both fins before sewing either one. The two fin instructions are mirrored, so their shaped edges should face outward.
The Tail Will Not Stay Curled
Confirm that the narrow tail is unstuffed. Shape it into a spiral, then tack the inner curve to two or three nearby rounds. Avoid pulling so tightly that the tail puckers.
Toy Safety and Care
- Plastic safety eyes are not suitable for children under three. Use firmly embroidered eyes instead.
- Sew the snout, crest, fins and any decoration through the crocheted fabric, not only around surface loops.
- Do not add beads, buttons, wire, glue-on pieces or loose embellishments to a young child’s toy.
- Pull-test every seam and inspect the toy regularly. Repair loosened parts before the toy is used again.
- Use washable, colorfast yarn and toy-grade stuffing.
- Wash according to the yarn label, reshape while damp and air-dry completely.
Get the Printable Baby Seahorse Pattern
Prefer a clean printable edition? The HooksyLane PDF organizes the complete pattern, US abbreviations, materials, construction notes, assembly, troubleshooting and safety guidance in one polished file.
Visit the HooksyLane store for the printable pattern.
More Crochet Inspiration from HooksyLane
Browse more amigurumi crochet patterns, explore free crochet patterns, or build your skills in the HooksyLane crochet learning library. Save this baby seahorse crochet pattern and new project ideas from HooksyLane on Pinterest, and find printable collections in the HooksyLane Gumroad store.