
Crochet Reindeer Pattern: Christmas Amigurumi Tutorial
Table of Contents
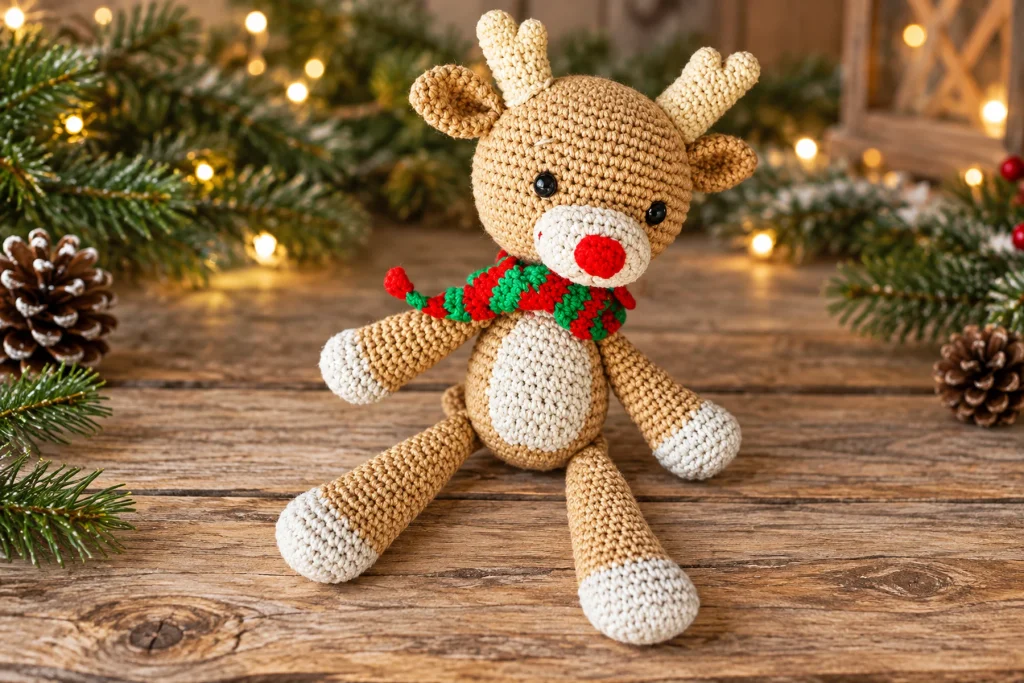
This crochet reindeer pattern helps you make a warm, long-limbed Christmas amigurumi with a round face, shaped cream muzzle, bright red nose, branched antlers, movable-looking legs and a striped holiday scarf. The tutorial includes the complete US-terms pattern plus yarn selection, stitch-count checks, antler joining, hoof shaping, facial finishing, assembly order, troubleshooting, care and toy-safety guidance.
Crochet Reindeer Pattern at a Glance
- Skill level: Confident beginner to intermediate.
- Construction: Separate head, body, muzzle, nose, antlers, ears, belly panel, four legs, tail and scarf.
- Main techniques: Spiral rounds, oval crochet, increases, invisible decreases, BLO shaping, color changes, joined antler branches, embroidery and seaming.
- Suggested hook: US E/4 / 3.5 mm, or the size that creates a firm fabric.
- Time estimate: Approximately 8-12 hours, depending on finishing experience.
- Best use: Christmas decor, handmade gifts, nursery shelf styling or a seasonal keepsake.
Why This Christmas Reindeer Works for Holiday Crochet
Reindeer designs combine recognizable Christmas details with year-round amigurumi techniques. The red nose gives the face an immediate focal point, while the long limbs create a relaxed shelf-sitter shape. The narrow striped scarf adds color without requiring complicated clothing construction. Because each component is made separately, you can complete the project in short sessions and adjust the final expression during assembly.
Seasonal searches begin climbing before December, so this is a useful project to crochet early for gifting, decorating or photographing. For the cleanest result, finish the main reindeer before attaching the scarf. That lets you evaluate the proportions and place the scarf without hiding uneven seams.
Materials for the Christmas Reindeer

- DK or light worsted acrylic or cotton-blend yarn in tan for the head, body, ears, limbs and tail.
- Cream or ivory yarn for the muzzle, belly panel, hooves and antlers.
- Small amounts of bright red and evergreen yarn for the nose and scarf.
- US E/4 / 3.5 mm crochet hook.
- Two 10 mm safety eyes, or black embroidery thread for child-safe eyes.
- Polyester toy stuffing.
- Stitch marker, yarn needle, pins, embroidery scissors and stuffing tool.
- Optional white, dark brown and pink embroidery thread for highlights, eyebrows and blush.
Yarn and Gauge Guidance
Amigurumi gauge is judged by fabric density rather than a standard square. Crochet a small sample with your main yarn. The stitches should sit close together and hide the stuffing when stretched gently. If gaps appear, move down one hook size. If the fabric feels stiff or your hands strain, move up by 0.25-0.5 mm. Cotton gives crisp antlers and defined hooves; acrylic makes a lighter, softer toy.
US Crochet Abbreviations
| Abbreviation | US meaning |
|---|---|
| MR | magic ring |
| ch | chain |
| sc | single crochet |
| hdc | half double crochet |
| inc | 2 sc in the same stitch |
| 4-sc inc | 4 sc in the same stitch |
| dec | single crochet 2 stitches together; invisible decrease recommended |
| BLO | back loop only |
| st(s) | stitch(es) |
| R | round or row |
| FO | fasten off |

Before You Begin
- Work spiral pieces continuously and place a marker in the first stitch of every round.
- Count after every shaping round. Long limbs magnify small stitch-count errors.
- Use an invisible decrease through the front loops for a smoother surface.
- Leave long sewing tails on the muzzle, nose, ears, antlers, belly and tail.
- Stuff with small tufts rather than large clumps.
- Pin every component before sewing and compare the reindeer from the front, side and back.
Complete Crochet Reindeer Pattern
Head
R1: With tan, work 6 sc in a MR. [6]
R2: Inc in each st around. [12]
R3: (Sc in next st, inc in next st) 6 times. [18]
R4: (Sc in next 2 sts, inc in next st) 6 times. [24]
R5: (Sc in next 3 sts, inc in next st) 6 times. [30]
R6: (Sc in next 4 sts, inc in next st) 6 times. [36]
R7: Sc in each st around. [36]
R8: (Sc in next 5 sts, inc in next st) 6 times. [42]
R9: (Sc in next 6 sts, inc in next st) 6 times. [48]
R10: Sc in each st around. [48]
R11: (Sc in next 7 sts, inc in next st) 6 times. [54]
R12-18: Sc in each st around. [54]
Eye placement: Insert the 10 mm eyes between R15 and R16 with approximately 8 stitches between them. Keep the backs loose until the muzzle has been pinned beneath the eyes. For a child under three, omit plastic eyes and embroider them securely.
R19: (Sc in next 7 sts, dec) 6 times. [48]
R20: (Sc in next 6 sts, dec) 6 times. [42]
R21: (Sc in next 5 sts, dec) 6 times. [36]
R22: (Sc in next 4 sts, dec) 6 times. [30]
R23: (Sc in next 3 sts, dec) 6 times. [24]
R24: (Sc in next 2 sts, dec) 6 times. [18]
Stuff the head firmly, shaping the cheeks with small tufts. Leave the final 18 stitches open for joining to the body. FO with a long tail.
Body
R1: With tan, work 6 sc in a MR. [6]
R2: Inc in each st around. [12]
R3: (Sc in next st, inc in next st) 6 times. [18]
R4: (Sc in next 2 sts, inc in next st) 6 times. [24]
R5: (Sc in next 3 sts, inc in next st) 6 times. [30]
R6: (Sc in next 4 sts, inc in next st) 6 times. [36]
R7-11: Sc in each st around. [36]
R12: (Sc in next 4 sts, dec) 6 times. [30]
R13-14: Sc in each st around. [30]
R15: (Sc in next 3 sts, dec) 6 times. [24]
R16-17: Sc in each st around. [24]
R18: (Sc in next 2 sts, dec) 6 times. [18]
R19-20: Sc in each st around. [18]
Stuff the base firmly so the seated toy remains stable, then lighten the stuffing toward the neck. FO with a long tail for attaching the head.
Cream Muzzle
Foundation: With cream, ch 7. Work around both sides of the chain; the final chain is the turning chain.
R1: Starting in second ch from hook: 2 sc in first ch, sc in next 4 ch, 4 sc in last ch; working along opposite side, sc in next 4 ch, 2 sc in final ch. [16]
R2: Inc in next 2 sts, sc in next 4 sts, inc in next 4 sts, sc in next 4 sts, inc in final 2 sts. [24]
R3-4: Sc in each st around. [24]
R5: Dec, sc in next 8 sts, dec twice, sc in next 8 sts, dec. [20]
Add a thin layer of stuffing. Pin the horizontal centerline straight beneath the eyes; the lower edge should reach approximately head R21. Sew around the entire edge and add a small amount of stuffing before closing the last inch.
Branched Antlers – Make Two
Each antler uses one small branch and one main piece. Work tightly and stuff only if your yarn is very soft. A firm unstuffed antler usually holds its shape more cleanly.
Small Branch
R1: With ivory or light brown, work 4 sc in a MR. [4]
R2: Sc in next 3 sts, inc in next st. [5]
R3: Sc in next 4 sts, inc in next st. [6]
R4: Sc in next 5 sts, inc in next st. [7]
R5: Sc in next 6 sts, inc in next st. [8]
FO. Do not close the opening; the branch is joined to the main piece.
Main Antler
R1: Work 4 sc in a MR. [4]
R2: (Sc in next st, inc in next st) twice. [6]
R3: Sc in each st around. [6]
R4: (Sc in next 2 sts, inc in next st) twice. [8]
R5: Sc in each st around. [8]
R6: (Sc in next 3 sts, inc in next st) twice. [10]
R7: Sc in each st around. [10]
R8: Hold the small branch beside the main antler. Crochet through 4 sts of the branch and the next 4 sts of the main piece together, then inc, sc in next 4 sts, inc. [12]
R9: Work 4 sc around the remaining exposed branch stitches, then 8 sc around the main piece. [12]
R10: (Sc in next 5 sts, inc in next st) twice. [14]
R11: Sc in each st around. [14]
R12: (Sc in next 6 sts, inc in next st) twice. [16]
R13-14: Sc in each st around. [16]
FO with a long sewing tail. Shape the joined branch with your fingers and repeat for the second antler.
Ears – Make Two
R1: With tan, work 4 sc in a MR. [4]
R2: (Sc in next st, inc in next st) twice. [6]
R3: (Sc in next 2 sts, inc in next st) twice. [8]
R4: (Sc in next st, inc in next st) 4 times. [12]
R5: Sc in each st around. [12]
R6: (Sc in next 2 sts, inc in next st) 4 times. [16]
R7-8: Sc in each st around. [16]
R9: (Sc in next 2 sts, dec) 4 times. [12]
Do not stuff. Fold each ear in half and sew through both layers at the base. Leave a long tail for attaching it behind the antler.
Red Nose
Foundation: With red, ch 3. Work around both sides of the chain.
R1: 2 sc in first ch, 4 sc in last ch, then 2 sc along the opposite side. [8]
FO with a long tail. The small oval is sewn across the center of the muzzle, spanning approximately muzzle rounds 1-3. Add a tiny pinch of stuffing only if you want a raised nose.
Cream Belly Panel
Foundation: With cream, ch 5. Beginning in second ch from hook, work in rows.
Row 1: Inc, sc in next 2 sts, inc. [6]
Row 2: Inc, sc in next 4 sts, inc. [8]
Rows 3-8: Sc across. [8]
Row 9: Dec, sc in next 4 sts, dec. [6]
Rows 10-11: Sc across. [6]
Row 12: Dec, sc in next 2 sts, dec. [4]
Rows 13-14: Sc across. [4]
FO with a long tail. Block the piece lightly with your fingers, pin it vertically to the center front of the body and sew with small matching stitches.
Hind Legs – Make Two
R1: With cream, work 6 sc in a MR. [6]
R2: Inc in each st around. [12]
R3: (Sc in next st, inc in next st) 6 times. [18]
R4: (Sc in next 2 sts, inc in next st) 6 times. [24]
R5: (Sc in next 3 sts, inc in next st) 6 times. [30]
R6: BLO sc in each st around. [30]
R7: Sc in next 10 sts, (dec, sc in next 2 sts) twice, dec, sc in next 10 sts. [27]
R8: Sc in next 8 sts, (dec, sc in next st) 3 times, dec, sc in next 8 sts. [23]
R9: Sc in each st around. [23]
R10: Change to tan; sc in next 4 sts, (dec, sc in next st) 5 times, sc in next 4 sts. [18]
R11: BLO sc in each st around. [18]
R12: Sc in each st around. [18]
R13: Sc in next 8 sts, dec, sc in next 8 sts. [17]
R14-15: Sc in each st around. [17]
R16: Sc in next 8 sts, dec, sc in next 7 sts. [16]
R17: Sc in each st around. [16]
R18: Sc in next 7 sts, dec, sc in next 7 sts. [15]
R19: Sc in each st around. [15]
R20: Sc in next 7 sts, dec, sc in next 6 sts. [14]
R21: Sc in each st around. [14]
R22: Sc in next 6 sts, dec, sc in next 6 sts. [13]
R23: Sc in each st around. [13]
R24: Sc in next 6 sts, dec, sc in next 5 sts. [12]
R25: Dec 6 times. [6]
Stuff the cream hoof firmly and the long tan leg more lightly. Close the final six stitches. Return to the unused front loops from R11 and work 18 sc around in tan to create a neat cuff above the hoof. Embroider a firm line from the center front of the foot toward R7, pulling gently to divide the hoof.
Front Legs – Make Two
R1: With cream, work 6 sc in a MR. [6]
R2: Inc in each st around. [12]
R3: (Sc in next st, inc in next st) 6 times. [18]
R4: (Sc in next 2 sts, inc in next st) 6 times. [24]
R5: BLO sc in each st around. [24]
R6: Sc in next 8 sts, (dec, sc in next st) twice, dec, sc in next 8 sts. [21]
R7: (Sc in next 5 sts, dec) 3 times. [18]
R8: Change to tan; (sc in next 4 sts, dec) 3 times. [15]
R9: BLO sc in each st around. [15]
R10: Sc in each st around. [15]
R11: Sc in next 7 sts, dec, sc in next 6 sts. [14]
R12-13: Sc in each st around. [14]
R14: Sc in next 6 sts, dec, sc in next 6 sts. [13]
R15-16: Sc in each st around. [13]
R17: Sc in next 6 sts, dec, sc in next 5 sts. [12]
R18: Sc in each st around. [12]
R19: Sc in next 5 sts, dec, sc in next 5 sts. [11]
R20: Sc in each st around. [11]
R21: Sc in next 5 sts, dec, sc in next 4 sts. [10]
R22: Dec 5 times. [5]
Stuff the hoof and lower arm, leaving the top slightly flexible for sewing. Close the final five stitches. Return to the unused loops from R9 and work 15 sc around in tan. Embroider the hoof division from the center front toward R6.
Tail
R1: With tan, work 6 sc in a MR. [6]
R2: Inc in next 2 sts, work 2 hdc in each of next 2 sts, inc in final 2 sts. [12]
FO with a long tail. Fold the piece in half and make two small stitches at the tip to hold the tapered leaf shape.
Striped Scarf
Foundation: Ch 5. Starting in second ch from hook, sc across. [4]
Rows 1-56: Sc across, ch 1 and turn. [4]
Color plan: Alternate red and green every 2 rows. FO and weave both ends into the scarf.
The scarf should wrap comfortably without compressing the neck. If your gauge creates a shorter strip, continue repeating two red rows and two green rows until it fits. Optional: add short yarn tassels to both ends.
Assembly Order for a Balanced Reindeer
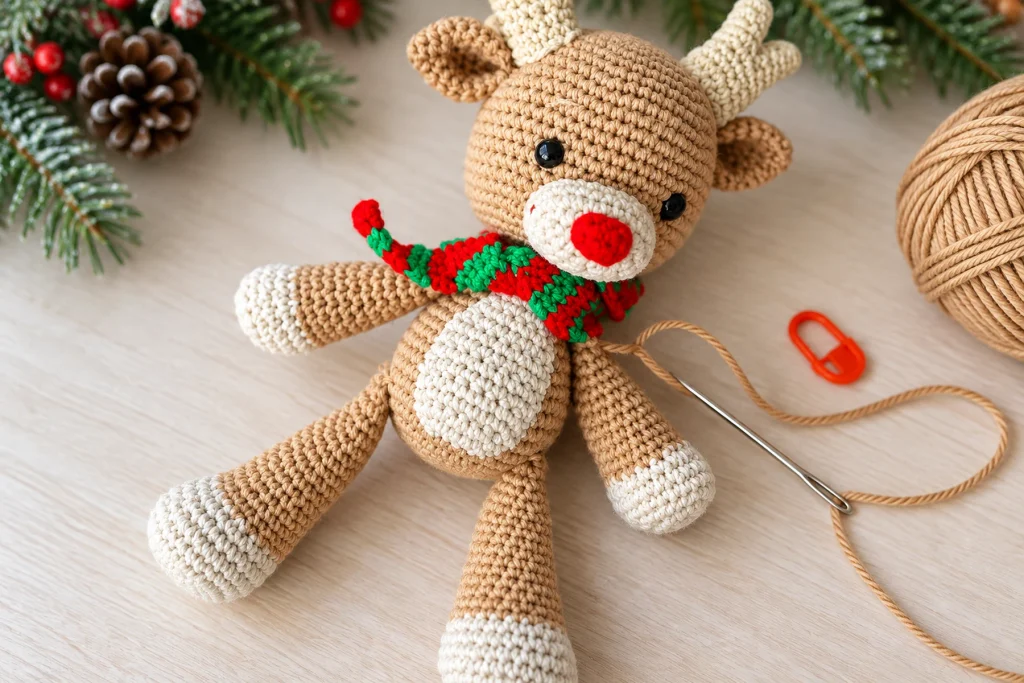
- Sew the head to the body’s 18-stitch neck opening, matching one stitch to one stitch. Add stuffing through the last gap if necessary.
- Pin the muzzle directly beneath the eyes with its centerline horizontal. Sew and finish stuffing it.
- Center the red nose on the muzzle and embroider a small mouth beneath it.
- Attach the antlers between head rounds 4 and 10.
- Sew each ear one round below and slightly behind its antler.
- Pin the hind legs between body rounds 6 and 7. Use a strong thread joint if you want gentle movement, or sew them firmly for a child-safe display toy.
- Attach the front legs about two rounds below the head.
- Center and sew the belly panel to the front of the body.
- Attach the folded tail between body rounds 6 and 7 at the center back.
- Wrap the scarf around the neck and secure it with two or three hidden stitches so it cannot slip off.

Face Shaping and Embroidery
For subtle eye sculpting, thread a long tan yarn tail behind the head. Bring the needle out beside one eye, pass beneath the stuffing to the opposite eye and pull only until both eyes settle slightly into the face. Repeat once, knot securely and hide the tail. Avoid over-pulling, which can distort the head.
Use white thread to add a tiny highlight at the upper edge of each eye. For the eyebrows, place the outer point one stitch beside the eye and approximately two rounds above it. Place the inner point another two stitches inward and two rounds higher. Add blush one round below and one stitch outside each eye, covering about three stitches with soft pink thread.
Troubleshooting
The Head Looks Too Large for the Body
The generous head is part of the amigurumi style, but overstuffing can make it dominate. Keep the body base firm, the neck supported and the head evenly rounded. Pin the head at several points before completing the seam.
The Antler Branch Leaves a Hole
During R8 of the main antler, align four branch stitches with four main-piece stitches. Crochet through both layers, then inspect the join before continuing. Close any tiny gap with the antler’s yarn tail.
The Hoof Does Not Have a Clear Shape
Make sure the cream section is firm before changing to tan. The BLO rounds create a ridge. After finishing, embroider the center division and pull gradually until the hoof curves without puckering.

The Legs Twist in Different Directions
Spiral crochet naturally shifts. Rotate each leg so the decreases and color-change jog face the body. Pin all four limbs and set the toy on a flat surface before sewing.
The Muzzle Looks Crooked
Mark the horizontal center of the muzzle with two pins. Align those pins under the eyes, then add top, bottom and side pins. Sew a few stitches at opposite points before filling the spaces between them.
Safety and Care
Plastic safety eyes can loosen and are not recommended for children under three. Use embroidered eyes for a young child’s toy. Secure all limb seams, avoid removable scarf tassels for babies and inspect the toy before gifting. Spot clean with cool water and mild soap. If your yarn is machine washable, place the toy in a mesh bag, use a gentle cycle and air-dry completely.
Customization Ideas
- Use chocolate brown with oatmeal accents for a natural woodland palette.
- Replace the striped scarf with burgundy, forest green or gold.
- Embroider a snowflake on the belly panel.
- Make a smaller version with sport-weight yarn and a 2.5 mm hook.
- Add the year to a small fabric tag for a Christmas keepsake.
More HooksyLane Crochet Ideas
Explore more amigurumi crochet patterns, browse seasonal projects in free crochet patterns, and improve your finishing with the HooksyLane crochet guides. Follow HooksyLane on Pinterest for visual inspiration, and visit the HooksyLane Gumroad store for printable crochet resources.
Final Quality Checklist
- Both eyes are level and approximately eight stitches apart.
- The muzzle and red nose are centered.
- The antlers mirror each other and their branch joins are closed.
- The ears sit one round below and behind the antlers.
- All four hooves are shaped and the embroidered divisions match.
- The belly panel and tail are centered.
- The scarf is secured with hidden stitches.
- All pins are removed and yarn tails are hidden.
This crochet reindeer pattern becomes much easier when each component is counted carefully and pinned before sewing. Take extra time with the antler join, hoof shaping and face placement; those three details create the polished expression that makes this Christmas reindeer stand out in photos, gifts and holiday displays.