Easy Crochet Water Bottle Holder Pattern to Try Today
Table of Contents
Have you ever juggled a reusable bottle while enjoying a walk or running errands? This crochet water bottle holder pattern creates a handmade accessory that holds your bottle securely and keeps your hands free. Beginners and intermediate crocheters can enjoy this useful, satisfying project.
This guide shows you how to make a stylish, useful holder for various bottle sizes. Clear, step-by-step instructions help you follow along with confidence at any skill level. Try different stitch textures, colors, and strap designs to create your own style.
Before starting this crochet water bottle holder pattern, check your gauge and measure your bottle. These steps help create a snug fit for your new holder. Grab your yarn and hook, then enjoy this fun, practical project!
Introduction to Crochet Water Bottle Holders
Making a crochet water bottle holder blends creativity with daily use. This handmade water bottle carrier is a fabric sleeve that fits snugly around your reusable bottle. It keeps your bottle secure and adds personal style to your hydration routine.
These holders are versatile. You can add:
- A shoulder strap for easy carrying
- A crossbody loop for hands-free convenience
- A wristlet for quick access
- A short handle for a traditional feel
These choices suit many activities, including:
- Walking
- Running errands
- Going to school or work
- Traveling
- Outdoor adventures
A crochet water bottle holder offers many benefits. It provides:
- Hands-free carrying to keep your hands free for other tasks.
- Improved grip to prevent slipping.
- Protection from minor scratches and dents.
- Reduced reliance on disposable beverage containers, promoting sustainability.
To make your handmade water bottle carrier, gather these basic supplies:
- Medium-weight cotton yarn
- A crochet hook suitable for your yarn
- Scissors
- A yarn needle
- Stitch markers
- Measuring tape
- Your water bottle for sizing
Cotton yarn is often the best choice because it is durable, washable, and less likely to stretch than softer fibers. With these materials, you can create a useful, stylish accessory that improves your hydration experience.
Choosing the Right Yarn for Your Holder
Your yarn choice shapes your crochet water bottle holder’s strength, stretch, style, and care needs.
For most projects, cotton or cotton-blend yarn makes a firm fabric and handles regular washing well. acrylic yarn offers many colors at an affordable price. wool or wool blends add warmth but need careful washing and may stretch or felt over time.
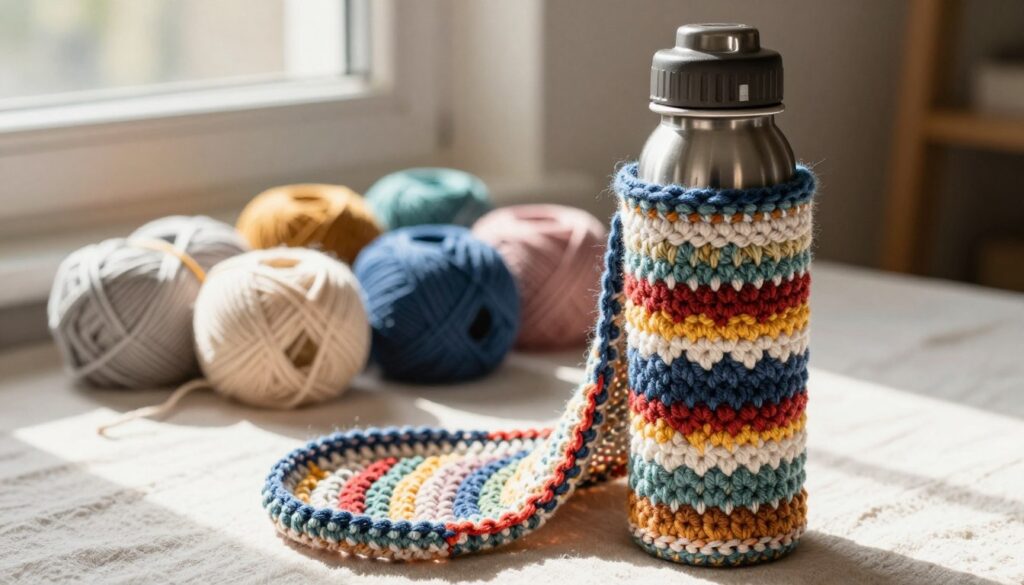
Yarn weight affects your holder’s final size and texture. Worsted or medium-weight yarn is beginner-friendly, easier to handle, and quick to work. Lighter yarn makes a slimmer holder, while bulky yarn creates a thicker fabric and works faster.
Check the yarn label for its recommended hook sizes before starting. Make a small gauge swatch, then compare it and the finished fabric with your water bottle. If they do not match your needs, adjust the hook size, stitch count, or shaping.
Follow these crochet water bottle cozy instructions to make a holder that suits your needs and preferences. Happy crocheting!
Essential Crochet Techniques for Beginners
Basic crochet techniques help you create beautiful projects. As a beginner, you will learn stitches and methods that support your crochet journey. Here are essential techniques to know:
- Slip Knot: This starts most crochet projects. Loop the yarn around your fingers, then pull the working yarn through the loop.
- Chain Stitch (ch): This stitch forms your work’s base. Yarn over, then pull the yarn through the loop on your hook.
- Single Crochet (sc): This basic stitch adds texture. Insert your hook into the stitch, yarn over, and pull through. Yarn over again, then pull through both loops.
- Slip Stitch (sl st): Use this stitch to join rounds or move yarn without adding height. Insert your hook, yarn over, and pull through the stitch and loop.
- Working in the Round: This method creates circular projects. Start with a magic ring or chain, then join rounds with a slip stitch.
- Increasing: To make your holder wider, increase stitches. Usually, you add extra stitches in the same space.
- Joining Rounds: At the end of each round, join with a slip stitch to its first stitch.
Steady tension and accurate stitch counting help you complete a successful project. Loose tension may make your holder sag, while tight tension can make it uncomfortable. Count your stitches often to stay on track.
Learn common U.S. crochet abbreviations, such as:
- ch: chain
- sc: single crochet
- sl st: slip stitch
- st/sts: stitch/stitches
As part of your easy crochet bottle holder tutorial, place a stitch marker at the start of each round. This marker shows where each round begins. If you have more experience, check the base shape, side height, and strap attachment points.
Free Crochet Water Bottle Holder Pattern
Use this easy pattern to make a unique water bottle holder quickly. This free crochet pattern for bottle holder suits beginners and gives intermediate crocheters room to modify. Let’s begin!
Materials Needed
| Material | Quantity |
|---|---|
| Medium-weight cotton yarn | Approximately 100 yards |
| Crochet hook (size H/8) | 1 |
| Scissors | 1 |
| Yarn needle | 1 |
| Stitch markers | 2 |
| Measuring tape | 1 |
| Water bottle for fitting | 1 |
| Optional strap material | As needed |
Step-by-Step Instructions
- Measure your bottle: Start by measuring the circumference and height of your water bottle. This will help you create a snug fit.
- Create the base: Begin with a magic ring and crochet a flat circular or oval base. Make sure to check your stitch count as you go.
- Work upward: Continue crocheting in joined or continuous rounds, increasing as necessary until you reach the desired height.
- Check the fit: Regularly insert your bottle to ensure it slides in securely without being too tight.
- Strap construction: If your design includes a strap, chain the desired length, add reinforcing rows, and attach it across from one another for balance.
- Finishing touches: Weave in all ends, secure the top edge, and lightly block the holder if needed.
Adjust the stitch pattern, base size, or strap length while keeping the overall construction. Use this step-by-step crochet water bottle holder guide to make a useful, stylish accessory.
Customizing Your Water Bottle Holder
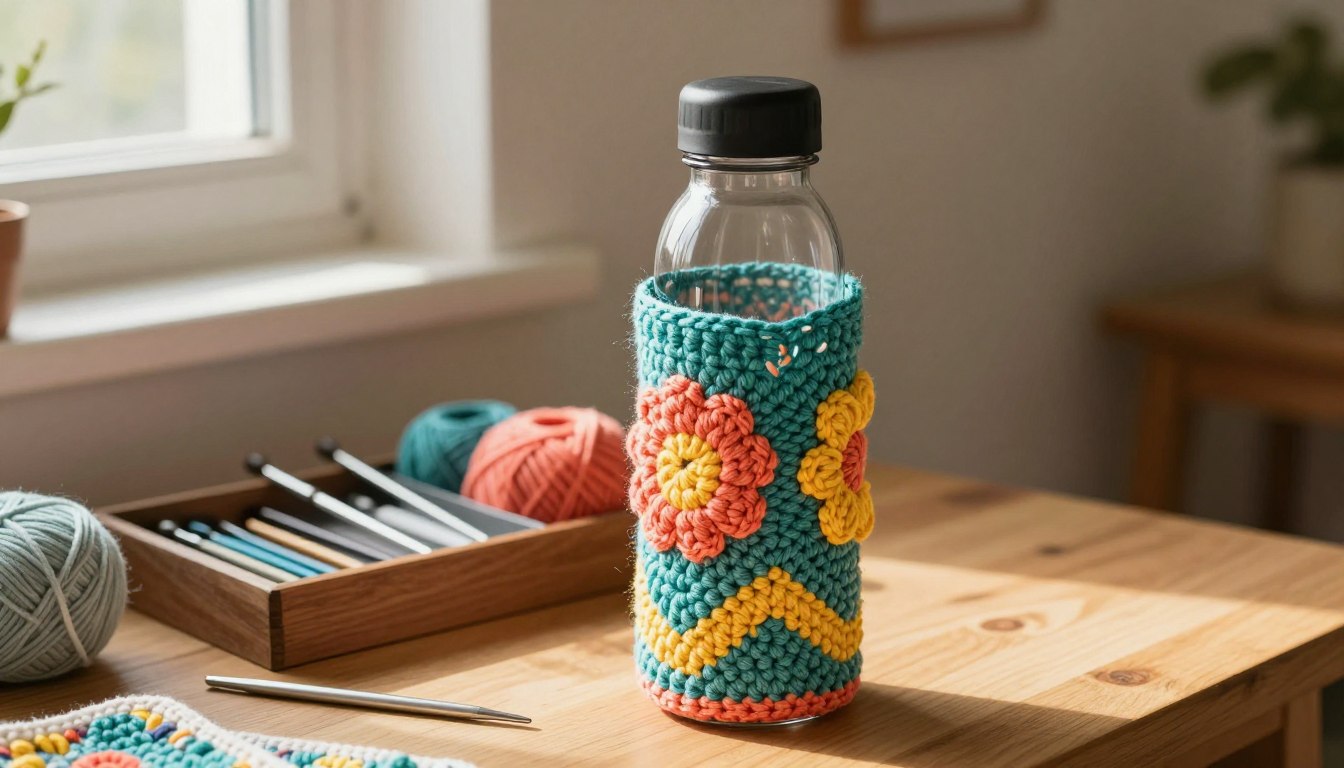
Turn a basic crochet water bottle holder into a unique expression of your style. A few creative touches can make your crochet water bottle holder reflect your personality. Beginners and intermediate crocheters have many ways to make a DIY crocheted bottle sling their own.
Beginners can add initials or a small heart to their design. These simple details make the holder feel special without challenging your skills. You can also use surface crochet for bold shapes, or embroider small details to show your creativity.
With advanced techniques, try textured stitches or a small motif panel. These details improve your holder’s look while keeping it practical. Alternating colors and a contrasting handle can make your DIY crocheted bottle sling stand out.
For a classic look, choose one neutral shade. Two-color stripes feel modern, while a bright body and dark strap make your holder pop. Earth tones suit outdoor adventures, and school or team-inspired combinations can show your spirit.
For a new look, try planned pooling, color blocking, or narrow stripes. These techniques change your holder’s appearance without requiring a different construction method. Check your yarn’s colorfastness, especially with different fibers, so your creation lasts.
Customizing your crochet water bottle holder lets you express your creativity. These tips help you make a functional, stylish accessory that shows your personal style. Enjoy the process and let your imagination guide you!
Tips for Making Your Crochet Holder Unique
Personal touches can improve your crochet water bottle holder pattern’s style and function. Beginners and intermediate crocheters can customize it while keeping it practical and strong.
Begin with structural upgrades, such as cable-style textures or post stitches. These techniques improve the holder’s look and strength while supporting heavier bottles. Raised panels and ribbing can also build a secure design that keeps your bottle safe.
For decoration, try wooden beads, stitched labels, or tassels on your crochet water bottle holder. Secure each attachment firmly, and place it away from the bottle opening to prevent spills or accidents.
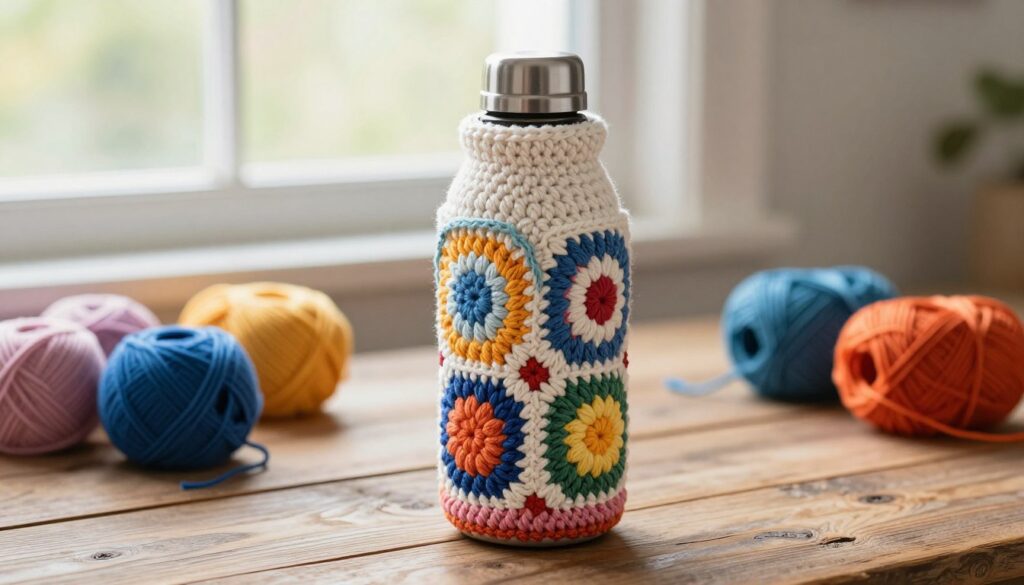
Choose short handles for quick grabs or wrist straps for comfortable carrying. For more choice, use an adjustable shoulder strap or a crossbody design. A full bottle can be surprisingly heavy, so use dense stitches and reinforced rows for durability.
Beginners can start with a simple chain reinforced with single crochet for the straps. Intermediate crocheters can try braided handles or different cable designs for a more polished look. Whichever method you choose, use secure attachment points that can support the bottle’s weight.
Embellishments can improve your holder, but avoid adding too many. Too many decorations can make it bulky or unstable, defeating its purpose. Balance style and function, and your unique crochet water bottle holder will stand out.
Troubleshooting Common Issues
Spotting mistakes early can make crochet more enjoyable. When making your crochet water bottle holder, you may face common issues. Learning fixes can build your crafting confidence.
Here are some frequent problems you may face:
| Issue | Possible Cause | Solution |
|---|---|---|
| Base curls up | Too tight tension | Loosen your grip or switch to a larger hook. |
| Sides flare outward | Incorrect stitch count | Count stitches regularly and adjust as needed. |
| Holder is too tight | Wrong yarn weight | Consider using a lighter yarn or adjusting your stitch count. |
| Uneven rounds | Skipping stitches | Use stitch markers to keep track of your rounds. |
| Strap twists | Improper finishing | Reinforce the strap and weave in ends securely. |
Do not panic when you spot a mistake. Unravel carefully to the error, place your hook in the correct stitch, and continue. Count stitches after every round, and compare the holder with the bottle throughout the project.
Make a gauge swatch first to help keep your tension consistent. Check the first round carefully to prevent later problems. Changing the hook size can adjust tension, but major fit issues may require different yarn weight or stitch count.
Fixing small mistakes early is usually easier than continuing with an incorrect stitch count. With practice, you will get better at troubleshooting these crochet water bottle cozy instructions. This can make crafting more satisfying.
Caring for Your Crochet Water Bottle Holder
Caring for your handmade water bottle carrier keeps it useful and attractive. Regular care can extend its life for many adventures. Here are practical ways to maintain your crochet holder:
- Check the Yarn Label: Before washing, always refer to the yarn label for specific care instructions. Different fibers have different requirements.
- Washing: For cotton and cotton blends, gently hand wash or use a delicate machine cycle with mild detergent. Avoid using hot water as it can shrink the fibers.
- Drying: After washing, reshape your holder and air dry it completely. High heat can damage synthetic fibers or shrink cotton.
- Stain Treatment: Treat small stains promptly with a mild soap solution. Avoid harsh bleach unless the yarn manufacturer permits it.
- Storage: Always empty and dry your holder before storing. Place it in a cool, dry area away from direct sunlight. Store it flat or loosely folded, not hanging, to prevent stretching.
- Regular Checks: Periodically inspect the strap, seams, and base for wear. This helps identify any issues before using it with a full bottle.
Follow these simple tips to keep your handmade water bottle carrier in great condition for your next adventure.
Join the Crochet Community
Connecting with fellow crafters can improve your crochet journey. The crochet community helps you learn from others and share your experiences. Beginners and experienced crocheters can exchange ideas and show completed projects on many online platforms.
Join forums, social media groups, or local craft gatherings. These spaces help you ask questions and receive feedback about your work.
When sharing a water bottle holder, take a clear photo in natural light. Include a bottle for scale, then describe your yarn, hook, and pattern modifications.
Specific questions can bring valuable advice about reinforcing straps or fixing a curling base. Always credit the original designer when sharing patterns. This practice supports creativity and respect in the crafting community.
Use this step-by-step crochet water bottle holder guide to create other practical accessories. Explore patterns for market bags, bottle cozies, and more. Your crochet journey is just beginning, and the community is here to support you every step of the way.