
Waffle Stitch Crochet: Simple Tutorial With Clear Steps
Table of Contents
Waffle stitch is a two-row crochet pattern that combines double crochet and front post double crochet to make a raised, cushioned fabric. That texture gives blankets and other projects a cozy feel, while the repeat stays manageable for a beginner who knows basic double crochet.
You can learn the stitch with a small swatch before you commit to a larger project. This tutorial uses US crochet terms and explains how the raised fabric forms, how to follow the rows, and how to check your work. A small practice piece also helps you spot the posts without worrying about the size of a finished blanket.
Start with a small practice piece if you are still getting comfortable turning rows and finding stitch posts.
How Does Waffle Stitch Crochet Create Its Texture?
The raised squares form because front post double crochet brings selected stitches forward while ordinary double crochet fills the spaces between them. A front post double crochet, or fpdc, is a double crochet worked around the post of the stitch below, rather than into its top loops.
The standard flat waffle stitch uses a foundation chain that is a multiple of 3 plus 2 chains. The two extra chains form the foundation row. After that row, you repeat two pattern rows built from double crochet and front post double crochet.
Ordinary double crochet, or dc, makes the base of the fabric. Selected posts stand out when you work an fpdc around them, creating vertical ridges across the row.
Keep each raised post aligned with a space in the next row to form a clear grid.
In the next pattern row, you shift which stitches receive the raised treatment. That alternating placement makes the waffle pattern instead of a set of straight ridges.
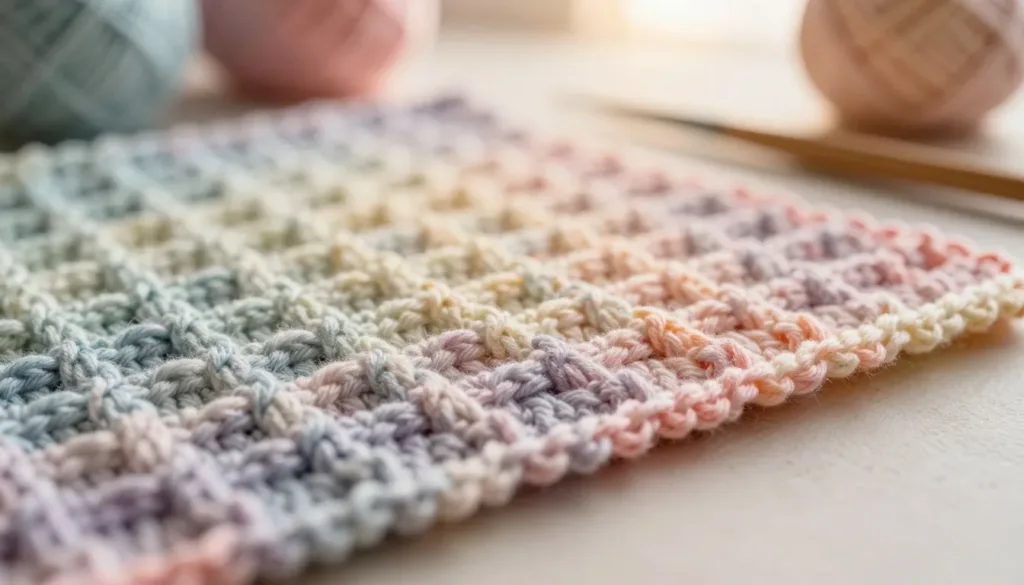
Both sides show a grid, but one side has a more defined appearance. The less defined side still has texture, so you can use either side as the public side of a project.
A standard crochet waffle stitch works best when you can see where each post belongs. Follow the pattern’s stitch placement rather than choosing posts by eye alone.
For the standard version worked flat, the chain multiple and two-row repeat work together. A multiple of 3 plus 2 chains sets up the foundation row, while the alternating rows build the raised grid.
Keep the raised posts aligned with the spaces in the next row so the grid remains clear.
Learn Double Crochet and Front Post Double Crochet
You need only two stitches for the standard pattern: double crochet for the base and front post double crochet for the raised columns. The key difference is where you place your hook, either through the stitch top or around its post.
To make a US double crochet, or dc, yarn over and insert the hook into the indicated stitch. Yarn over again and draw up a loop, leaving three loops on your hook. Yarn over and pull through two loops twice to finish the stitch.
For front post double crochet, or fpdc, bring the hook from the front of your work around the post. Pass it behind the post and bring it back to the front.
Yarn over and draw up a loop, then finish the fpdc like a regular dc. The hook circles the post; it does not go through the top loops of the stitch.
That difference matters when you look for the next stitch. The next visible opening may not belong to the next stitch named in the pattern.
Instead, find the next stitch itself and guide the hook around its post. This makes it easier to place the raised stitch correctly, even when the fabric’s openings look crowded.
Once you can identify the post, the two crochet stitches feel like a practical combination rather than unrelated steps. A half double crochet tutorial can help if you also want to learn a shorter basic stitch.
Practice one dc and one fpdc on a scrap piece until the post is easy to identify from the front of your work.
Written Waffle Stitch Pattern for Flat Rows
A standard flat swatch begins with a foundation row of double crochet, followed by two alternating pattern rows. Use US terms and keep the turning chain out of the stitch count for this version.
The turning chain is ch 2 and does not count as a stitch. Work the first actual stitch into the first stitch of each row, not into the turning chain.
These waffle stitch crochet written pattern steps form a free written pattern you can follow without relying on a video.
- Foundation chain: Chain a multiple of 3 plus 2.
- Row 1: Work dc in the third chain from the hook and in each chain across. Turn.
- Row 2: Ch 2, then dc in the first stitch. Repeat fpdc in the next stitch and dc in the next 2 stitches to the final stitches. Finish with fpdc in the second-to-last stitch and dc in the last stitch. Turn.
- Row 3: Ch 2, then dc in the first stitch. Repeat dc in the next stitch and fpdc in the next 2 stitches. Finish with dc in the final 2 stitches. Turn.
- Repeat Rows 2 and 3 for the pattern.
On Row 2, the repeated fpdc and dc placements create raised posts across the fabric. The first dc and final stitches keep the row edges in line with the pattern.
Row 3 changes the placement of the raised stitches. Work dc in the next stitch and fpdc in the next two stitches as the repeat calls for, then finish with two dc.
Read the last stitches carefully as you reach the edge. The specified finish helps the next row begin with the correct placement instead of shifting the grid.
Count the stitches at the end of each row before turning so an accidental increase does not widen the swatch.

Chain Counts and Turning Chain Conventions
The safest way to avoid mismatched edges is to follow one pattern’s starting-chain, turning-chain, and row instructions together. The standard flat method uses a multiple of 3 plus 2 chains and a non-counting ch 2, but other patterns count the turning chain as a dc.
Those setups are not interchangeable. One ch-2-counts pattern starts with ch 17 and makes 15 first-row stitches, while the standard method treats its ch 2 as a turning aid.
A separate washcloth example starts with ch 22 for 21 stitches, uses ch 1 turns, and works about 14-16 rows. It calls for 30-40 yd of cotton yarn and an H hook.
Keep each pattern’s stitch count and edge instructions together. Changing only the starting chain or turning rule can leave an edge too wide, too narrow, or uneven.
The washcloth setup is an example of its own method, not a new starting rule for the standard waffle stitch. Use its chain, turning, and row directions as a matched set.
US and UK crochet terms also use different names for some stitches. A pattern written in UK terms may use “double crochet” for a stitch that has a different US name.
Check the stated terms before you begin, especially when a pattern uses abbreviations. The same letters can refer to different stitches across the two systems.
Before you begin, check whether the turning chain counts as a stitch and whether the pattern names US or UK terms.
Check Gauge Before Sizing Your Project
A swatch measured after only a couple of rows can look wider than the finished waffle fabric. The stitch can draw inward as you add rows, so early measurements can mislead.
Gauge depends on your yarn, hook, tension, and whether you measure double crochet or waffle stitch. Make a swatch larger than the area you plan to measure, then wash or block it if that suits the finished item.
Measure a central 4-inch square after the fabric settles. Compare that result with the gauge for your chosen pattern, not with a number from another pattern.
For example, an Easy Waffle Stitch Blanket uses double-crochet gauge of 14 stitches and 8 rows per 4 inches with an H/5 mm hook. That is not the same as a gauge measured in the raised pattern.
Another tutorial’s swatch measures 11 stitches and 3 rows per 3 inches with a J/6 mm hook and #4 yarn. A size 3 yarn blanket lists 14 stitches and 10 rows per 4-by-4-inch square.
These examples use different yarns, hooks, and measuring methods. The size 3 yarn blanket gauge belongs to that pattern and should not replace the gauge for another project.
A Winterscape swatch can narrow from 12 inches wide after 2 rows to about 10 inches after 10 rows. The change shows why two rows may not reveal the finished width.
The Craft Yarn Council’s yarn weight guide lists suggested hook sizes and gauge ranges as guidelines, while patterns set their own gauge.
Use the measured waffle-stitch gauge, rather than a double-crochet-only gauge, when estimating a project worked mostly in waffle stitch.
Make a Small Practice Swatch
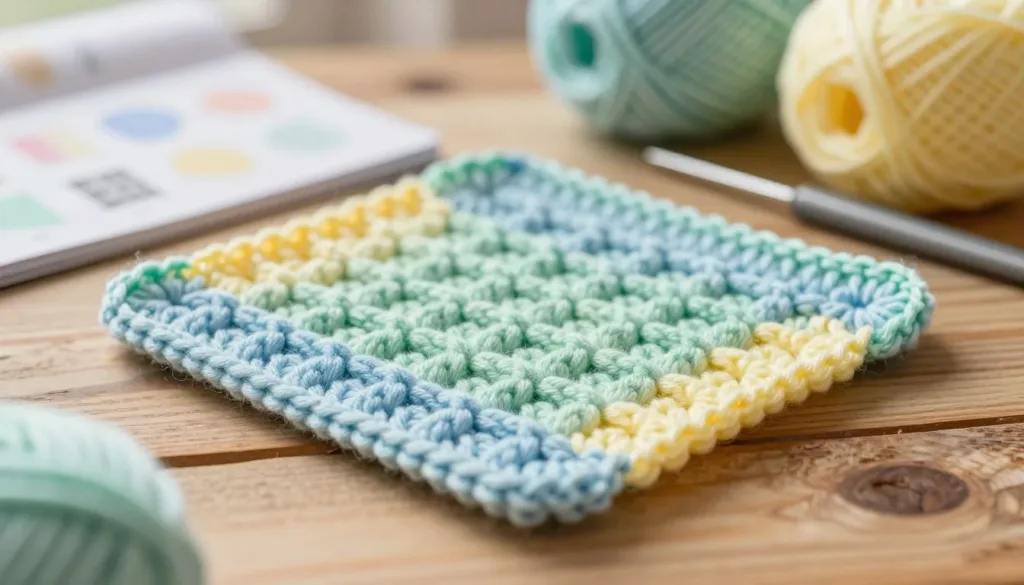
A small square lets you check your tension and see the grid develop before committing to a blanket. One separate tutorial method uses medium-weight yarn, a US H/5 mm hook, and a foundation chain of 23.
That swatch method uses a multiple of 4 plus 3 and aims for a finished size of 6 by 6 inches. It is not the standard flat pattern’s foundation rule, which uses a multiple of 3 plus 2.
Use this short sequence to practice the separate tutorial’s setup:
- Choose a small amount of medium-weight yarn and a US H/5 mm hook.
- Make ch 23 using that tutorial’s multiple-of-4-plus-3 setup.
- Work the sample until it measures 6 by 6 inches.
- Inspect the raised columns, then compare the width after several rows.
The chain count may feel unusual beside the standard method, but it belongs to this tutorial’s swatch instructions. Keep its row setup with its own chain rule.
Look at how evenly the columns rise and whether the square stays close to its planned size. Small changes in tension can alter both the grid and the width.
A clear step photo or photo tutorial can help you compare the hook’s placement with your own work. The practice piece also gives you fabric to test before choosing a larger project.
If you want to practice the standard blanket version, use its own foundation instructions instead. Do not combine that chain multiple with this separate sample’s setup.
Keep the swatch’s foundation rule attached to its own tutorial rather than combining it with the standard pattern’s chain multiple.
Adapt the Stitch for Rounds
Working the texture in rounds means removing the flat row’s edge stitches and adapting the repeat to the project’s shape. Roundwork needs its own setup, since the edge of a flat row does not carry around a tube or square.
For a joined-round method, close the round at its end, then turn before working the next round. Do not copy a flat-row repeat unchanged if its stitch count or edge steps do not fit the round.
Flat rows use edge stitches to keep their sides neat. In rounds, you remove those flat-row edge instructions and focus on the repeat that builds the raised texture.
A tube worked in rounds has a different shape from a square worked outward from its center. A tube can keep its shape without corner increases, while a square needs increases at all four corners.
Those four increases help the square hold its corners as the fabric grows. Without them, the sides may not stay square.
Turning after a joined round changes which side faces you for the next round. That turn is part of the referenced method, so leaving it out changes the pattern’s placement.
A baby cocoon worked in rounds is one example of a project shape built from a flat base and a straight body. It does not use waffle stitch, but it shows how round construction differs from flat rows.
Test the repeat on a small round before scaling it up, especially when the pattern includes increases.
Shop Crochet Essentials
Explore useful tools, colorful yarn and books for your next project.
As an Amazon Associate, I earn from qualifying purchases.
Choose a Blanket Size and Yarn
A lapghan, baby blanket, and throw can all use waffle texture, but each needs its own chain count and yarn estimate. Use the finished size and gauge of one pattern as a matched guide.
These blanket examples have different gauges and turning-chain conventions. Their chain counts and yarn amounts cannot be swapped as if they belonged to one pattern.
Compare these three separate patterns before choosing your yarn and hook:
- Winterscape: Worsted-weight #4 yarn and a US H/5.0 mm hook make a lapghan or baby size about 38 by 30 inches, using about 600 g. Its throw measures about 40 by 54 inches and uses about 1,200 g. Start with ch 146 for the smaller size or ch 155 for the larger one. Adding rows increases length.
- Baby blanket: Five skeins of Bernat Softee Baby yarn, at 310 yd per skein, make a blanket about 34 by 33 inches. Use a US H/8 (5.0 mm) hook, start with ch 116, and work 82 rows.
- Light-yarn blanket: Size 3 yarn and an I/9 (5.50 mm) hook use about 1,100 yd. The blanket measures about 30 by 30 inches with its border and 28 by 28 inches without it. Start with ch 104 for 102 first-row stitches.
The Winterscape pattern changes width by adjusting its starting chain while keeping the multiple of 3 plus 2. It adds rows to increase length.
The size 3 pattern also changes width with its chain multiple and changes height by adding or removing rows. Follow that pattern’s own gauge and turning-chain rules when you adjust it.
An Easy Waffle Stitch Blanket gives another size reference: it starts with ch 182 and measures about 45 by 60 inches. Its dimensions belong to that pattern’s setup, not the other examples.
The Craft Yarn Council’s yarn weight guide gives suggested hook sizes and gauge ranges for weight categories. Treat those ranges as guidelines and follow the gauge named by your chosen pattern.
Choose the pattern whose finished dimensions match your intended use, then check its own gauge before buying or measuring out yarn.
Finish the Edges and Choose a Project
The stitch suits projects where you want a textured, substantial fabric, from a dishcloth to a blanket or scarf. Its raised fabric uses more yarn than plain dc and feels thicker in your hands.
Waffle stitch works well for washcloths and dishcloths, blankets, scarves and shawls, hats, and potholders. Both sides show a grid, but one side has a more defined appearance.
A single crochet border is optional. If you add one, work single crochet along the top and bottom, then place 2 single crochet stitches at each row end along the sides.
Space the side stitches so the edge lies flat instead of pulling inward or forming a ruffle. The raised texture can make a border useful, but a border is not required.
Some waffle fabric already has an edge that looks finished without extra stitches. Leave it unbordered when an added edge would not improve the shape.
For a baby project, you might also enjoy a simple baby dress pattern made in joined rounds, though it uses different stitches.
Add a border only when it improves the edge’s shape or finish; waffle fabric can stand on its own.
For more project ideas beyond blankets and garments, browse beginner-friendly crochet patterns across home decor, bags, and other categories.
Add a border only if it improves the edge’s shape or finish, since the stitch can stand on its own.
Conclusion
Once you can recognize the posts and keep the two rows in sequence, the waffle texture becomes a steady, repeatable pattern. The repeat gets easier when you know how dc and fpdc look in your own fabric.
A swatch is the best way to check the texture, width, and feel before you commit to a larger piece. Your chosen yarn and hook can change how the fabric settles.
Make a small swatch with your chosen yarn and hook, measure it, and use that fabric to guide your next project.


